Voted Travelers' Choice 2023

Find Your Next Adventure
Where Will You Go Next?
Find Your Next Adventure
Where Will You Go Next?
Resources For Photographers
About Our Company
JOIN OUR FREE FACEBOOK GROUP - THE BCJ TRIBE
Astrophotography: Shooting the Night Sky
by Kenton Krueger
Outside of our adventure to Alaska for the Northern Lights (we’ll shoot the Aurora in Iceland, too), Backcountry Journeys doesn’t feature a tour solely dedicated to astrophotography… Yet, anyway!
However, many of our itineraries due provide opportunities for astrophotography from time to time, as getting a chance for night sky images in amazing places like a ghost town in Utah, the Yosemite Valley, or at the Grand Canyon are too good to miss! Astrophotography is so cool that for some photographers that style is all they do! And it’s pretty easy to get started.

In this piece, we’ll take a quick look at some of the basics to get you started on the road to amazing night sky images, and the surreal experiences that come from getting out at night with your cameras! As with everything in photography, you can explore this topic to great lengths. This piece is not meant to include every single thing to consider with astrophotography, it is a more basic approach aimed at beginners who’d like to get out and get started with shooting the night sky.

Location, the moon, and composition
Unfortunately for many folks, finding a truly dark night sky will prove difficult as light pollution affects a large majority of the places where people live. A really dark sky is a necessity for a solid night sky image, so you’ll need to find one.
If you are lucky enough to live in a rural area or say Northern Arizona, you have easy access to these skies. If you live in Pittsburgh, you may need to travel somewhere further from home to get to a dark sky. Speaking of dark skies, you’ll probably want to plan your shoot for a night when the moon is not prevalent, as a high-in-the-sky full moon, if not in your composition plans, would also be light pollution. Can you utilize the moon in your image? Certainly! But for our purposes here let’s go with finding a dark night without the moon casting its light on our shot. Images of stars are OK. Images of stars with some sort of awesome foreground subject are MUCH better, so set out with composition in mind. Say, the Milky Way above a Native American ruin for example. There is much more of a story to convene with that foreground than with only stars in the sky.
So, you’ve timed your shoot for a dark night, scouted your location for light pollution as well as a composition with the foreground. Now, the most difficult part. Getting out of bed in the middle of the night to get to your location. It’s not easy. Maybe staying up all night is easier than going to bed and waking up at 2 or 3 a.m.? If you are able to camp near your location, all the better! Either way, you’re at your spot now and ready to go. But, it’s DARK! Having a headlamp with you is going to make things considerably easier, so get one. How about a flashlight? Well, you’ll want one of those two but for a different reason, we’ll get to later. Having a headlamp is advantageous because it keeps your hands free to do things like adjusting your settings. But first, let us get set up.
Stabilize your camera
We say this a LOT but have/use a GOOD tripod. We’re going to be utilizing longer shutter speeds with astrophotography so stabilizing your camera is essential. Apologies to those of you who despise your tripods, but just like there is no crying in baseball, there is no hand-holding when shooting the night sky.
Let’s back up a bit to make sure we’re on the same page with a couple of things before moving into settings. If you already aren’t doing so all the time, please shoot in RAW this time (Why you should always shoot in RAW is for another conversation). This will allow you the greatest flexibility in post-processing (a topic we’ll not get into today, but will in the future), which is something you’ll most certainly want to do. We’ll also be shooting in manual mode so that we can tell our cameras precisely what we need them to do. We’ll also be focusing our lenses manually, so you can switch to manual focus now, too.
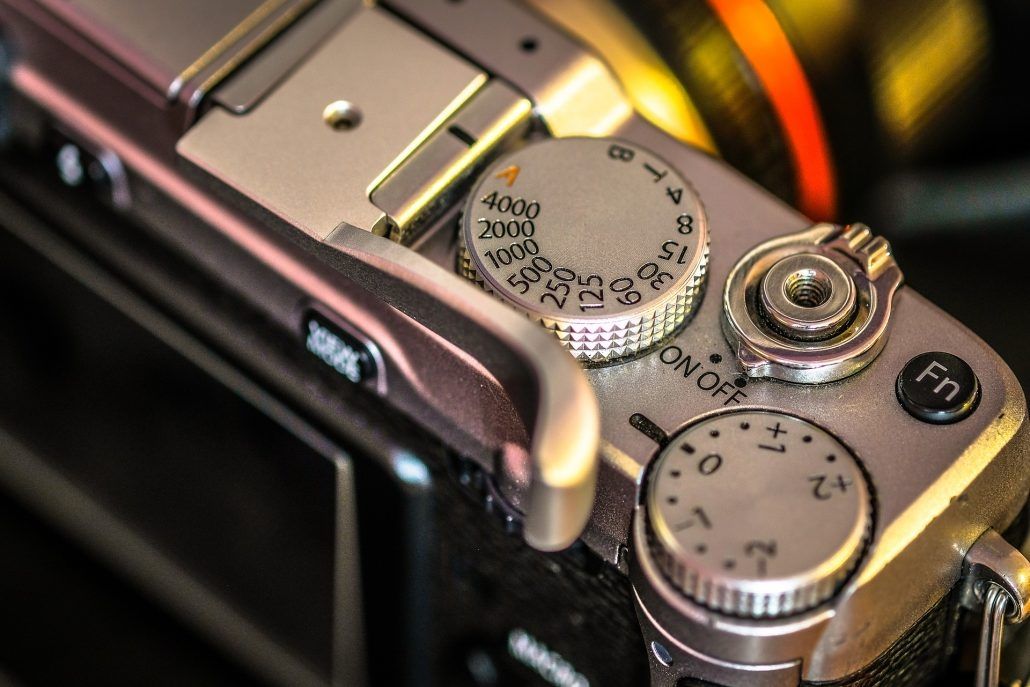
Slow your shutter speed
Now that you have your camera on a tripod (if you are still holding it in your hand, please see above), let’s take a look at shutter speed as the first setting to adjust. Because it is dark we’ll want to slow our shutter speed to something in the neighborhood of 10, 15, or maybe even 30 seconds. Know that the slower the shutter speed, the more likely you’ll have little messy star trails. While we’ve all seen cool photos of star trails circling across a timelapse night sky, we’re not going to be looking to do that here so we’ll proceed with the assumption that we want to avoid star trails to the best of our ability.
So, if a 30-second shutter speed is giving us star trails, as it likely will, try 25 or 20 seconds and see what happens. Unlike a monkey moving through a jungle canopy or an Osprey diving on a fish, the sky isn’t going to get away too quickly. Take the time to get your shutter speed right.
Widen your aperture
Next, we’ll open up our aperture and lens. We’re shooting little specks of light in an otherwise completely dark sky, so we’ll need to let as much of that small amount of light to hit our sensors as we can. In order to do so, you’ll additionally want to open your aperture as far as your lens will allow. This would be the smallest number f-stop. Go ahead and widen your lens to its widest aperture, as well, so as to get the widest f-stop available. This might be something like 17mm at f-2.8, for example. Remember that with that same lens set at say 35mm, the widest f-stop might be f-4, so widen that lens in order to capture the huge night sky, as well as to obtain that widest aperture.
Use manual focus
As stated earlier we’re going to need to manually focus with astrophotography. In most circumstances, autofocus will fail because it won’t be able to find enough contrast in the scene to focus upon. You’ll want to set your manual focus on infinite. Easy enough, right? Let’s use the camera’s viewfinder in order to achieve properly focused stars. First, find bright stars in the sky. Switch to manual focus on your lens if you haven’t already. Next, enable your live screen. Open your aperture to its widest. Set your shutter speed to 30 seconds, ISO to 3200 or 6400 so as to give your camera and lens its greatest light-gathering potential. Remember these are not necessarily going to be your settings when you get to shooting. Point your camera at a large grouping of stars then use the digital zoom function in live view to zoom in. Now manually adjust the focus on your lens until you get a sharp look at the stars. They’ll be small dots when in proper focus. Once you’re satisfied that you have them in focus, zoom back out.
Increase your ISO
Now that we have every other setting ready, or at least close, we can now work with ISO. Let’s start around 3200 to 6400 just to see how things look. From there we can easily bump it up, if necessary. Remember, ISO adds noise to our images so attempt to adjust your other settings prior to bumping up the ISO in order to maintain quality.

Additional Stuff
Remember that cool foreground subject that you made sure to find as a part of scouting your location? It’s probably pretty dark, right? Well, let’s light it up!
Let’s back up for a second, though. You’ll want to have your exposure for the ambient night sky dialed in prior to lighting your foreground subject. Take some shots without the added light making sure you’re happy with composition and focus. From there add your lighting elements. By utilizing a flashlight you can “paint” light on that foreground image so that it’ll appear nicely within your image. Similar to your settings, finding just the right amount of light and painting technique will involve some trial and error. Make sure you paint around as opposed to simply shining your light flatly on your subject. Also, work with how long you light the subject and adjust based upon your results. Recalling the importance of stability with these long exposure shots, make sure to either use a remote shutter or a delay setting on your shutter so that you can press the shutter without compromising stability.
There you have it! A start on the road to astrophotography. As mentioned previously, if you are really into this style of photography there can be an amazing amount more to learn, such as post-processing and alternate light sources, etc, so don’t hesitate to look deeper on the subject. We hope this short introduction was painless, easy to understand, and perhaps some inspiration to get out and try astrophotography if you haven’t already!

arrow_drop_down_circle
Divider Text
AUTHOR
SEARCH THE BLOG
clear


Join our free photo-travel community group on Facebook. A great place to swap stories & share images with fellow photographers!

Live events & webinars from the comfort of your own home. Free webinars on a variety of photography related topics – from photo editing to composition & more.

Check out the BCJ Trip Calendar for all of our upcoming Photography Tours, Workshops & Safaris!

FEATURED TRIP:
Mountain Gorillas of Rwanda
Photograph the complex personalities and behaviors of one of the world's most fascinating animals in the beating heart of Africa!
Mountain Gorillas of Rwanda
Photograph the complex personalities and behaviors of one of the world's most fascinating animals in the beating heart of Africa!


UPCOMING TRIPS WITH AVAILABILITY
[Block//Web Spots Left]
Price: [Block//Current Price]
Dates: [Block//Start Date %n/j/Y%+0] to [Block//End Date %n/j/Y%+0]
READ OUR NEWSLETTER FOR NEW TRIPS, ARTICLES, & PROMOS
BACKCOUNTRY JOURNEYS
"Backcountry Journeys offers guests the unique opportunity to explore our natural world from behind their own lens. We run a selection of hand-crafted Photo Tours, Workshops & Safaris connecting passionate people to exceptional experiences. Locations include Yosemite, Alaska, Yellowstone, Glacier National Park, Hawaii, Utah as well as Botswana & Costa Rica."
- Russ Nordstrand, Backcountry Journeys Founder & Director
- Russ Nordstrand, Backcountry Journeys Founder & Director
TRIP CATALOG
Download our Trip Catalog for detailed information on our many destinations for photography tours, workshops, and safaris.
All Images & Content are property of Backcountry Photography Tours, Workshops & Safaris LLCs - Copyright 2024
BACKCOUNTRY JOURNEYS
"Backcountry Journeys offers guests the unique opportunity to explore our natural world from behind their own lens. We run a selection of hand-crafted Photo Tours, Workshops & Safaris connecting passionate people to exceptional experiences. Locations include Yosemite, Alaska, Yellowstone, Glacier National Park, Hawaii, Utah as well as Botswana & Costa Rica."
All Images & Content are property of Backcountry Journeys Photography Tours, Workshops & Safaris LLC - Copyright 2024
TRIP CATALOG
Download our Trip Catalog for detailed information on our many destinations for photography tours, workshops, and safaris.