Awarded 2025 Travelers' Choice

About Backcountry Journeys
Why Choose Backcountry Journeys
If you're considering a photography trip, hear why Backcountry Journeys delivers the best experience in the industry.Frequently Asked Questions
If you're new to photography trips, or new to BCJ, you can find our common travel questions here.Fitness Levels
Our trips vary on physical intensity, and by reviewing our fitness levels, you can find out which trips may be more challenging, or aligned more closely with your comfort level.Meet The Crew
We've built an amazing team of experienced guides, and dedicated office staff that elevate your travel experience. Get to know their backgrounds, and hear their stories.Loyalty Program
We reward our frequent photo adventurers with exclusive discounts on amazing photography trips.Contact Us
If you need to get in touch with our office staff, or have additional business inquiries, you can find our information here.Refer a Friend
Know someone perfect for one of our tours? Recommend them through this quick form.Stay Up To Date On All Things
Backcountry Journeys
Backcountry Journeys
Our Photography Community
Our Webinars
Our regularly hosted webinars provide photography instruction from our own guides on a wide range of topics.Our Education Portal
Explore our library of articles that cover everything from common questions, to in-depth guides on how to achieve that perfect shot.Community Testimonials
We're proud to foster an amazing group of photo travelers, and here you can find their stories from their past adventures.Resources For Photographers
About Our Company
Resources For Photographers
About Our Company
12 Tips for Creating Great Landscape Photographs
Published November 4, 2019
Creating compelling landscape photographs is not easy. It takes skill, practice, dedication, and of course a bit of luck.
I spend a lot of time in the field, and still struggle with consistently creating work that I feel proud of. Photography is so much more than just dialing in the correct settings and pressing the shutter. A great landscape photograph is hard to capture.
However, whether you are a beginner or a professional shooter, there are some tips you should always keep in mind that will undoubtedly improve your landscape photographs. Photography is an art form as well as a technical skill, thus the more time you put in, the better you will become. I put together a list of easy tips that you should always consider when you are in the field or planning a shoot. The goal is simple – we want you to become the best photographer possible, as fast as possible.
Tips
- Location Matters

The Himalayas of Nepal offer some of the most fantastic mountains on the planet. It is an ideal spot for landscape photography. -Matt Meisenheimer
Location is key, and it is why I listed it as number one on the list. To create great landscape photography, you need a great landscape. It really is that simple. I live in Wisconsin and tend to not do much shooting in the area. Of course, Wisconsin is beautiful in its own right, but it lacks drama. When I say drama, I mean jagged mountains, otherworldly desert rock, rushing waterfalls, etc. You need a landscape with dramatic focal points available for the best possible shots. That is one reason I love Alaska so much.
The point is, choose a landscape that really blows you away. At Backcountry Journeys, we lead workshops all over the world to places like that. There is a reason we go to Glacier National Park, Alaska, Utah, and Yosemite each year (the list goes on). The beautiful landscapes and features of those areas provide a starting point for a great photograph.
- Shoot During the Best Light
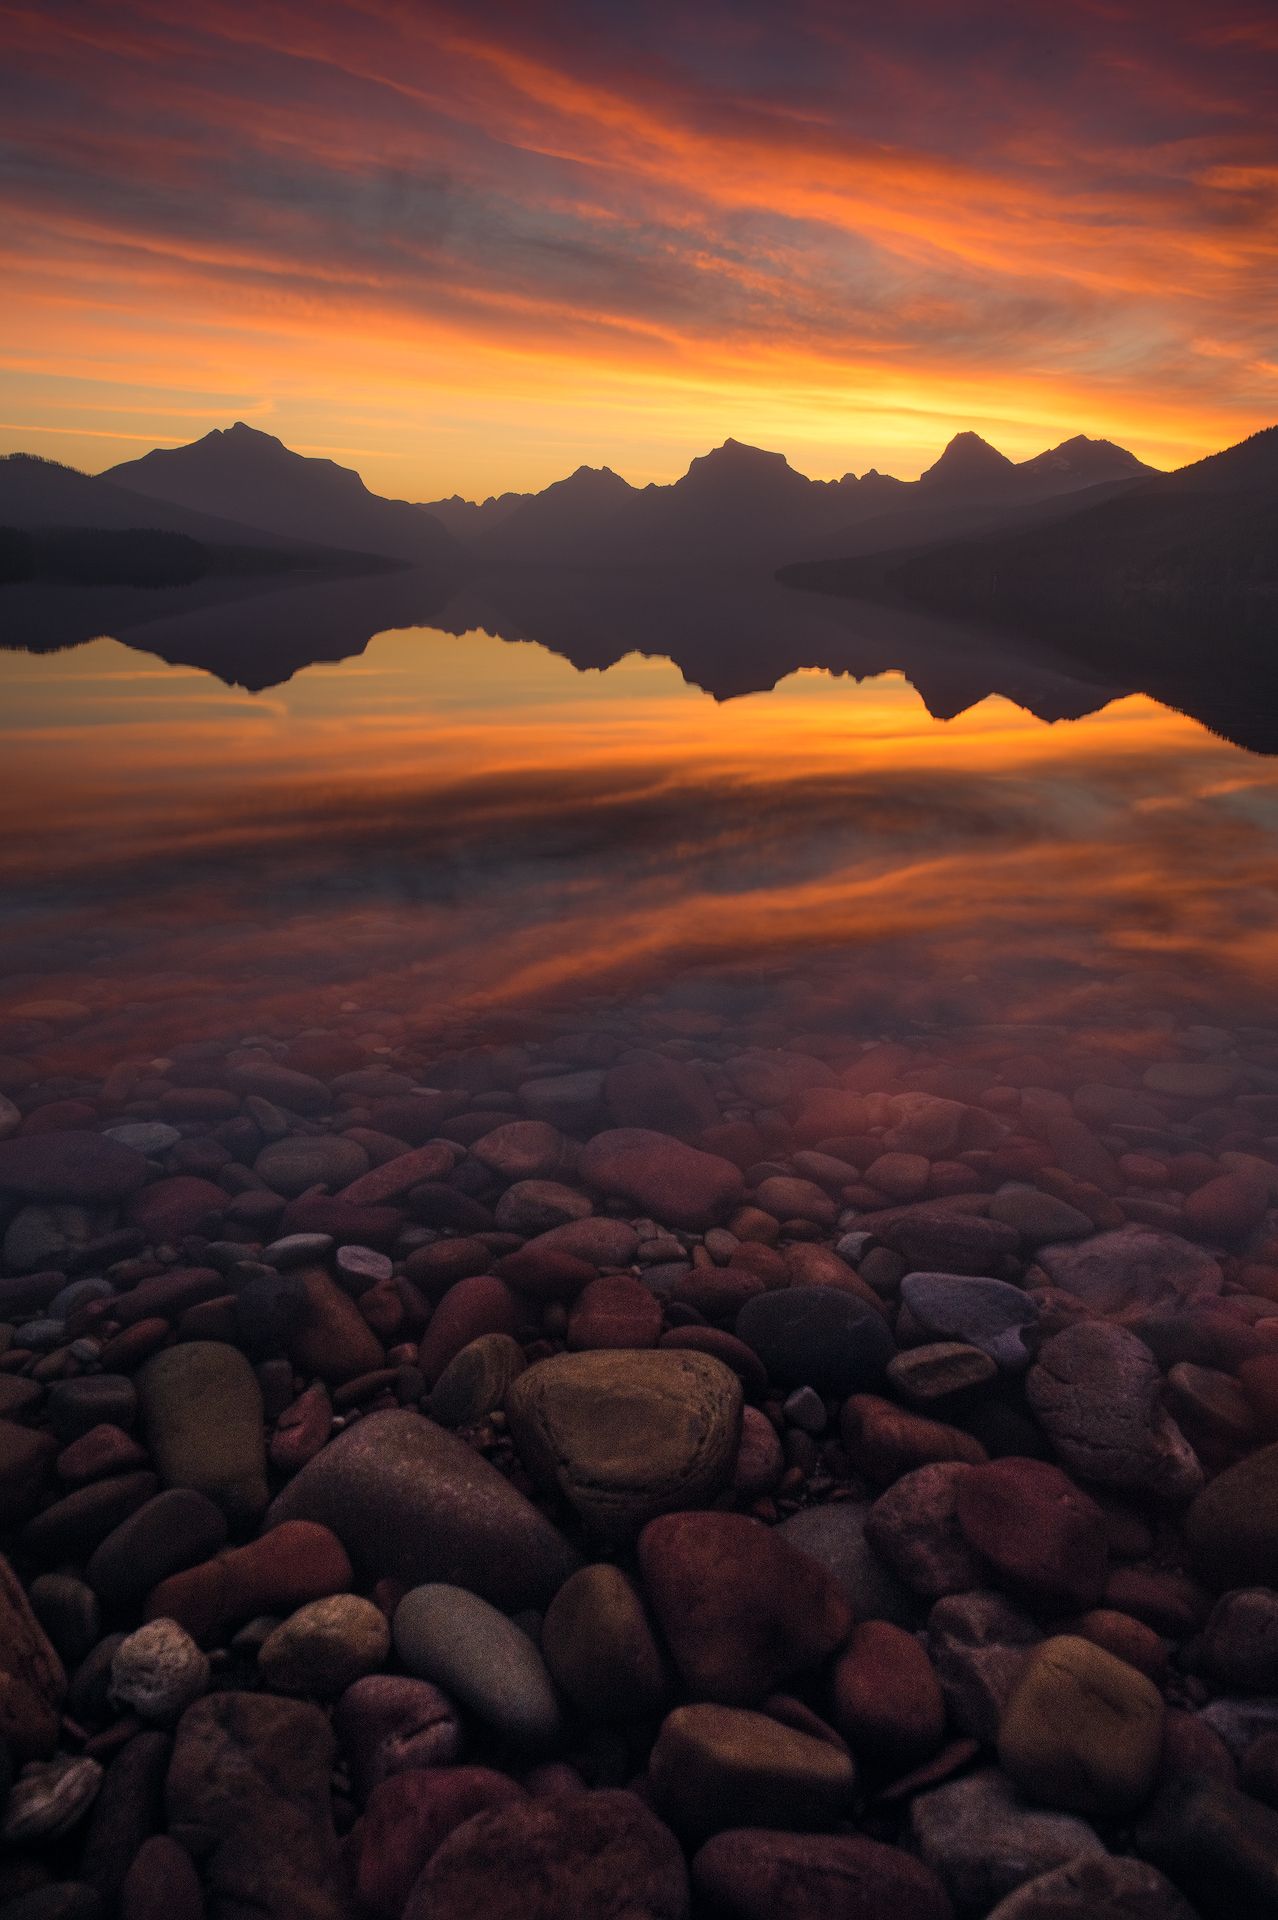
The best light occurs at Golden Hour, this was captured in Glacier National Park about 5 minutes before sunrise. -Matt Meisenheimer
The best possible photographs are created during the best possible light. So when is the best possible light? Photographers often refer to this period as the ‘Golden Hour.’ The ‘Golden Hour’ occurs when the sun is around six degrees above or below the horizon. In simple terms, it is the time around sunrise and sunset. I say go out early and stay late. I usually shoot around 1-2 hours before and after a respective sunrise or sunset, the exact time depends on conditions. Some of my personal favorite photographs were taken two hours before sunset, it just depends on the type of light you like.
The key takeaway here though is the best light will almost always occur around sunrise and sunset. All of us love photography and love to shoot as much as possible, but the shot you take at 12 pm will not come close to the shot you take around ‘Golden Hour’ from the same spot.
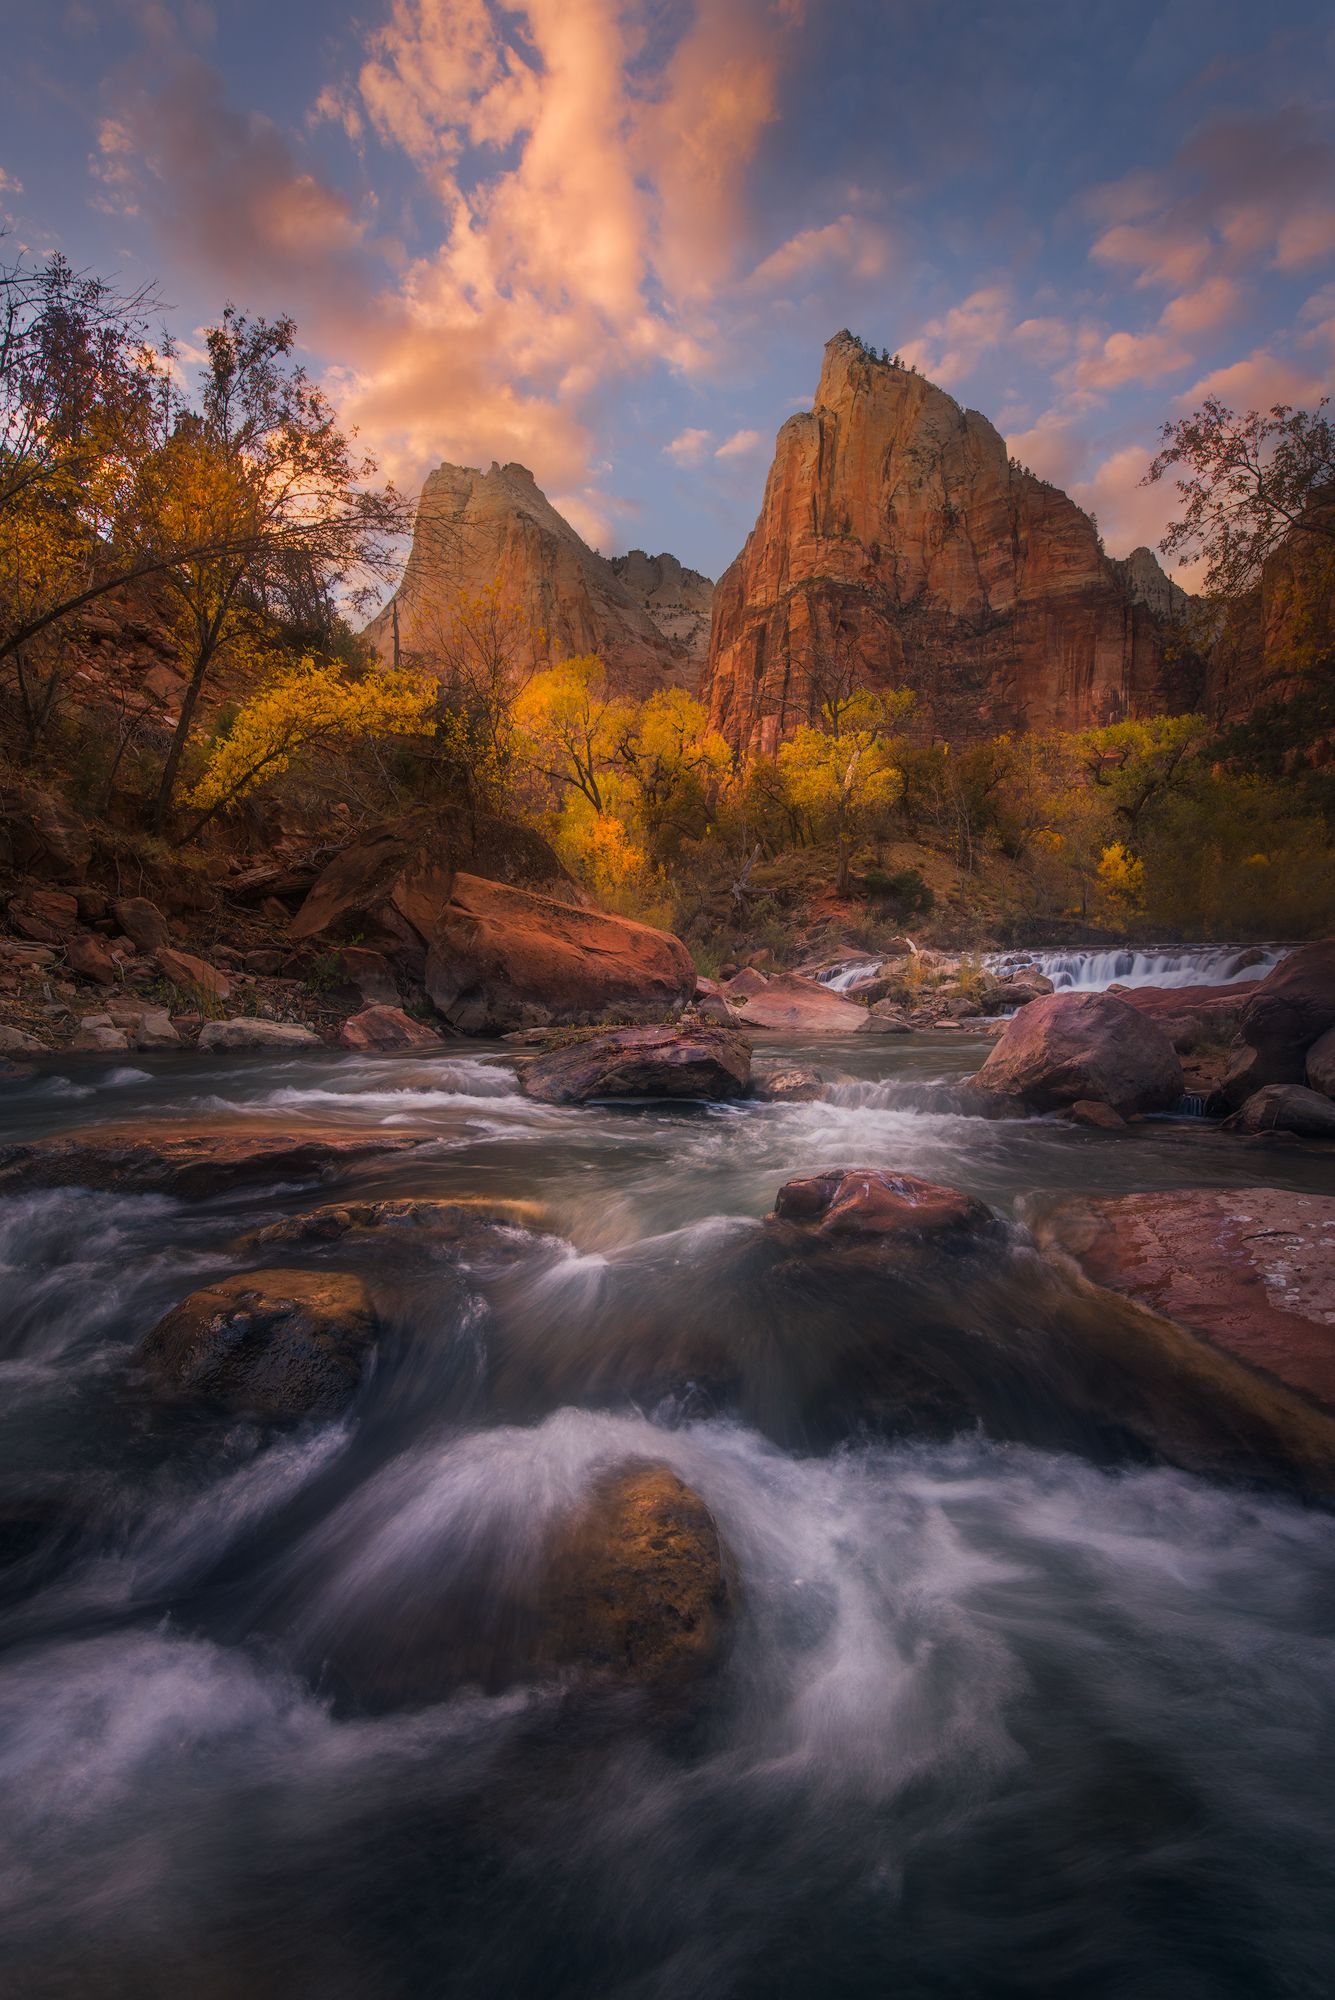
- Lead the Eye
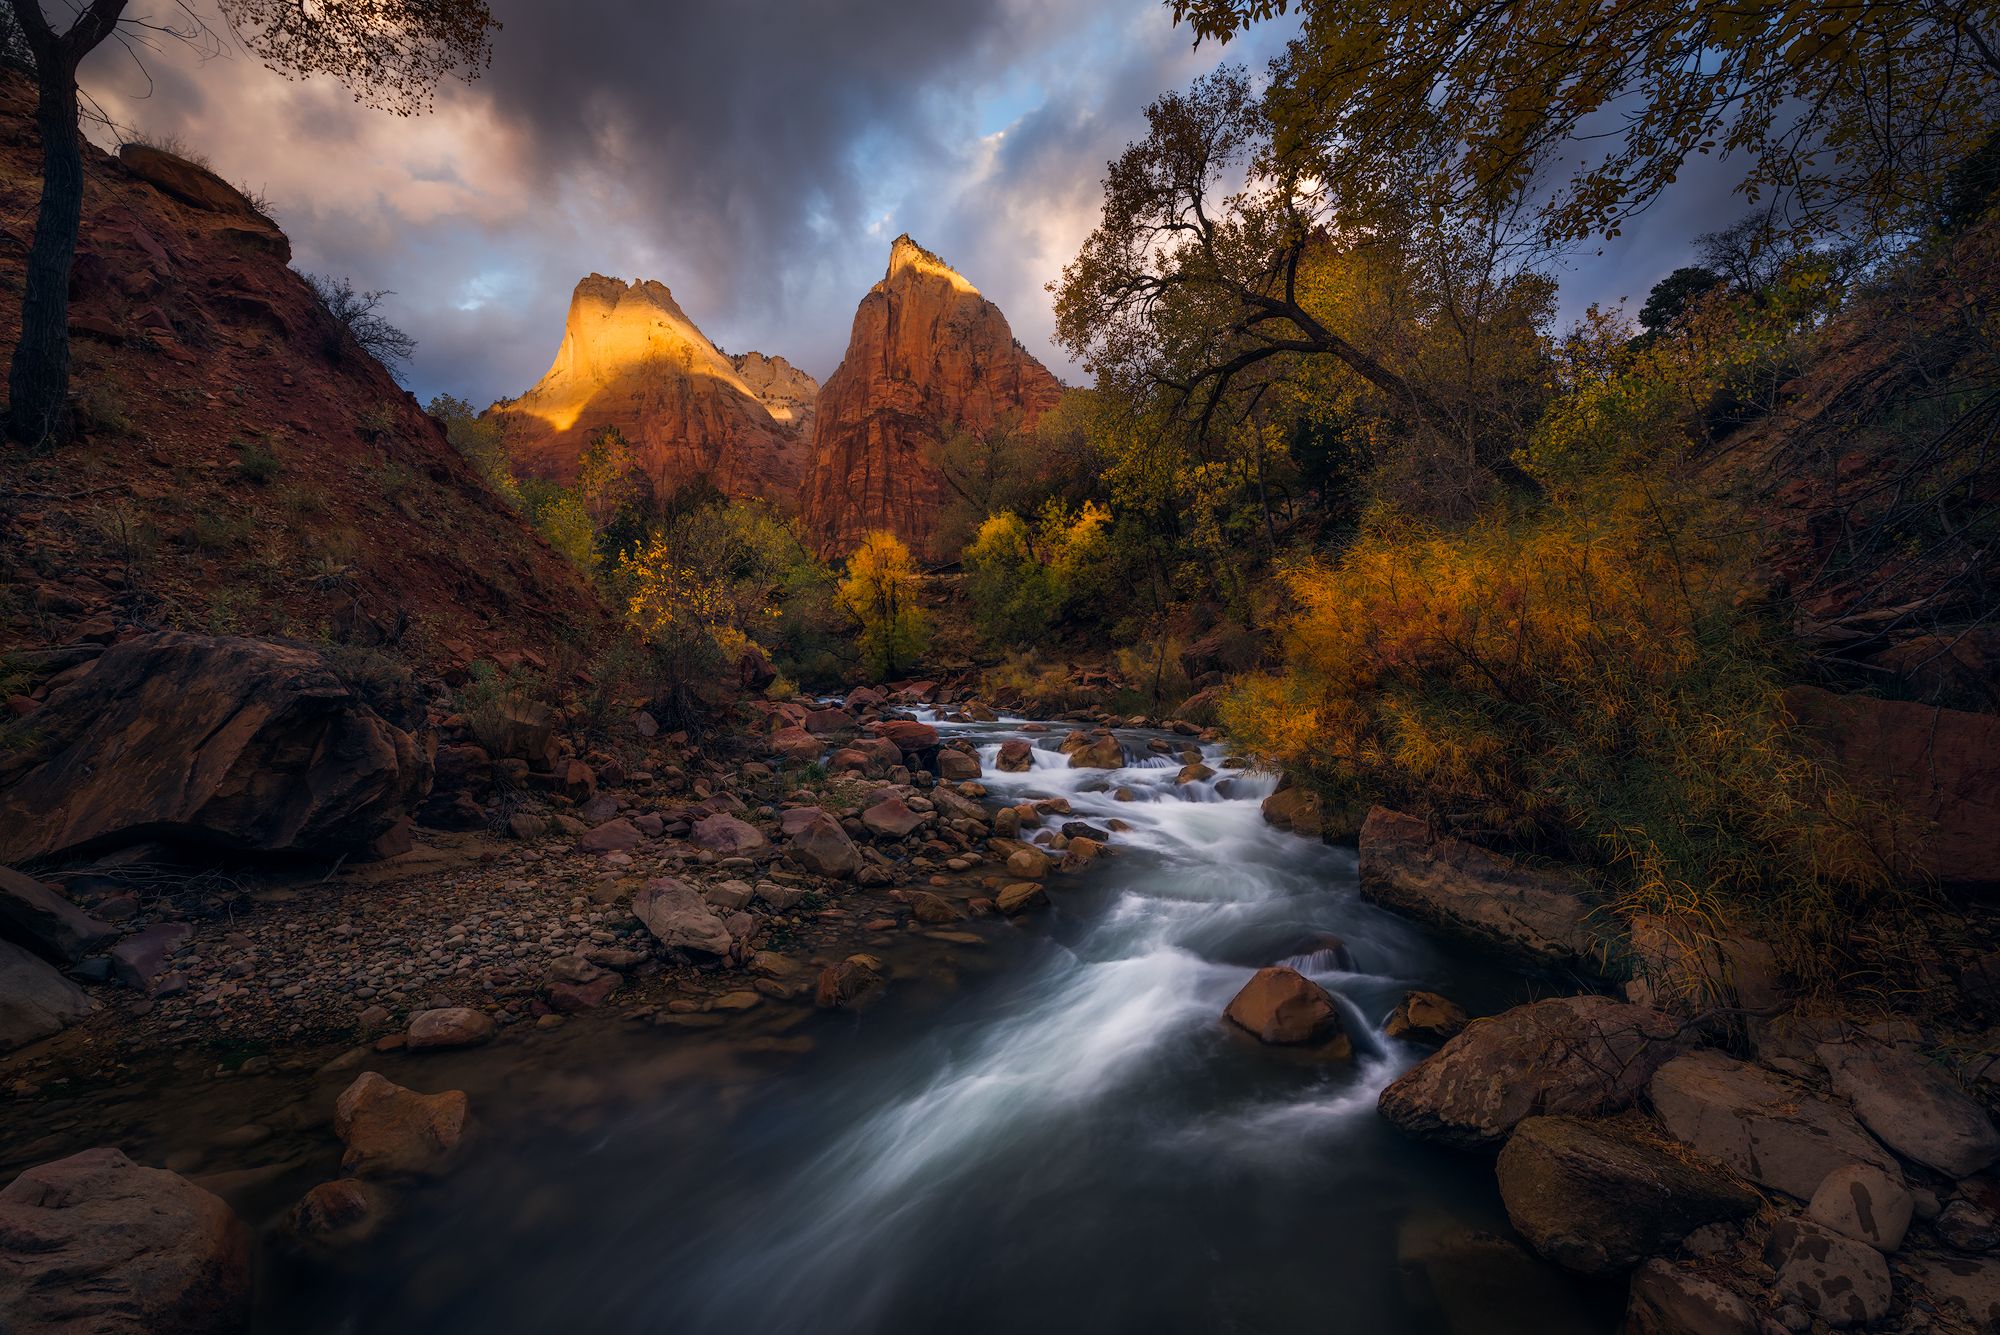
Water can be a great leading line, here the Virgin River in Zion National Park leads right into the Court of the Patriarchs. -Matt Meisenheimer
There are many compositional techniques to learn and practice, but one of the most powerful compositional techniques is the use of leading lines. Lines and curves can be used to help lead the eye to the focal point of your image. This is not a one size fits all tip, but when you are the field, keep it simple and see if you can find leading lines. Lines can also add depth to your image and can be used with other compositional techniques as well.
Side tip: Water can be one of the strongest leading lines available in nature and I often search for water because I know it can provide strong lines, as well as a strong foreground. Experiment with your shutter speed when shooting water. I prefer 1/5 second to 1 second for moving water, but preference varies from photographer to photographer.
- Shoot into the Sun
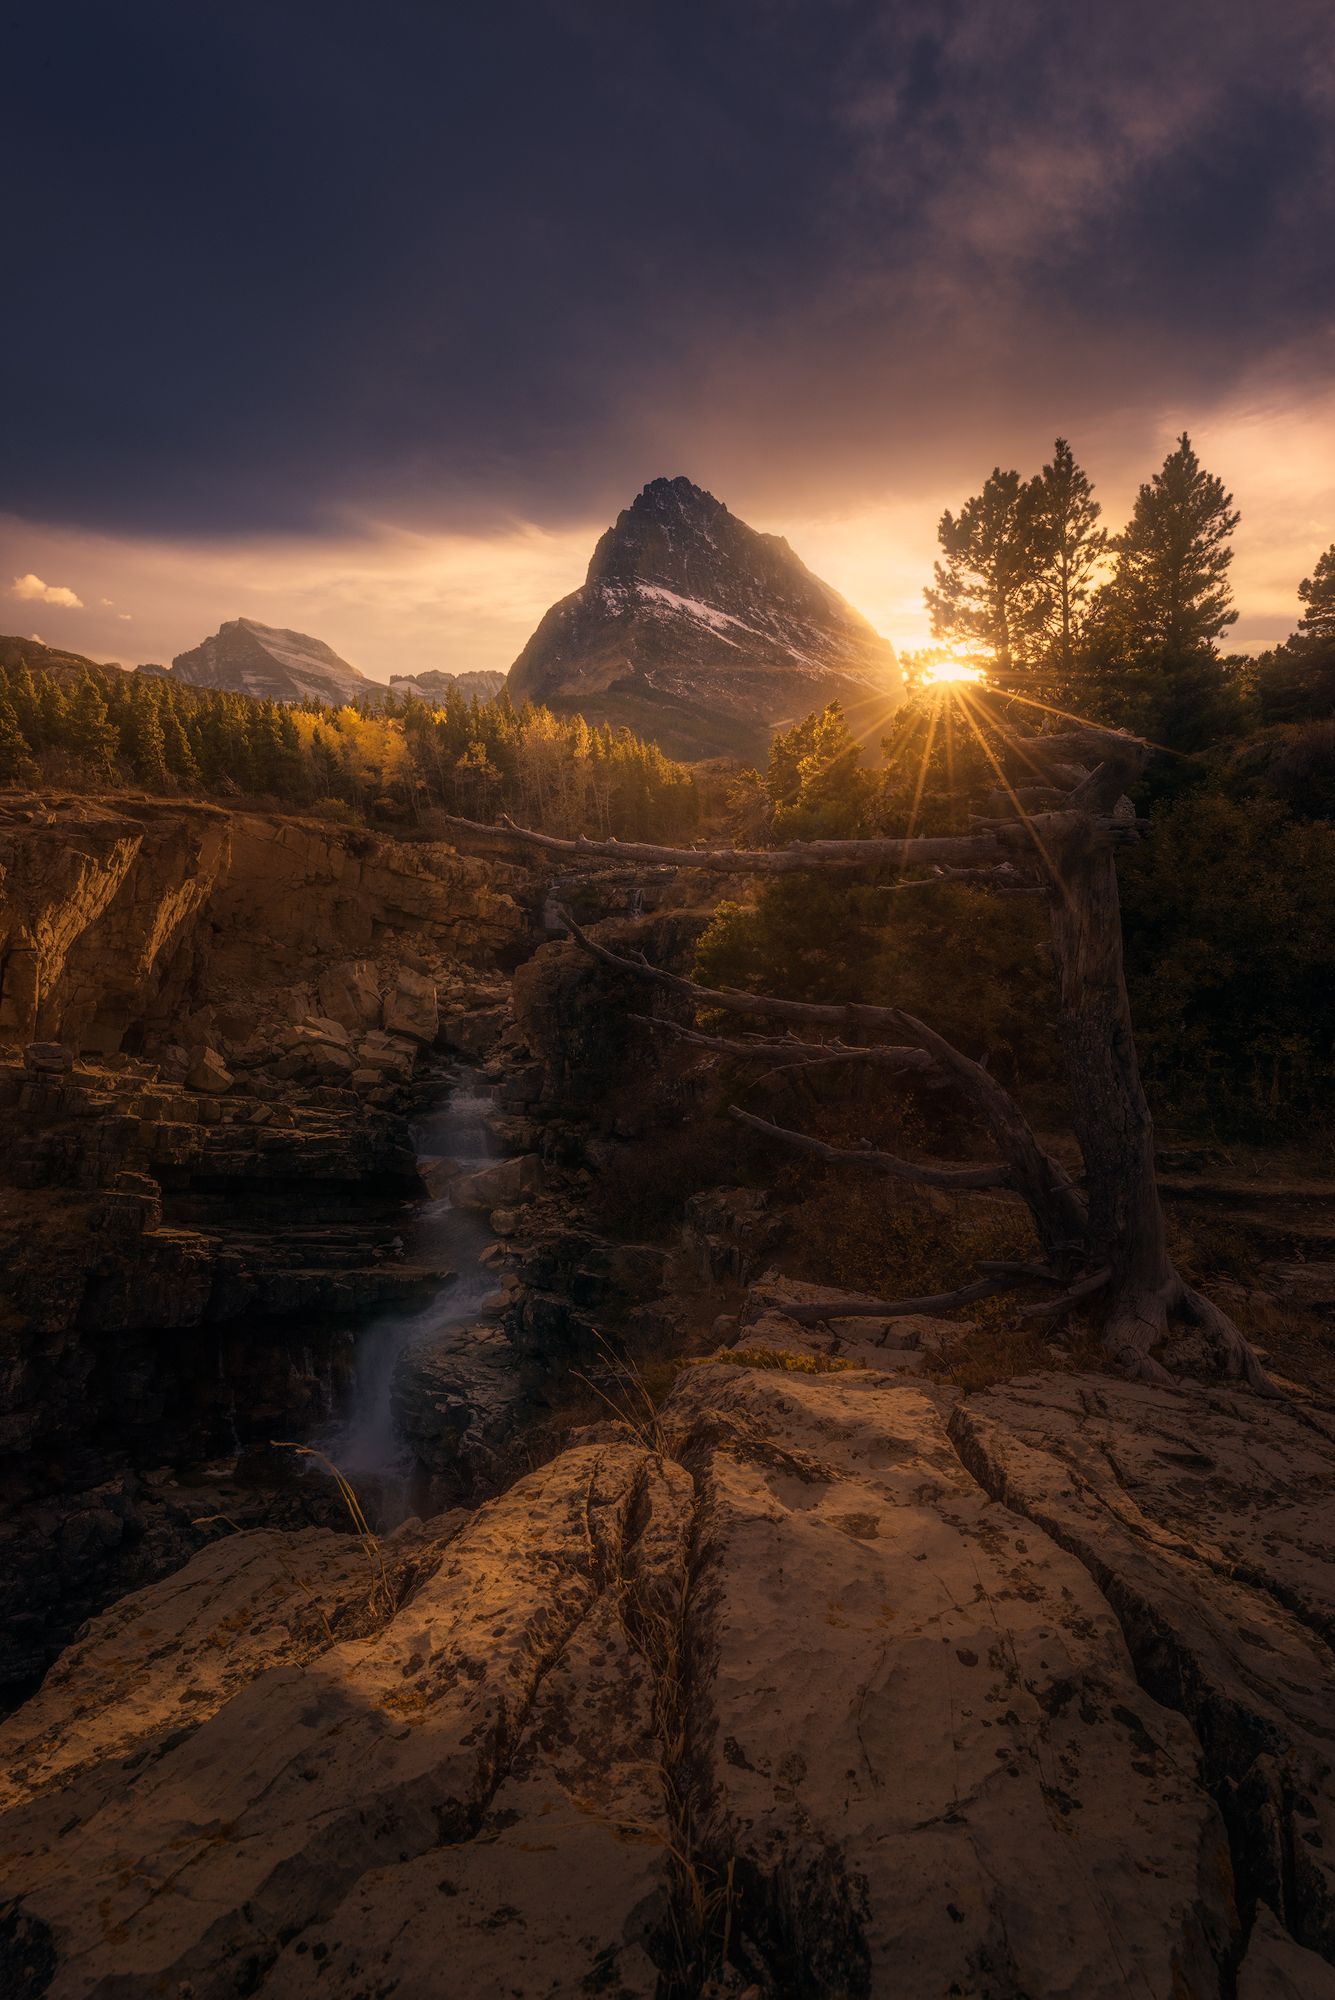
Look how dramatic shooting into the sun can be. This was captured in Glacier National Park and I did have to clean up flare, but it was worth it. -Matt Meisenheimer
Many photographers shy away from shooting into the sun. It seems to be an old ‘rule’ that some photographers stick by today. There is a time and place for everything but learning to shoot into the sun can result in some incredible images. The sun is an instant focal point or key element in your scene and can provide some awesome light for your image.
I think many photographers avoid shooting into the sun because it is difficult technically. There is a lot of dynamic range to be captured, which means you need to exposure blend or have a pro body that has a ton of dynamic range. There is also lens flare, which needs to be dealt with as well. Here’s a pro hack for dealing with flare – take your finger and place it over the sun in your frame and then snap a picture. You should see the flare disappear in your image. Then, take another shot immediately after without moving your camera (you need to be setup on a tripod). In post, you can then blend those two images together and effectively remove the flare.
- Look For Smaller Scenes
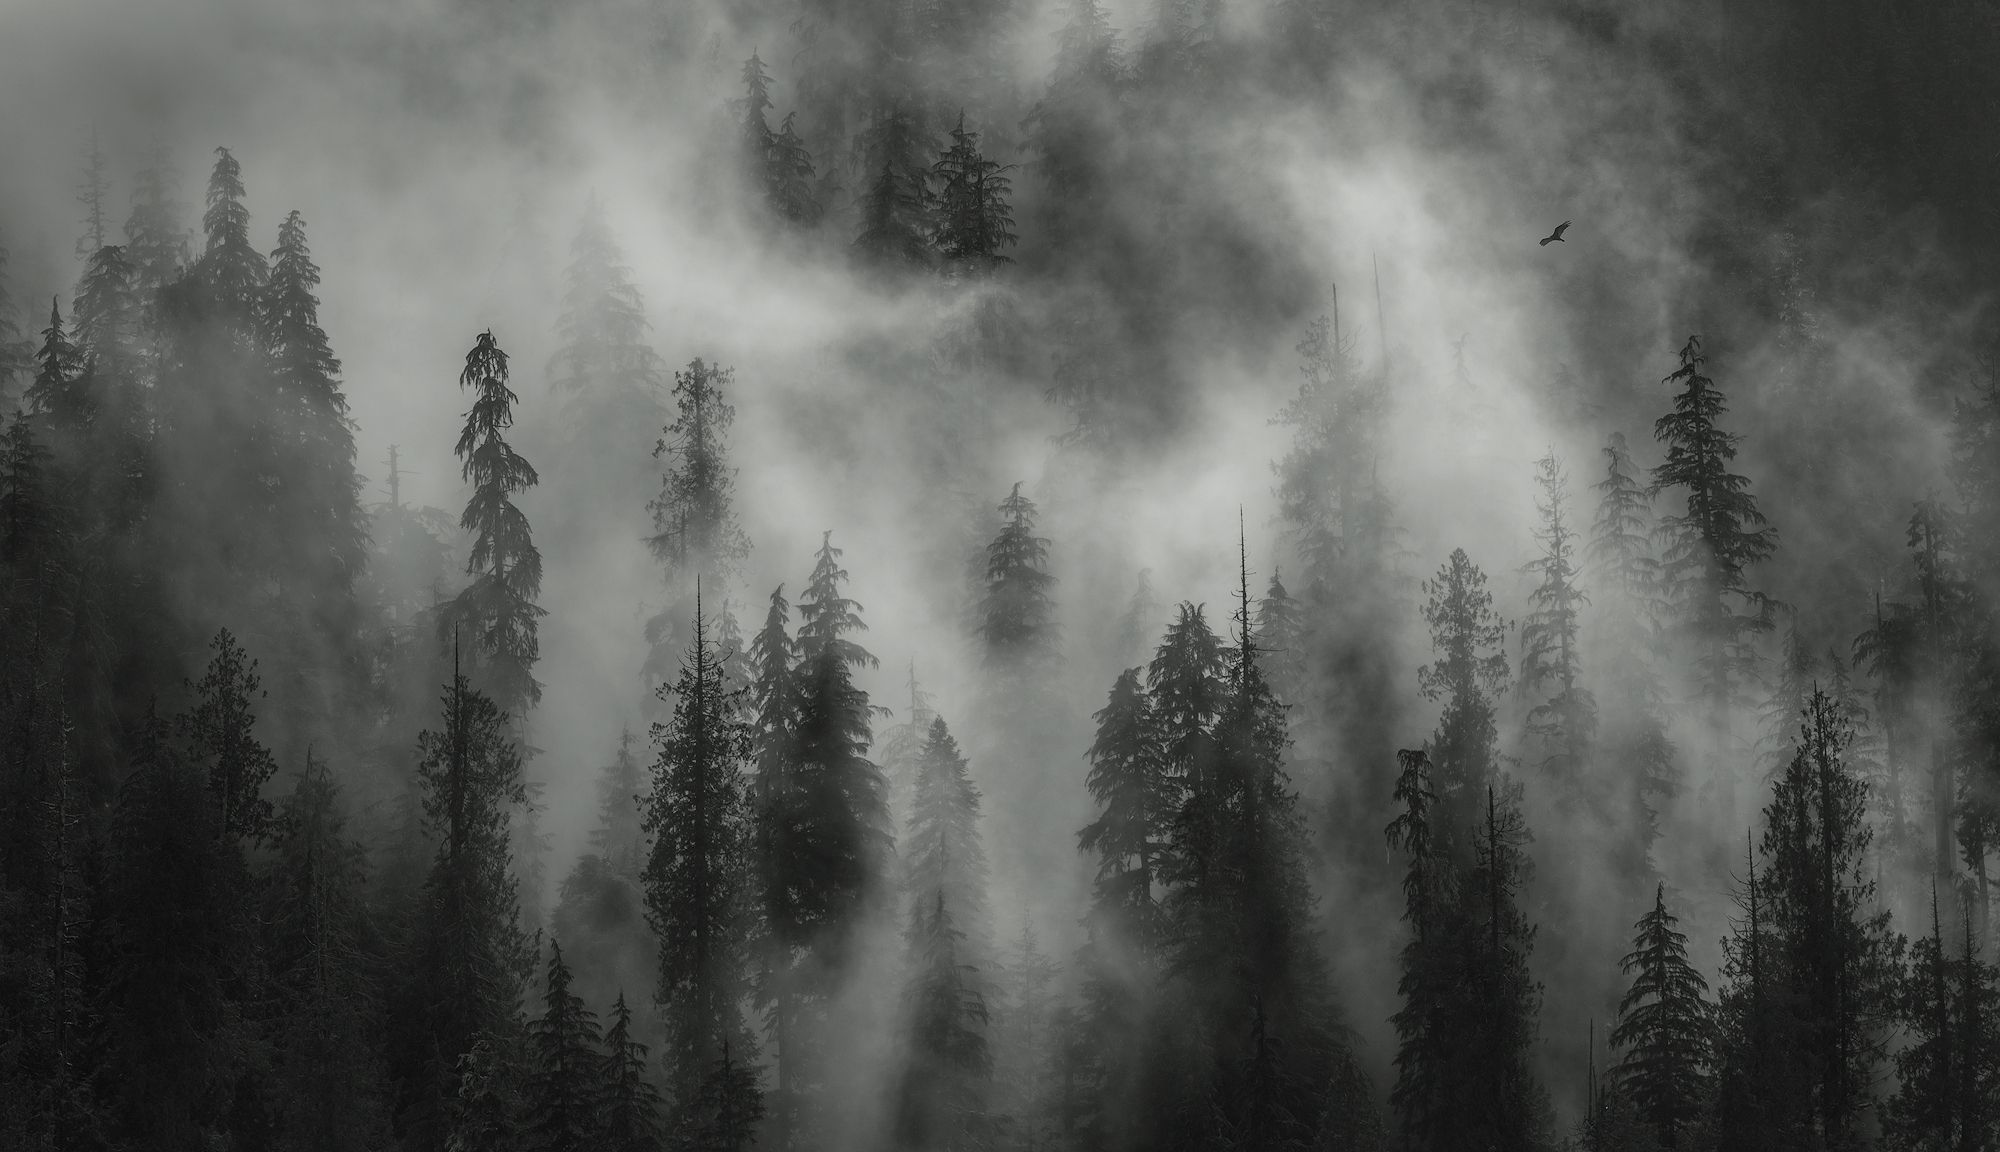
A tight perspective at 400mm revealed this scene – wispy clouds moving through the forests of Olympic National Park. -Matt Meisenheimer
A lot of the grand landscapes bode well for wide angle lenses. After all, great landscape shots are often about great foregrounds with great landscape scenes. But, constantly using your wide angle can make you a one-dimensional photographer. Next time when you are out shooting, attach a longer lens (70-400mm) and look for ‘smaller’ scenes. The world changes through your lens in amazing ways when you change focal lengths. Think of layered clouds in the mountains, fall leaves on the ground, textures of ice, etc. Abstracts can yield great landscape photos, but too often do photographers default to their wide angle lens.
- Give Yourself Time

I have visited this waterfall maybe five times, but only once did I find the conditions I wanted; the falls with sunlight filtering through the forest. Sometimes a shot takes persistence and multiple visits. -Matt Meisenheimer
Give yourself time to shoot, this can’t be understated. If you show up to a location 5 minutes before sunset, you are not going to get a good shot (unless it is literally a drive up icon location). I go out hours before good light to scout an area and to look for potential compositions so when the light gets good, I am ready and not running around to find something. On personal photo trips, I don’t shoot during the day at all. I go to the locations I want to shoot at sunrise or sunset and I look around, I get to know the locations. You should do the same on your own trips – give yourself time so you are prepared when the going gets good.
It is also OK to visit a location multiple times. I rarely ever come away with a great shot from a location when it is my first time there. Sometimes you have to continue to go back to a location multiple times to come away with something really powerful. I know photographers who have been shooting the same spots, at certain times of the year, for the last 10 years…just to get that one shot.
- Shoot in RAW
I made sure to expose for my highlights in this image, the result? An almost totally black foreground and midground. However, I was able to really expand my shadows and blacks because I shot in RAW. -Matt Meisenheimer
If you are serious about your photography, you should be shooting in RAW, no excuses. Shooting in RAW is the first step towards capturing great images because RAW gives you total control. RAW offers the highest level of image quality – JPGs are a compressed file type. RAW files record greatest levels of brightness – RAW are 12 or 14bit versus 8bit for JPG. RAW files allow you to push your shadows/highlights much more, and you have total control over your White Balance.
With RAW files, you will have to learn how to process and you will need to accommodate the larger file sizes, but the benefits greatly outweigh the costs.
- Watch Your Histogram

The Histogram in the top left shows a lot of ‘darks’ data, but the highlights are exposed properly and not clipping on the right or blown out. -Matt Meisenheimer
Blowing out your highlights is an easy way to ruin what could be a potentially great image. An easy way to correct this is to constantly be watching your Histogram when you’re shooting. The Histogram is a graphical representation of brightness values in your image. It graphs tonal values from 0% (black) to 100% (white). You want to watch for ‘clipping’ when you are shooting. That means data piling up on either end of the spectrum (see below for example).
Controlling your highlights and shadows is key to creating a great image. Highlights are especially important, as a viewer’s eye will almost always go to the brightest spots in an image. If you have really nice light, but blow out your highlights, you will lose a lot of the nice color in the sky. Watch that Histogram when you are out in the field and make sure you are not clipping your highlights (and shadows)!
- Use a Tripod
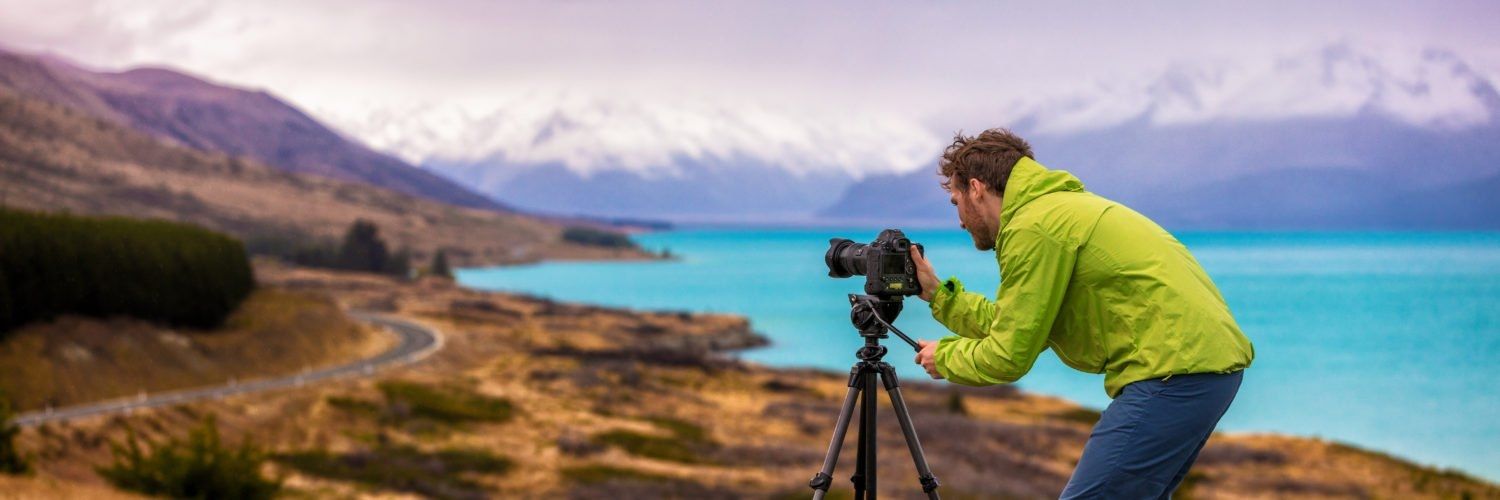
Invest in a tripod… and use it!
Many photographers hate, and I mean HATE using tripods. That is fine, I dislike using one too. The truth of the matter is you need a tripod to create the highest quality image. The best light occurs when the sun is lower on the horizon (or below) and that results in photographers shooting during periods of very low light. Low light means slow shutter speeds and you guessed it, slow shutter speeds mean shooting on a tripod for sharp shots.
The alternative is increasing your ISO to achieve a shutter speed that you can handhold. When you increase your ISO, you introduce noise into your image and your image quality degrades very quickly. My recommendation is to buy a high-quality tripod, Really Right Stuff specifically. It is an investment, but if you are an avid shooter, it will last you a lifetime. A high-quality tripod will cause less headaches and make it enjoyable to use a tripod. Until in-camera stabilization makes huge improvements and we can focus stack/exposure blend in camera, a tripod in a necessity.
- Look for Contrast
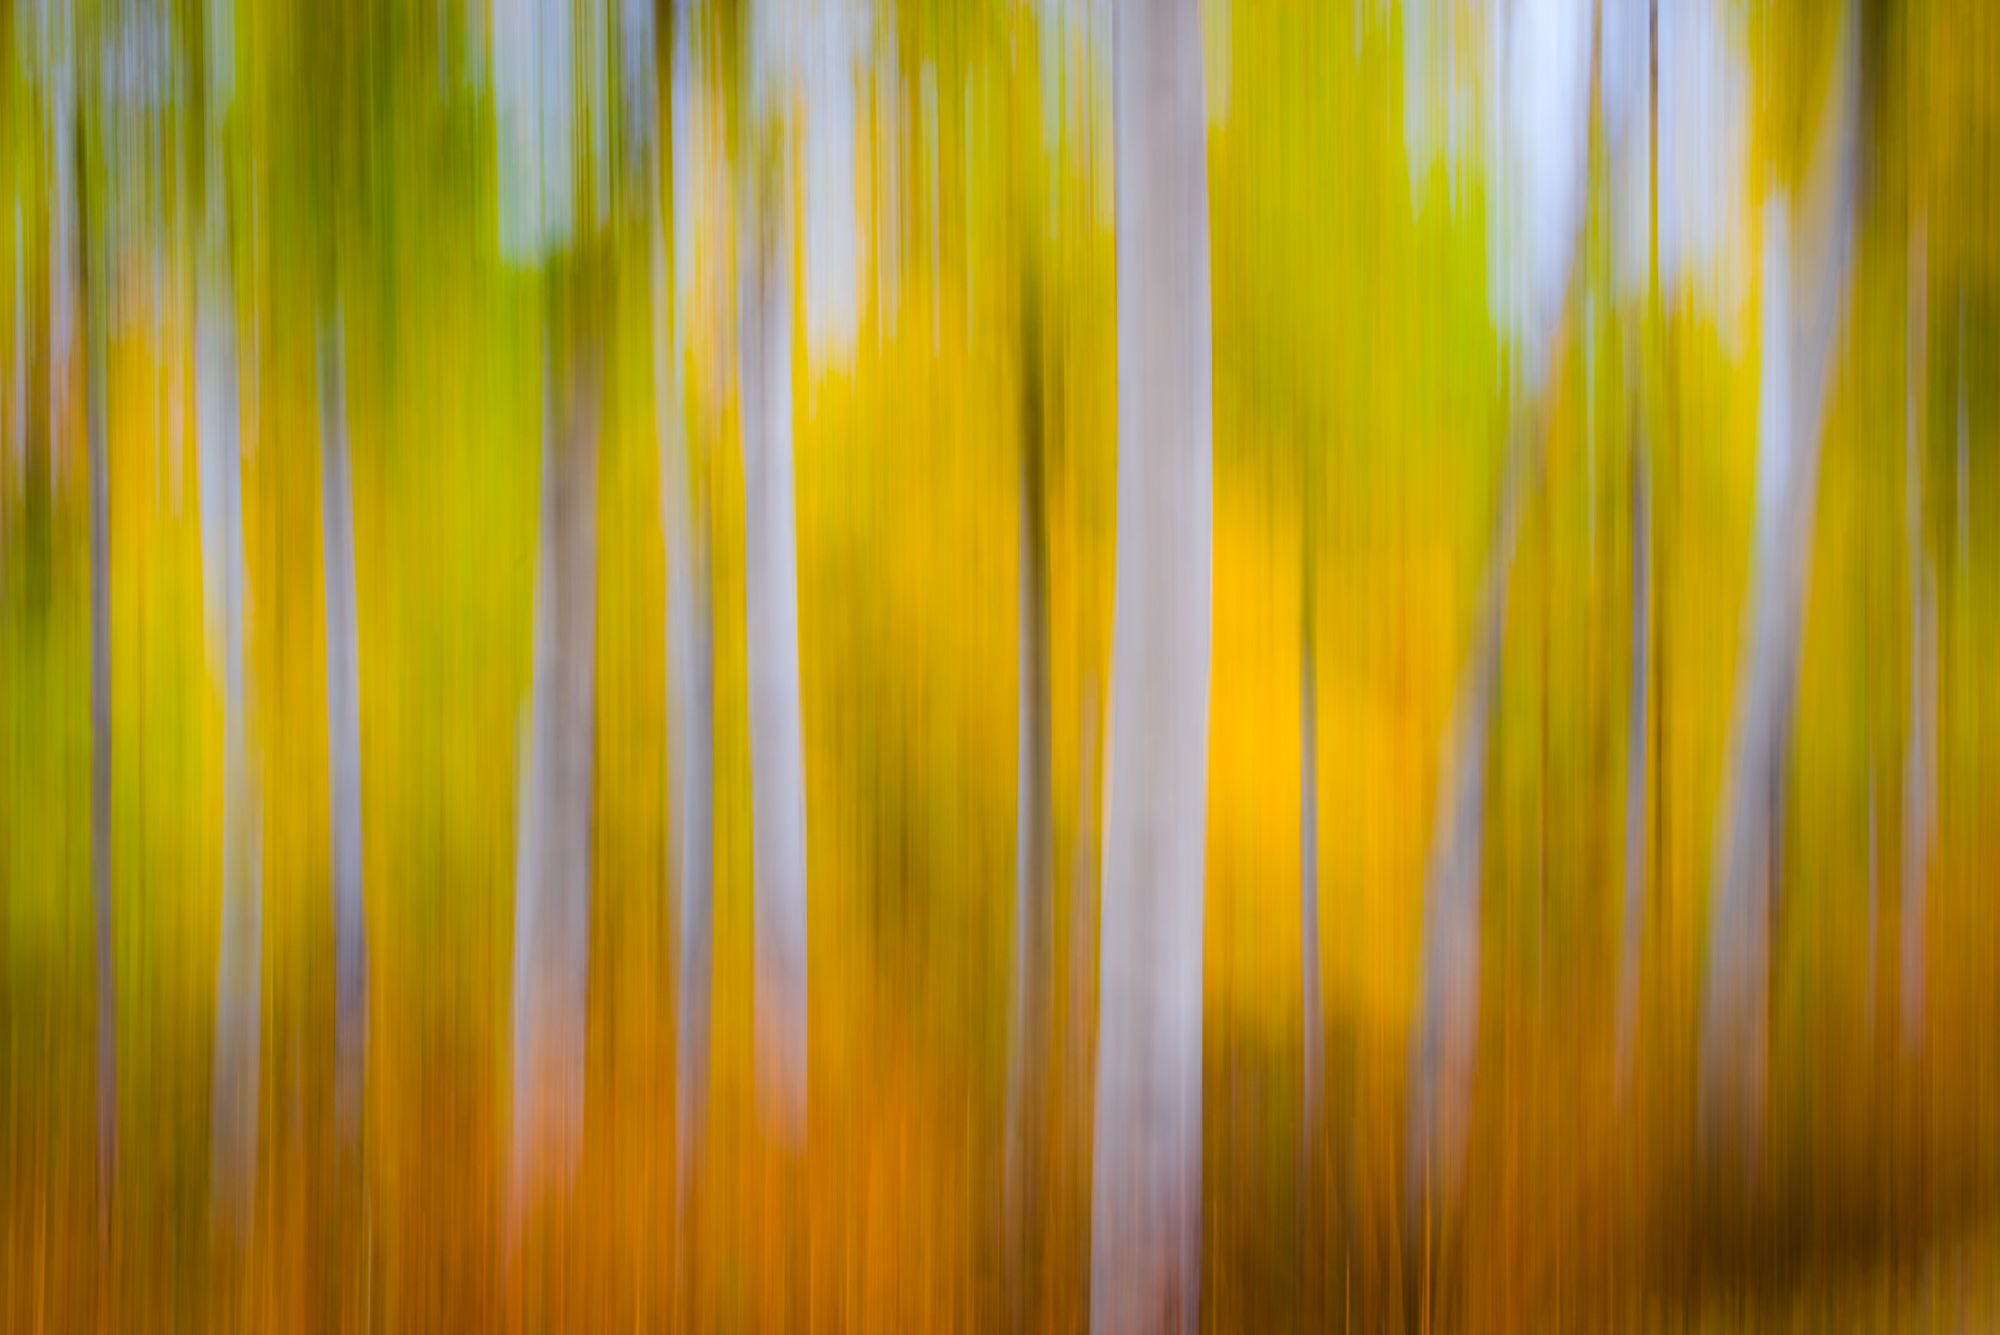
The white trunks of the Aspen trees contrast well with the bright, vibrant fall foliage. -Matt Meisenheimer
Contrast comes in many shapes and forms, and can be especially powerful in an image. It can help bring out certain elements and help isolate your focal point. Look for transitions in tonal contrast while in the field. Naturally, the eye will go from a darker area to a brighter area. Think about that in the field and see if you can find a way to use shadows and darkness to your advantage – use the shadows to emphasize the brighter parts of your image where your focal point is. Color contrast is another important form. Colors interact with each other in different ways, and the use of contrasting colors can be extremely effective when it comes to capturing a great shot and making an image pop.

We offer world-class travel photography
experiences around the world.
Each tour is bundled with lodging, meals, and transportation between workshops included, allowing you to focus on photography instead of the stress of traveling.
experiences around the world.
Each tour is bundled with lodging, meals, and transportation between workshops included, allowing you to focus on photography instead of the stress of traveling.
Get Our Trip Catalog
Receive a trip catalog that highlights all of our upcoming photo tours and workshops.Schedule a Trip Consultation
Meet with a photo experience coordinator, and experience a personal touch to your booking experience.Landscape Guide
Receive a FREE Landscape Cheat Sheet Written By a Pro Photographer.Webinars
Our regularly hosted webinars provide photography instruction from our own guides on a wide range of topics.Education Portal
Explore our library of articles that cover everything from common questions, to in-depth guides on how to achieve that perfect shot.
Backcountry Journeys
Connecting Passionate People To
Exceptional Experiences.
Exceptional Experiences.
Business Hours:
Mon-Fri, 8AM-4PM MT
928-478-1521
adventure@backcountryjourneys.com
Mon-Fri, 8AM-4PM MT
928-478-1521
adventure@backcountryjourneys.com
arrow_drop_down_circle
Divider Text
All Images & Content Are Property Of Backcountry Journeys Photography Tours, Workshops & Safaris LLC - Copyright 2026
About Us
Receive a Digital Trip Catalog
Find an upcoming photography tour with our interactive catalog.