2025 Travelers' Choice

About Backcountry Journeys
Why Choose Backcountry Journeys
If you're considering a photography trip, hear why Backcountry Journeys delivers the best experience in the industry.Frequently Asked Questions
If you're new to photography trips, or new to BCJ, you can find our common travel questions here.Fitness Levels
Our trips vary on physical intensity, and by reviewing our fitness levels, you can find out which trips may be more challenging, or aligned more closely with your comfort level.Meet The Crew
We've built an amazing team of experienced guides, and dedicated office staff that elevate your travel experience. Get to know their backgrounds, and hear their stories.Loyalty Program
We reward our frequent photo adventurers with exclusive discounts on amazing photography trips.Contact Us
If you need to get in touch with our office staff, or have additional business inquiries, you can find our information here.Refer a Friend
Know someone perfect for one of our tours? Recommend them through this quick form.Stay Up To Date On All Things
Backcountry Journeys
Backcountry Journeys
Our Photography Community
Our Webinars
Our regularly hosted webinars provide photography instruction from our own guides on a wide range of topics.Our Education Portal
Explore our library of articles that cover everything from common questions, to in-depth guides on how to achieve that perfect shot.Community Testimonials
We're proud to foster an amazing group of photo travelers, and here you can find their stories from their past adventures.Resources For Photographers
About Our Company
Resources For Photographers
About Our Company
A Deep Dive into Exposure Bracketing – What It Is and When You Need to Use It
Published September 3, 2026
Photography is of course both an art form and a science. Which is part of the reason I love it so much. Not only do you have to figure out and master all the technical, mechanical, and physical aspects and settings, but in order to capture a great image you also need to tap into your creativity and explore concepts like composition, perspective, color, and so much more. It is a constant balancing act between science and art, which are two of my favorite things.
In today’s article we’re going to dive into the scientific and technical side of things because at its core, photography is all about capturing light. Absorbing wavelengths of energy and matter and transforming them into digital signals that ultimate result in a 2-dimensional recreation of the world around us.
In order to achieve this, we adjust our camera settings to determine how much light reaches the camera's sensor, and we make those decisions based on the scene in front of us. But sometimes, the scene we want to photograph contains more light and contrast than our camera can capture in a single exposure. While modern cameras are great, they still have their limitations.
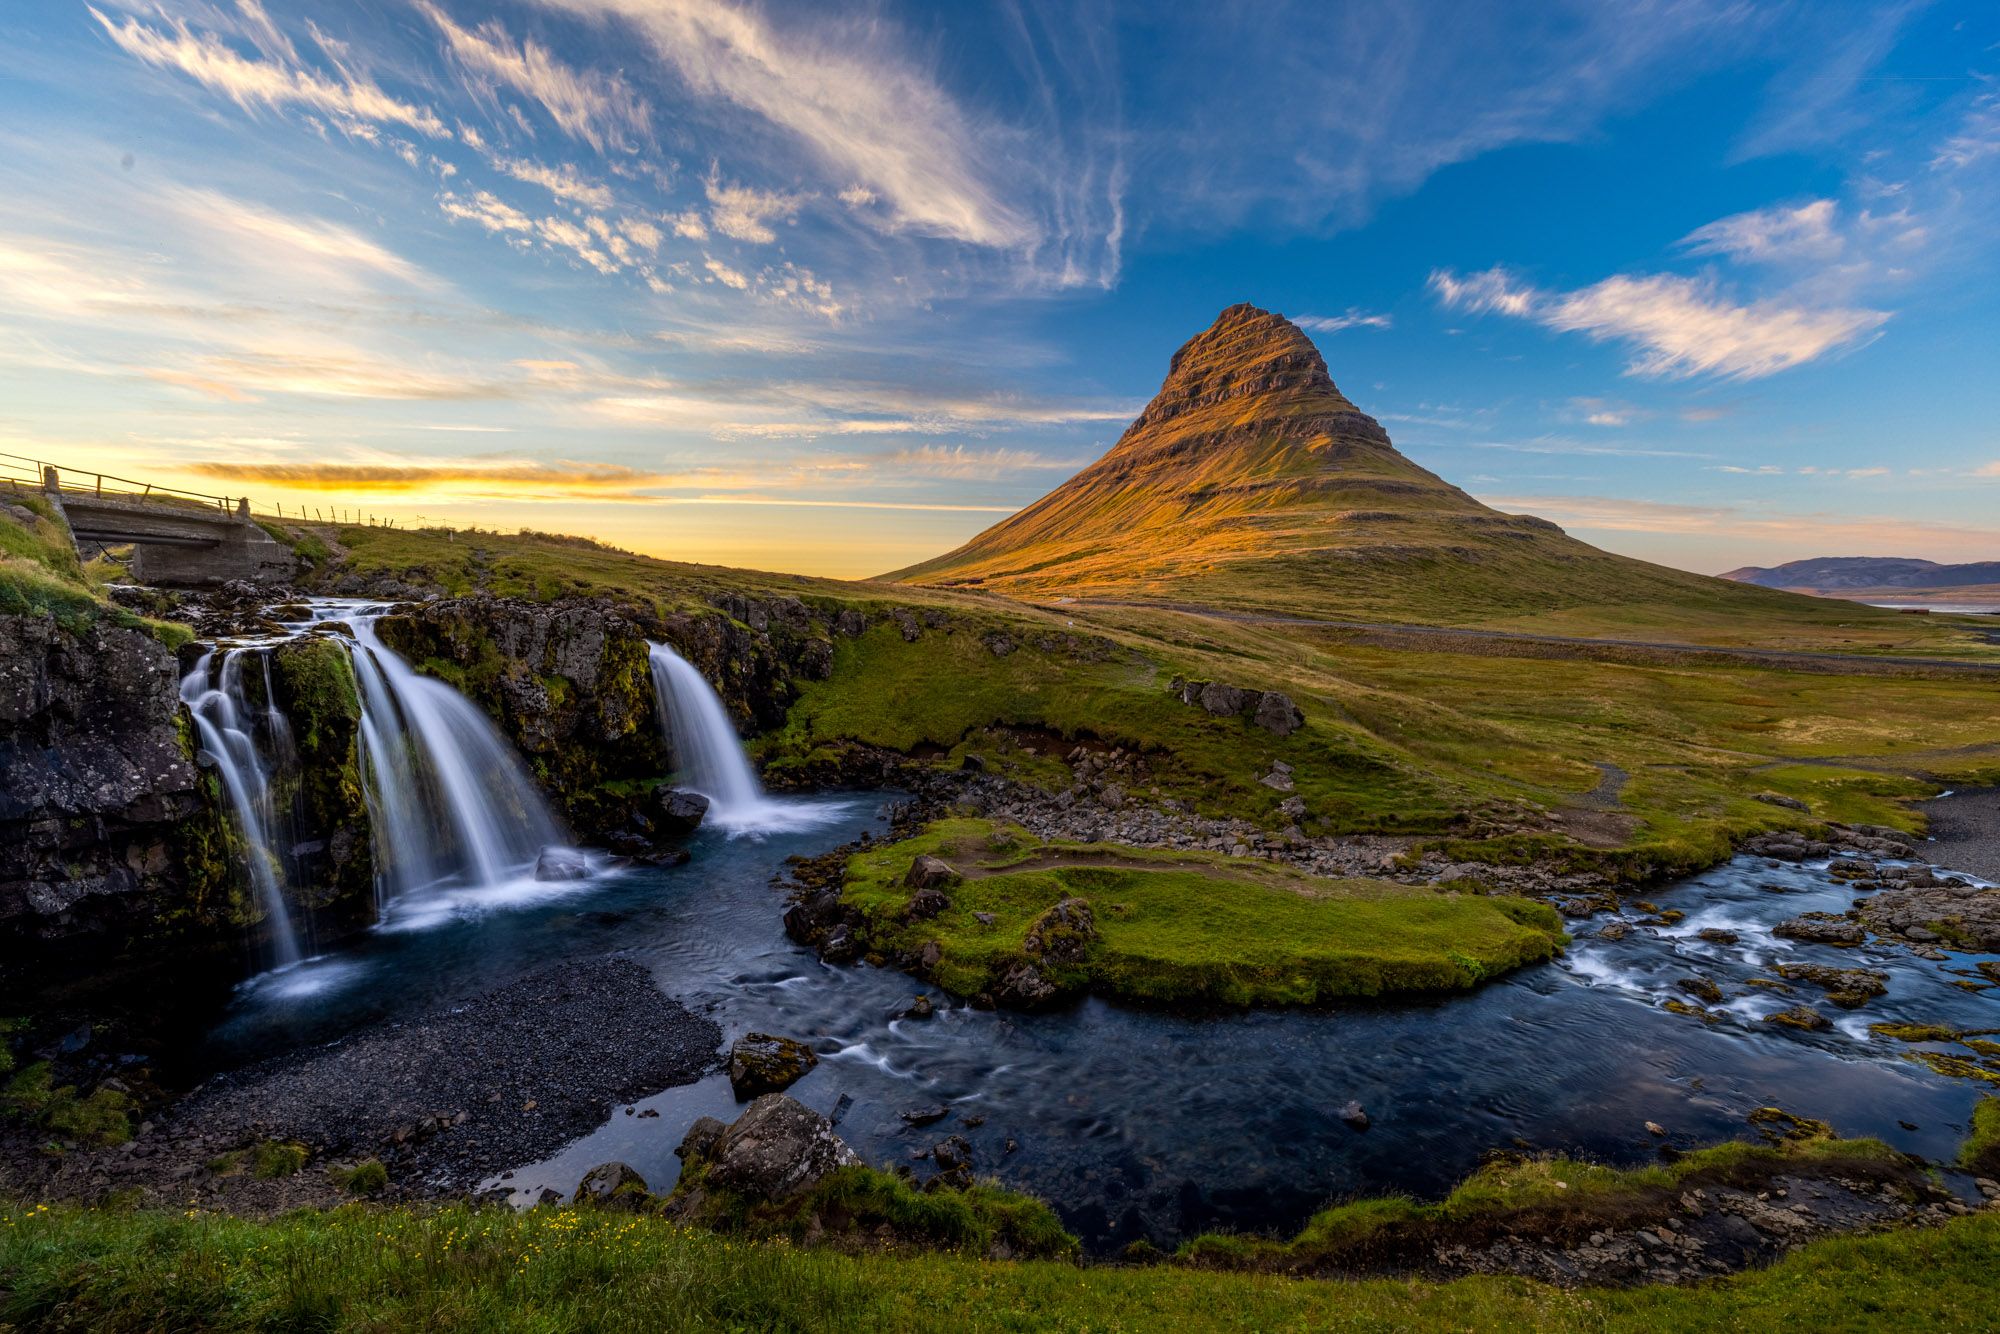
This is one of the fundamental challenges of photography. You might be standing in front of a spectacular landscape at sunrise, for example, with a brilliantly bright sky above a dark shadowed foreground that’s still waiting to receive the light of the day. You adjust your camera settings to properly expose the foreground, only to discover that the sky has become completely blown out. You make another adjustment to preserve the details in the sky, and now the foreground is nearly black… This is a very common occurrence and if you don’t know what to do, it can be quite frustrating.
So, what do you do to overcome such challenges?
This is where exposure bracketing comes into play.
Exposure bracketing is one of the most useful photography techniques available to photographers of all styles, skill levels, and backgrounds, and I find it particularly helpful for those interested in landscape photography. This simple technique allows you to capture multiple exposures of the same scene and ultimately combine them to create a final image containing considerably more tonal information than your camera could capture in a single frame. It’s a way to expand your cameras capabilities and escape it’s limitations.
The concept might sound complicated at first, but it is actually quite straightforward. Once you understand dynamic range, the histogram, and how your camera captures light, exposure bracketing becomes an incredibly useful tool to have in your photography toolbox.
Let's take a deep dive into what exposure bracketing is, why it works, when you should use it, and how you can turn your bracketed exposures into beautiful HDR images. If you’re new to photography this might sound overwhelming at first, but stick with me, it’s really not too bad and it’s something you’re going to love!
An Overview of Dynamic Range
Before we can understand exposure bracketing, we need to understand dynamic range.
Dynamic range, or more specifically ‘Native Dynamic Range’, refers to the range of brightness levels that a camera can capture in a single exposure. In simple terms, it is the distance between the darkest shadows and brightest highlights your camera can capture in a single image without losing detail or information.
Think about standing outside on a sunny day. Your scene might contain nearly black shadows underneath a tree, medium-toned rocks and vegetation, and intensely bright sunlight reflecting off clouds or snow. Your eyes, which have a far superior dynamic range than any modern-day camera, can move between these different levels of brightness and perceive an incredible amount of detail.
Your camera, however, has limitations and simply cannot recreate how our eyes see the world in this way.
Every camera sensor has a finite native dynamic range and while modern cameras are getting better year after year, they still have limitations. If the difference between the darkest and brightest portions of your scene exceeds that range, something has to give. You may be able to properly expose the shadows, but the highlights become too bright and lose detail. Or you can preserve the highlights, but the shadows become so dark that they contain little usable information.
This is particularly important in landscape photography because many landscapes contain enormous differences between light and shadow.
Consider a sunrise in the mountains. The sky may be illuminated by the rising sun while the mountains and foreground are still relatively dark. If you expose for the mountains, the sky may become completely white. If you expose for the sky, the mountains may become nearly black. Neither exposure necessarily represents what you actually saw with your eyes.

Or perhaps think about photographing a slot canyon. Most of the narrow canyon is full of very dark shadows where direct light simply can’t penetrate. The only illumination that exists is faint reflected and diffused light from above, apart from some very bright light beams sneaking in here and there. It would simply be impossible to capture this wide range of light and information in one shot because the shadows are so dark and the light beams are so bright. Again, you can choose to expose for either the light beam or the shadows, but you can’t capture both in one image. As the old adage goes, you can’t have your cake and eat it too. Or can you?...
This is where understanding your camera's dynamic range becomes so important.
The Histogram: A Photographer’s Best Friend
One of the most useful and helpful tools available on virtually every modern digital camera is the histogram. This tool is especially useful on newer mirrorless cameras because we can see it in real time before we even capture an image.
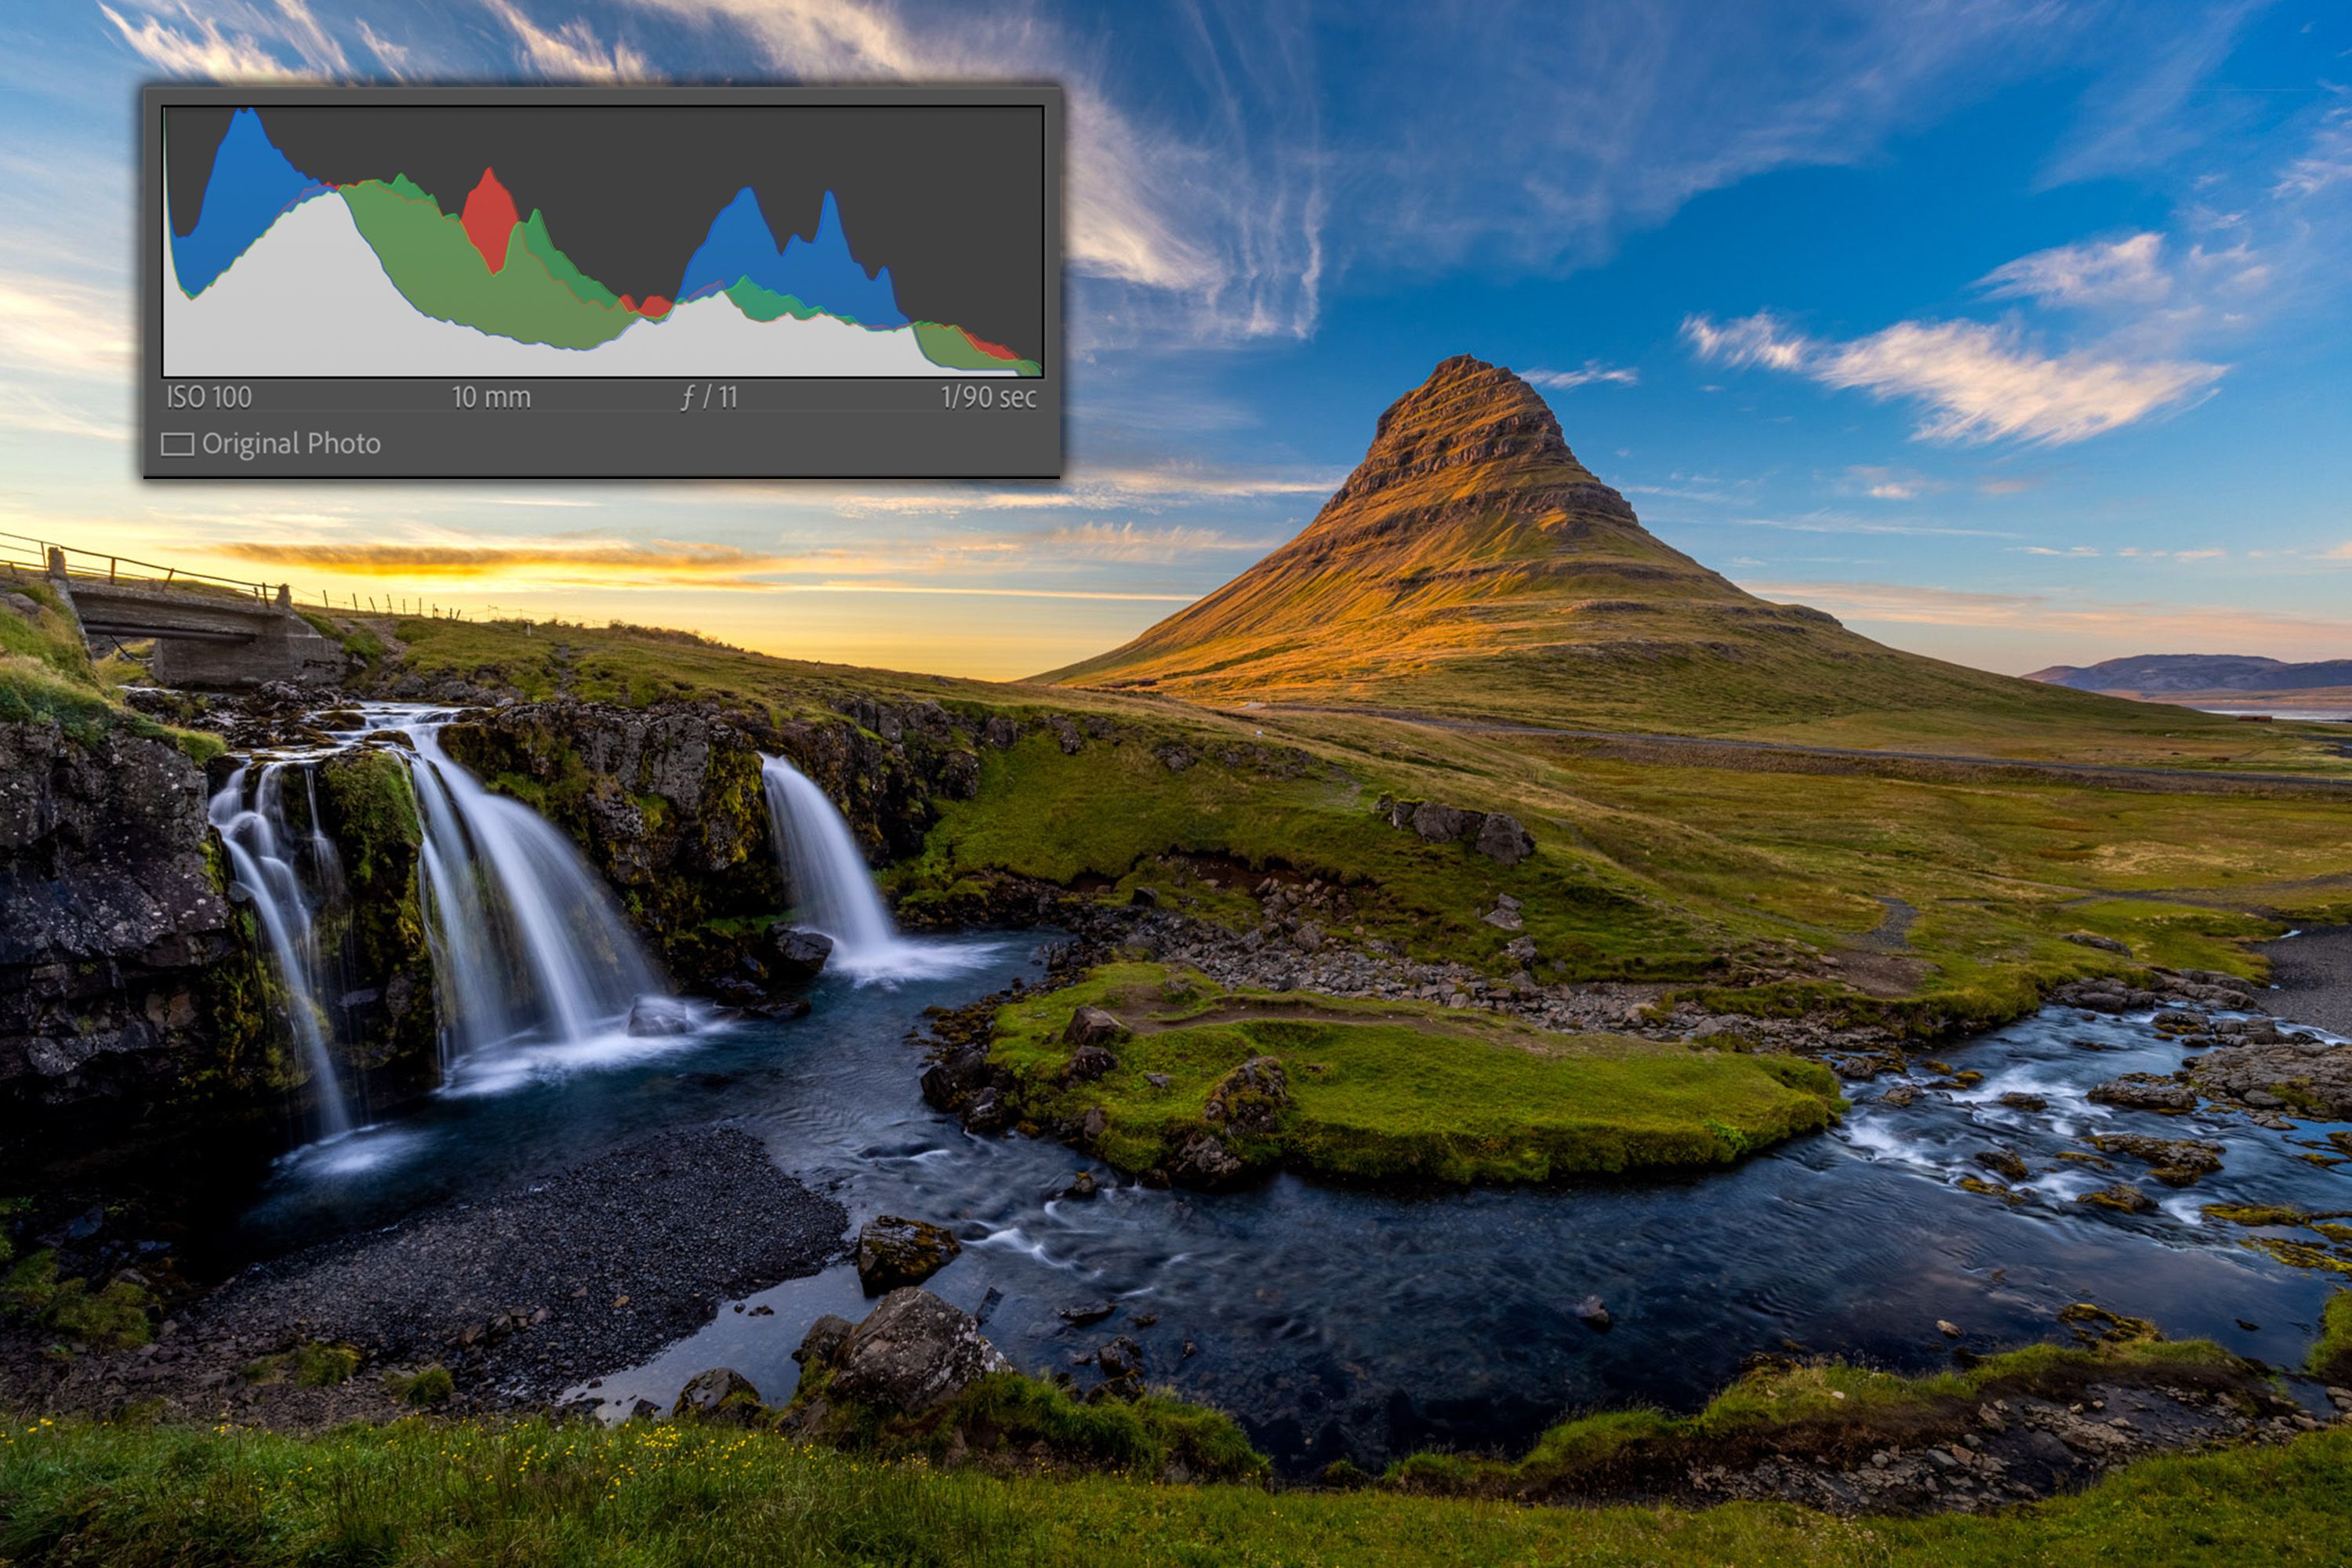
If you're unfamiliar with histograms, think of them as a visual representation of all the light your camera is capturing from the darkest shadows up to the brightest highlights. Fundamentally it is a graph or visual display showing the brightness levels contained within your photograph. The left side of the histogram represents the darkest tones, or blacks and shadows, while the right side represents the brightest tones, or highlights and whites. Everything between those two extremes represents the various mid-tones in your photograph.
The histogram gives you a visual representation of where the tonal information in your image is concentrated. For example, a predominantly bright image will have a histogram that is shifted to the right, while a mostly dark image will have a left-leaning histogram. Bottom line, this is an incredibly useful, helpful, and powerful tool that every photographer should understand and utilize.
Case and point, to show how much I love the histogram and how much I use it, I have two common phrases that you’ve likely heard if you’ve been on a trip with me:
"The histogram is your best friend." And “The histogram doesn't lie."
Your camera's LCD screen can be deceiving. In bright sunlight, it can be difficult to determine whether an image is properly exposed just by looking at the screen. Or perhaps you’ve manually adjusted the brightness of the screen which can also skew your results leading you to think you’re image is properly exposed when it isn’t. A photograph that appears perfectly exposed on the LCD might actually contain severely clipped highlights or shadows.
Additionally, the exposure meter is a popular tool to gauge whether an image is properly exposed. While the meter is useful and while I do utilize it every now and then, it just doesn’t compare to the histogram. Perhaps on older DSLR cameras this was the way to go but these days, I highly encourage you to rely more on your histogram and less on your meter. If the meter is a one-sentence overview or synopsis, the histogram is an in-depth guide with detailed paragraphs, lots of information, graphics, and more. It gives you so much more useful information than a meter ever could.
At the end of the day, the histogram gives you a much more objective and detailed look at what is happening.
So, just to recap, if an image is underexposed or predominantly dark the histogram will be shifted to the left. If it’s severely underexposed, it will be pressed up against the left edge of the frame or look as though it’s going off the frame entirely. If an image is overexposed or predominantly bright the histogram will be shifted to the right and if it’s severely overexposed or you’re clipping your highlights it will be pressed up against the right edge of the frame.
But what do you do if your histogram is overly stretched in both directions, hitting both the left and right edges of the frame? If your scene has such a large/wide dynamic range that the histogram is touching or extending past both the left and right edges, that's an important warning sign. It means the tonal range of your scene may be exceeding what your camera can capture in a single exposure.
And that's when you know you need to enter the realm of exposure bracketing…
An Overview of Exposure Bracketing – Capturing the Images
What Is Exposure Bracketing?
Quite simply, exposure bracketing is the process of capturing multiple photographs of the same scene at different exposures. It’s a way of expanding your camera’s dynamic range.
Rather than attempting to capture everything in one exposure, you deliberately take several photographs, each optimized for a different portion of the scene.
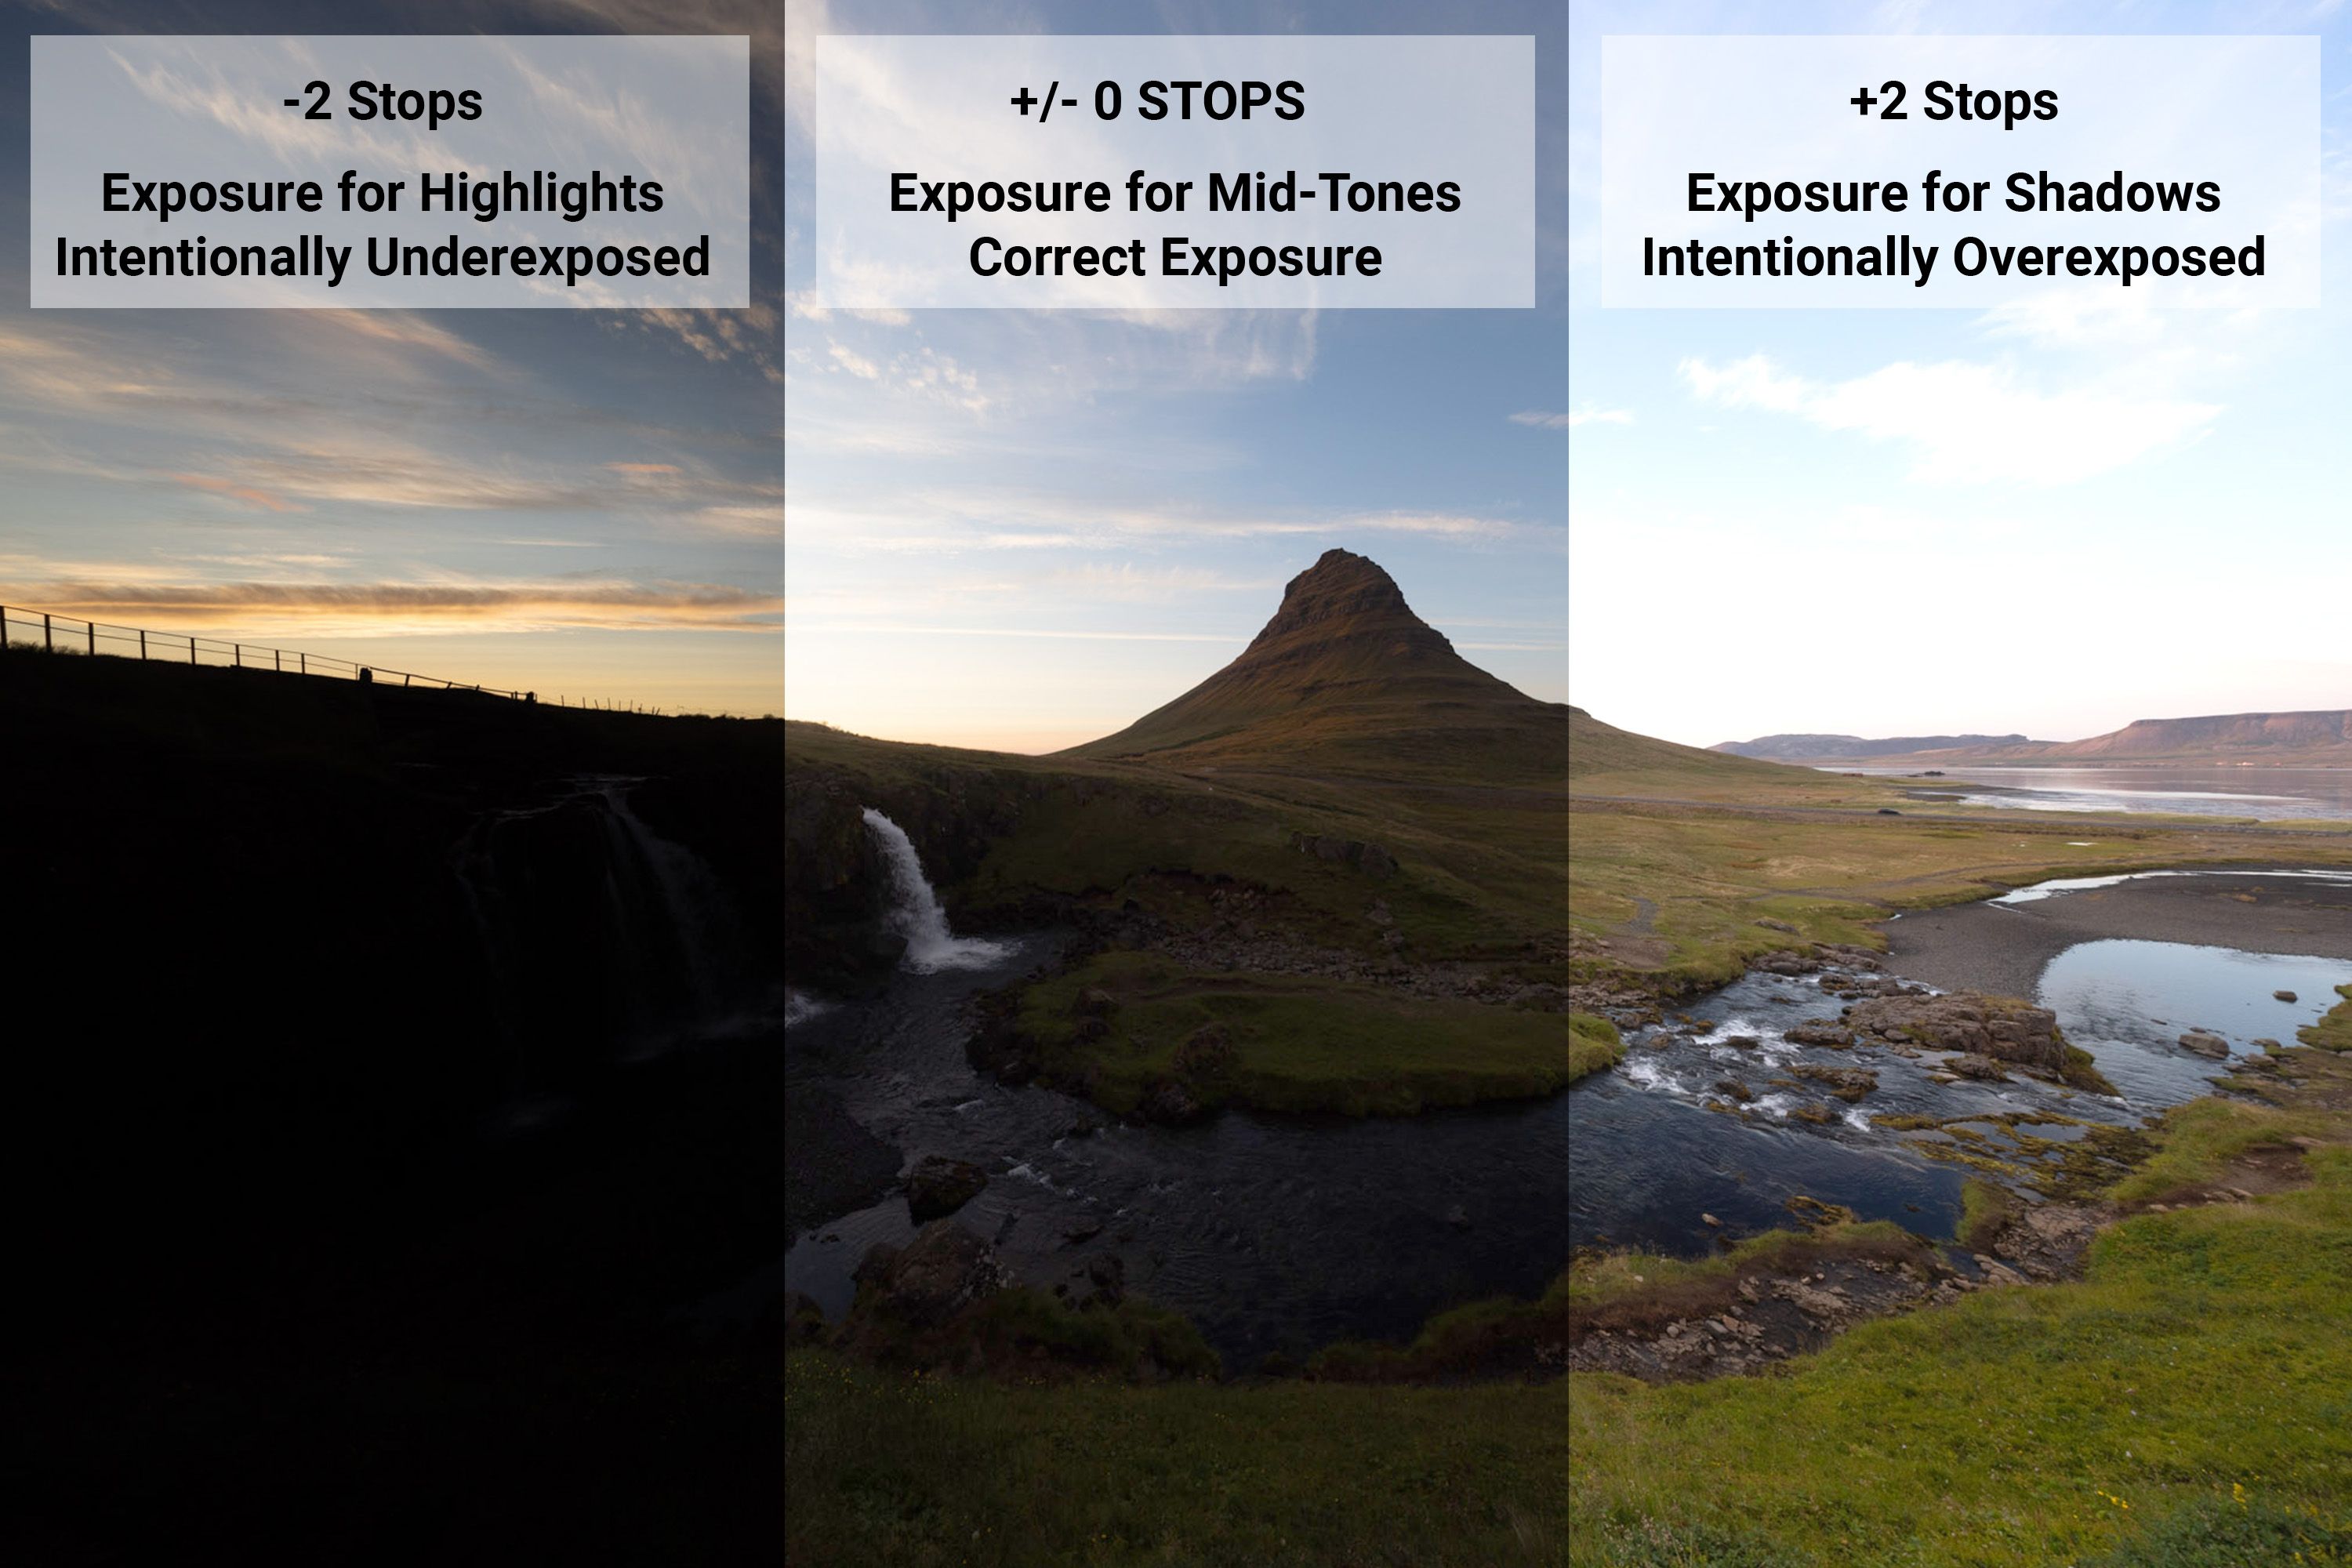
A common approach is to capture three exposures:
One exposure for the highlights
One exposure for the mid-tones
One exposure for the shadows
For scenes with an especially wide dynamic range, photographers may capture five or even seven exposures and they may have larger gaps between each exposure.
The basic idea is simple: instead of trying to force your camera to capture the entire range of light in a single exposure which can sometimes be impossible, you create several exposures that collectively contain all the information you need.
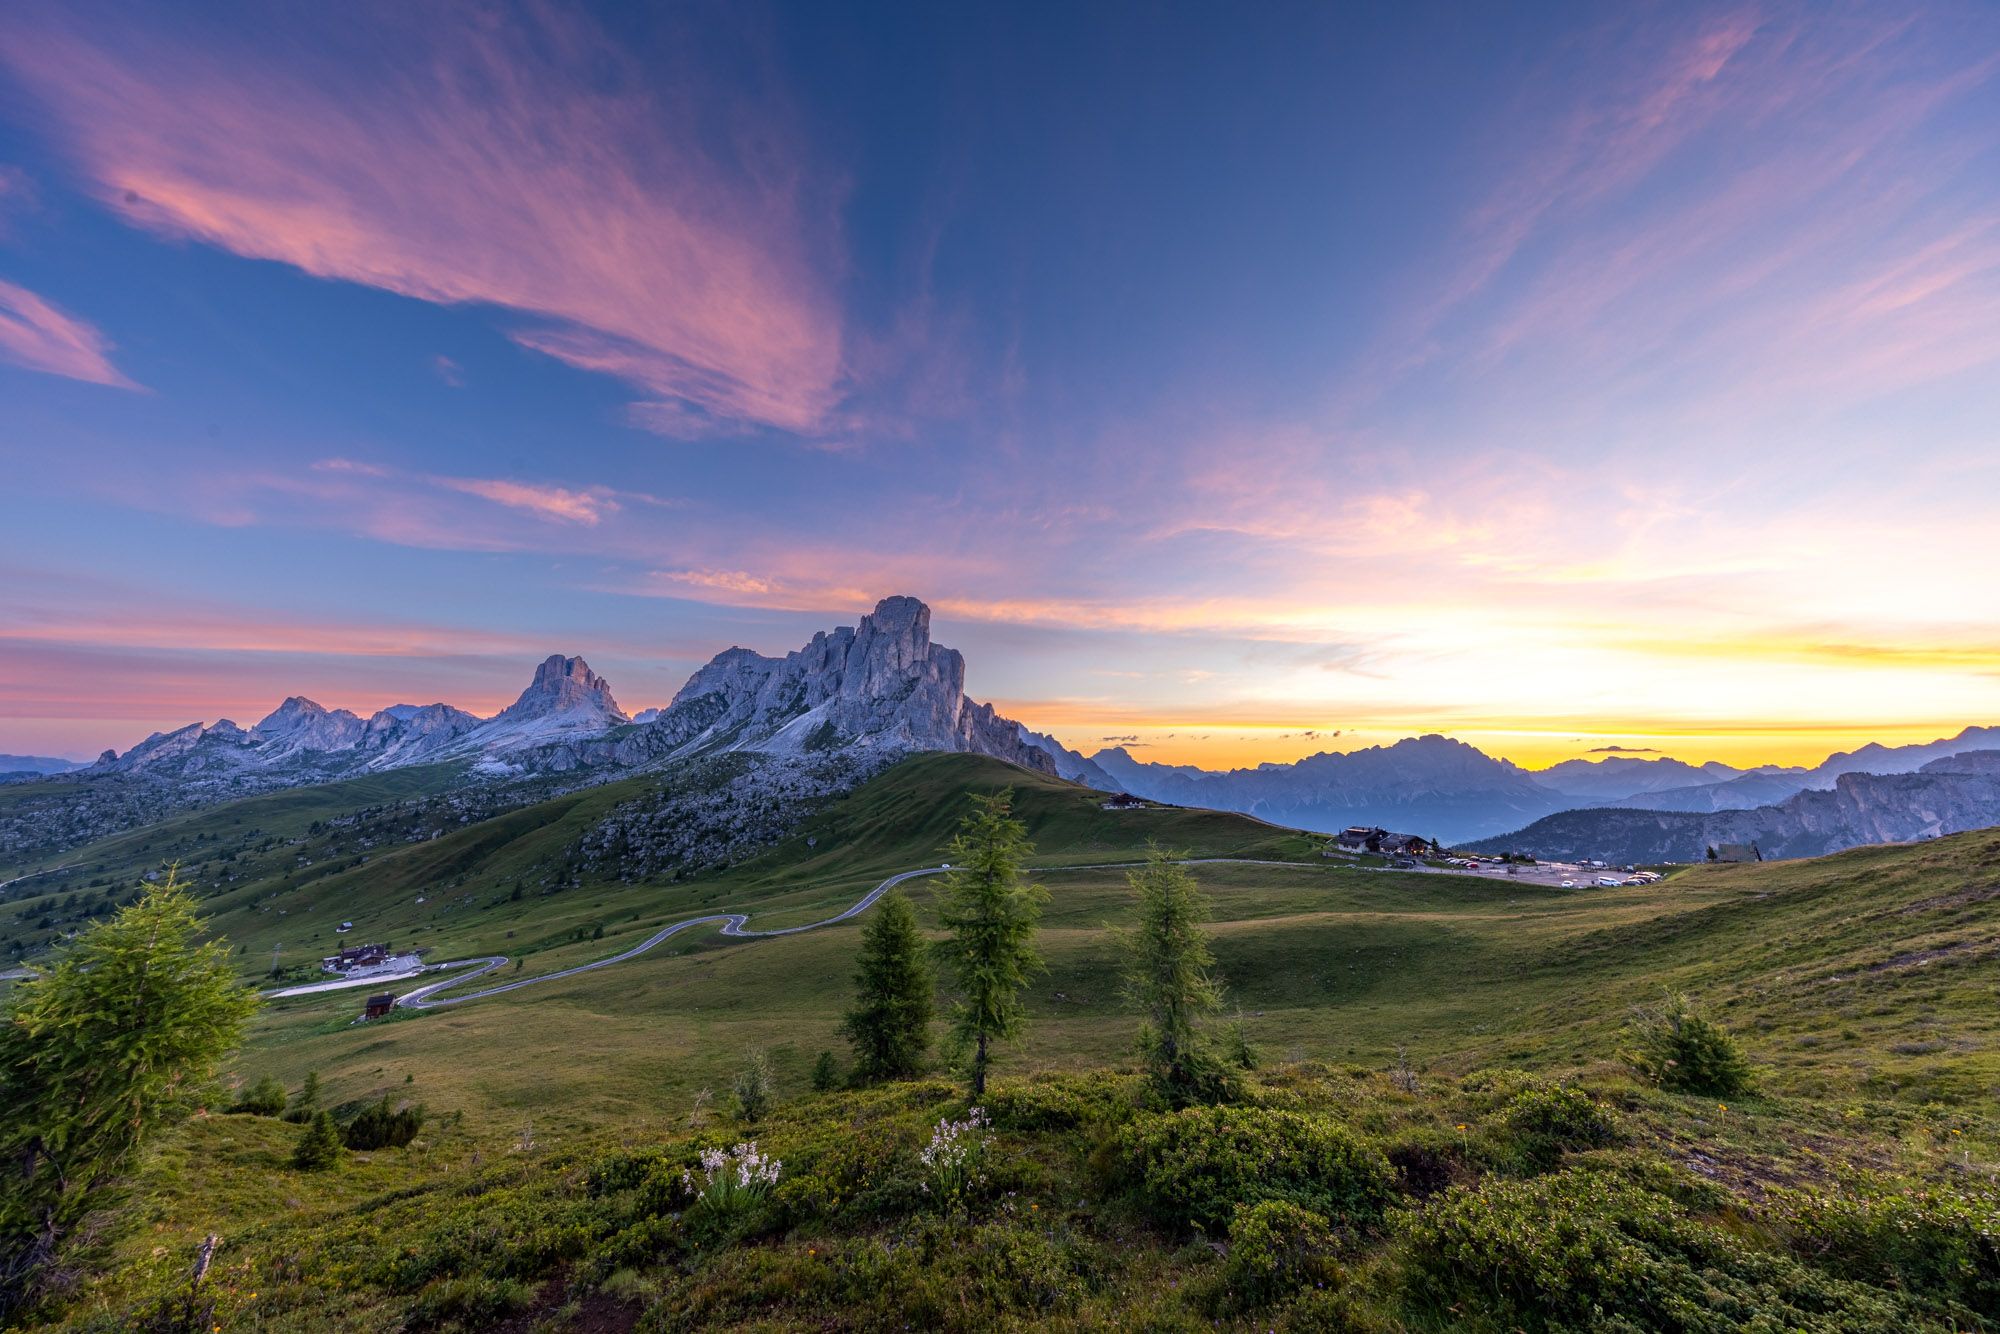
For example, imagine you're photographing a mountain landscape at sunset. Your darkest shadows are found in the foreground, while the brightest highlights are in the sky around the setting sun.
You might capture one darker exposure that preserves all of the detail in the sky. You might capture a second, brighter exposure that records the mid-tones. Finally, you might capture a third exposure that brings out detail in the dark shadows of your foreground.
Each individual photograph may not look perfect on its own but that's okay. The goal is to capture all of the information you need so that the exposures can later be combined into one final image.
And that’s it. That’s really all there is to exposure bracketing.
So, How Do You Actually Bracket?
There are several ways to create bracketed exposures but before we dive into that, I want to talk about the settings you actually change between each bracketed image. When changing your camera’s exposure or the brightness of an image you have three options. You can either change the shutter speed, aperture, or ISO. When it comes to bracketing, the only setting you want to change is shutter speed. While you technically can bracket with ISO and aperture, this is not common practice as it can lead to some undesirable outcomes. So, whenever you’re bracketing I encourage you to only change your shutter speed.
Now, how do you actually do it. Luckily it’s pretty straightforward. Make sure you’re in manual made and make sure you’re camera isn’t set to Auto ISO. Then you just have to capture multiple images at different shutter speeds. Many modern cameras even have an Auto Exposure Bracketing (AEB) function built directly into the camera. You can tell the camera how many exposures you want and how much you want each exposure to differ from the next.
For example, you might configure your camera to capture three images at:
-2 EV
0 EV
+2 EV
The camera then automatically captures one darker exposure, one standard exposure, and one brighter exposure that are each two stops apart from one another.
You can also bracket manually by changing your shutter speed between exposures. This technique can often be simpler when you’re first learning how to bracket and doesn’t require you to navigate through a complex bank of menus and settings.
For example, you could photograph the scene at 1/125 second, then 1/30 second, then 1/8 second. The aperture and ISO remain unchanged while the shutter speed changes, giving you progressively brighter exposures.
Why Should You Use Exposure Bracketing?
The primary reason to use exposure bracketing is simple: It allows you to capture more dynamic range than your camera can capture in a single exposure.
By capturing separate exposures for the shadows, mid-tones, and highlights, you're collecting more light and tonal information than you could in one frame.
This is especially valuable when you encounter a scene where properly exposing one portion of the image causes another portion to become either completely black or completely white.
Bracketing helps prevent this.
Instead of allowing the brightest highlights to become clipped, you can capture a darker exposure specifically designed to preserve highlight detail. Instead of allowing the darkest shadows to become completely black, you can capture a brighter exposure that retains information in those areas.
You are essentially giving yourself more information to work with during post-processing.
This is an important distinction: exposure bracketing doesn't magically increase the dynamic range of your camera sensor. Instead, you are using multiple exposures to collect information across a broader range of brightness levels than the sensor could capture in one exposure.
That distinction becomes important when we get to HDR Images in just a bit.
When Should You Use Exposure Bracketing?
So, when should you actually bracket?
The simple answer is: Whenever the scene contains more dynamic range than your camera can capture in a single exposure.
You don't need to bracket every photograph. In fact, doing so would unnecessarily complicate your workflow and create additional files that you don't need. Instead, learn to recognize situations where bracketing can help.
Again, your histogram is the best tool for making this decision.
If you're looking at the histogram and the tonal information is comfortably contained within the left and right sides of the graph, you will be able to capture the scene perfectly in a single exposure.
If your histogram is touching both the far left and far right sides of the graph meaning the scene is beyond your camera’s native dynamic range, you now know that you need to bracket if you want to preserve all the information and details of the scene.
Quite simply, the histogram will let you know if you need to bracket or not.
Common Situations Where You May Need to Bracket
Sunrises and Sunsets
Sunrises and sunsets are perhaps the most classic examples of when exposure bracketing can be useful. The sky can become incredibly bright while the landscape below remains relatively dark. This is particularly noticeable when the sun is still above the horizon or when you're photographing toward a bright portion of the sky.
Slot Canyons
Slot canyons can create an enormous range between light and shadow. You may have brilliant sunlight illuminating the canyon walls while other areas remain extremely dark. The contrast can easily exceed the dynamic range of your camera.This is another situation where capturing multiple exposures can help you preserve detail throughout the scene.
Bright, Sunny Days
Bright midday sunlight can create harsh contrasts between direct sunlight and deep shadows. Bracketing can help you make the most of those situations.
Snow-Covered Landscapes
Snow is incredibly bright and reflective, while areas underneath trees, rocks, or other objects can remain quite dark. This creates another situation where your camera may struggle to capture the entire range of tones in one exposure. Bracketing can help preserve the texture and detail of the brightest snow while also maintaining information in the darker portions of the landscape.
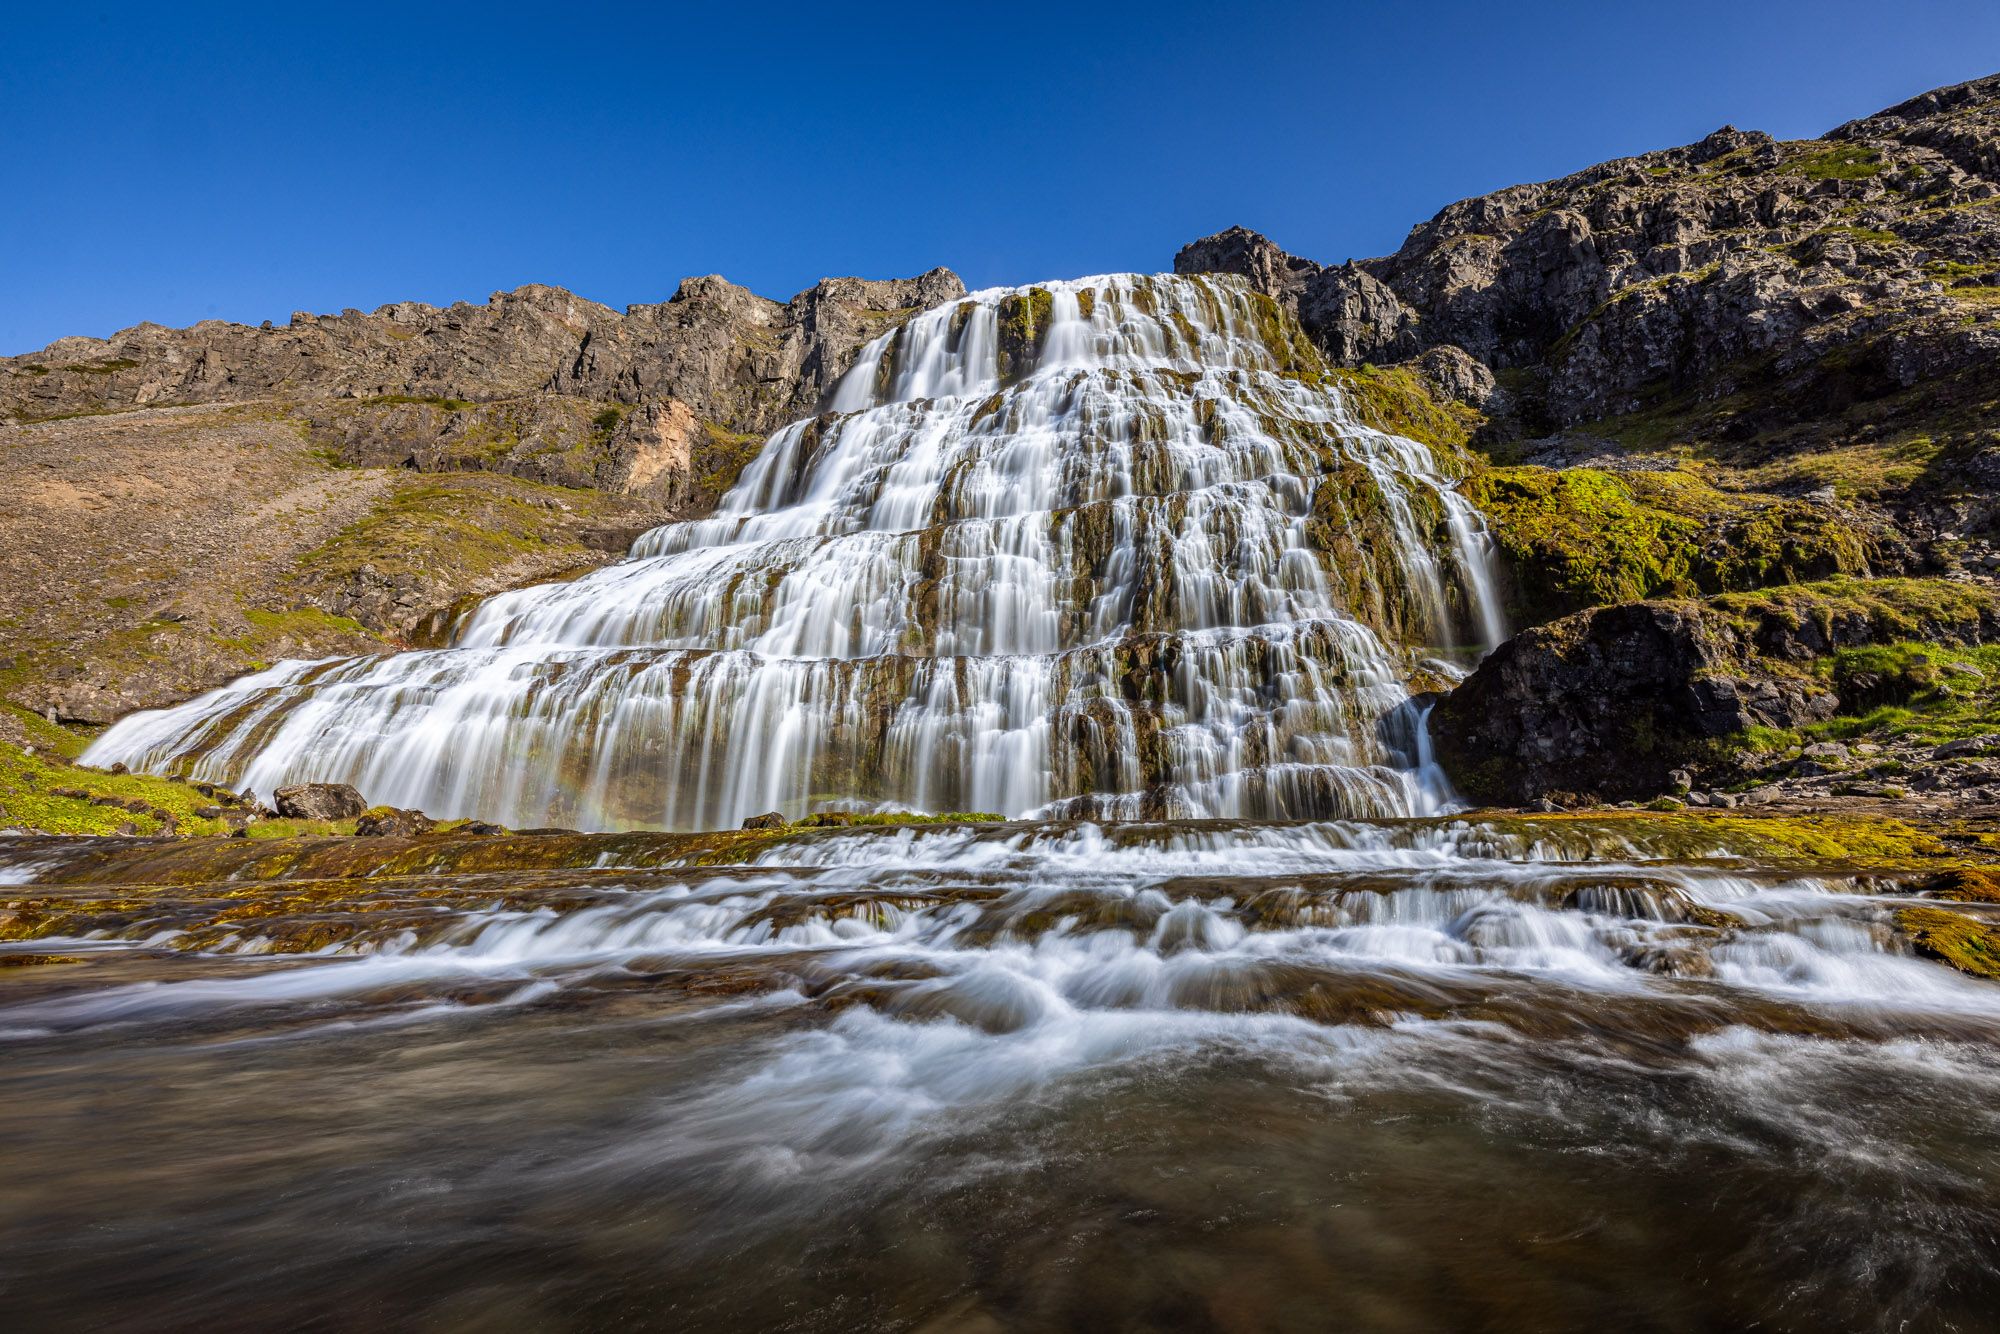
Waterfalls and Streams
White water can become surprisingly bright, especially when illuminated by direct sunlight. At the same time, other elements surrounding the water may fall into deep shadow. If your histogram shows that you're losing information at either end of the tonal range, bracketing can be a useful solution.
Any High-Contrast Landscapes
Ultimately, there are countless situations where you might benefit from exposure bracketing. The important thing isn't memorizing a list of scenarios. It's learning to recognize high dynamic range scenes. Look at your histogram. Examine your highlights and shadows. Ask yourself whether you can properly expose both ends of the scene in one frame. If the answer is no, bracketing is worth considering.
An Overview of HDR Images – Combining Your Bracketed Shots
Now that you've captured your bracketed exposures, what's next? How do take multiple images at different exposures and transform them into one usable file?
This is where HDR, or High Dynamic Range, comes into play.
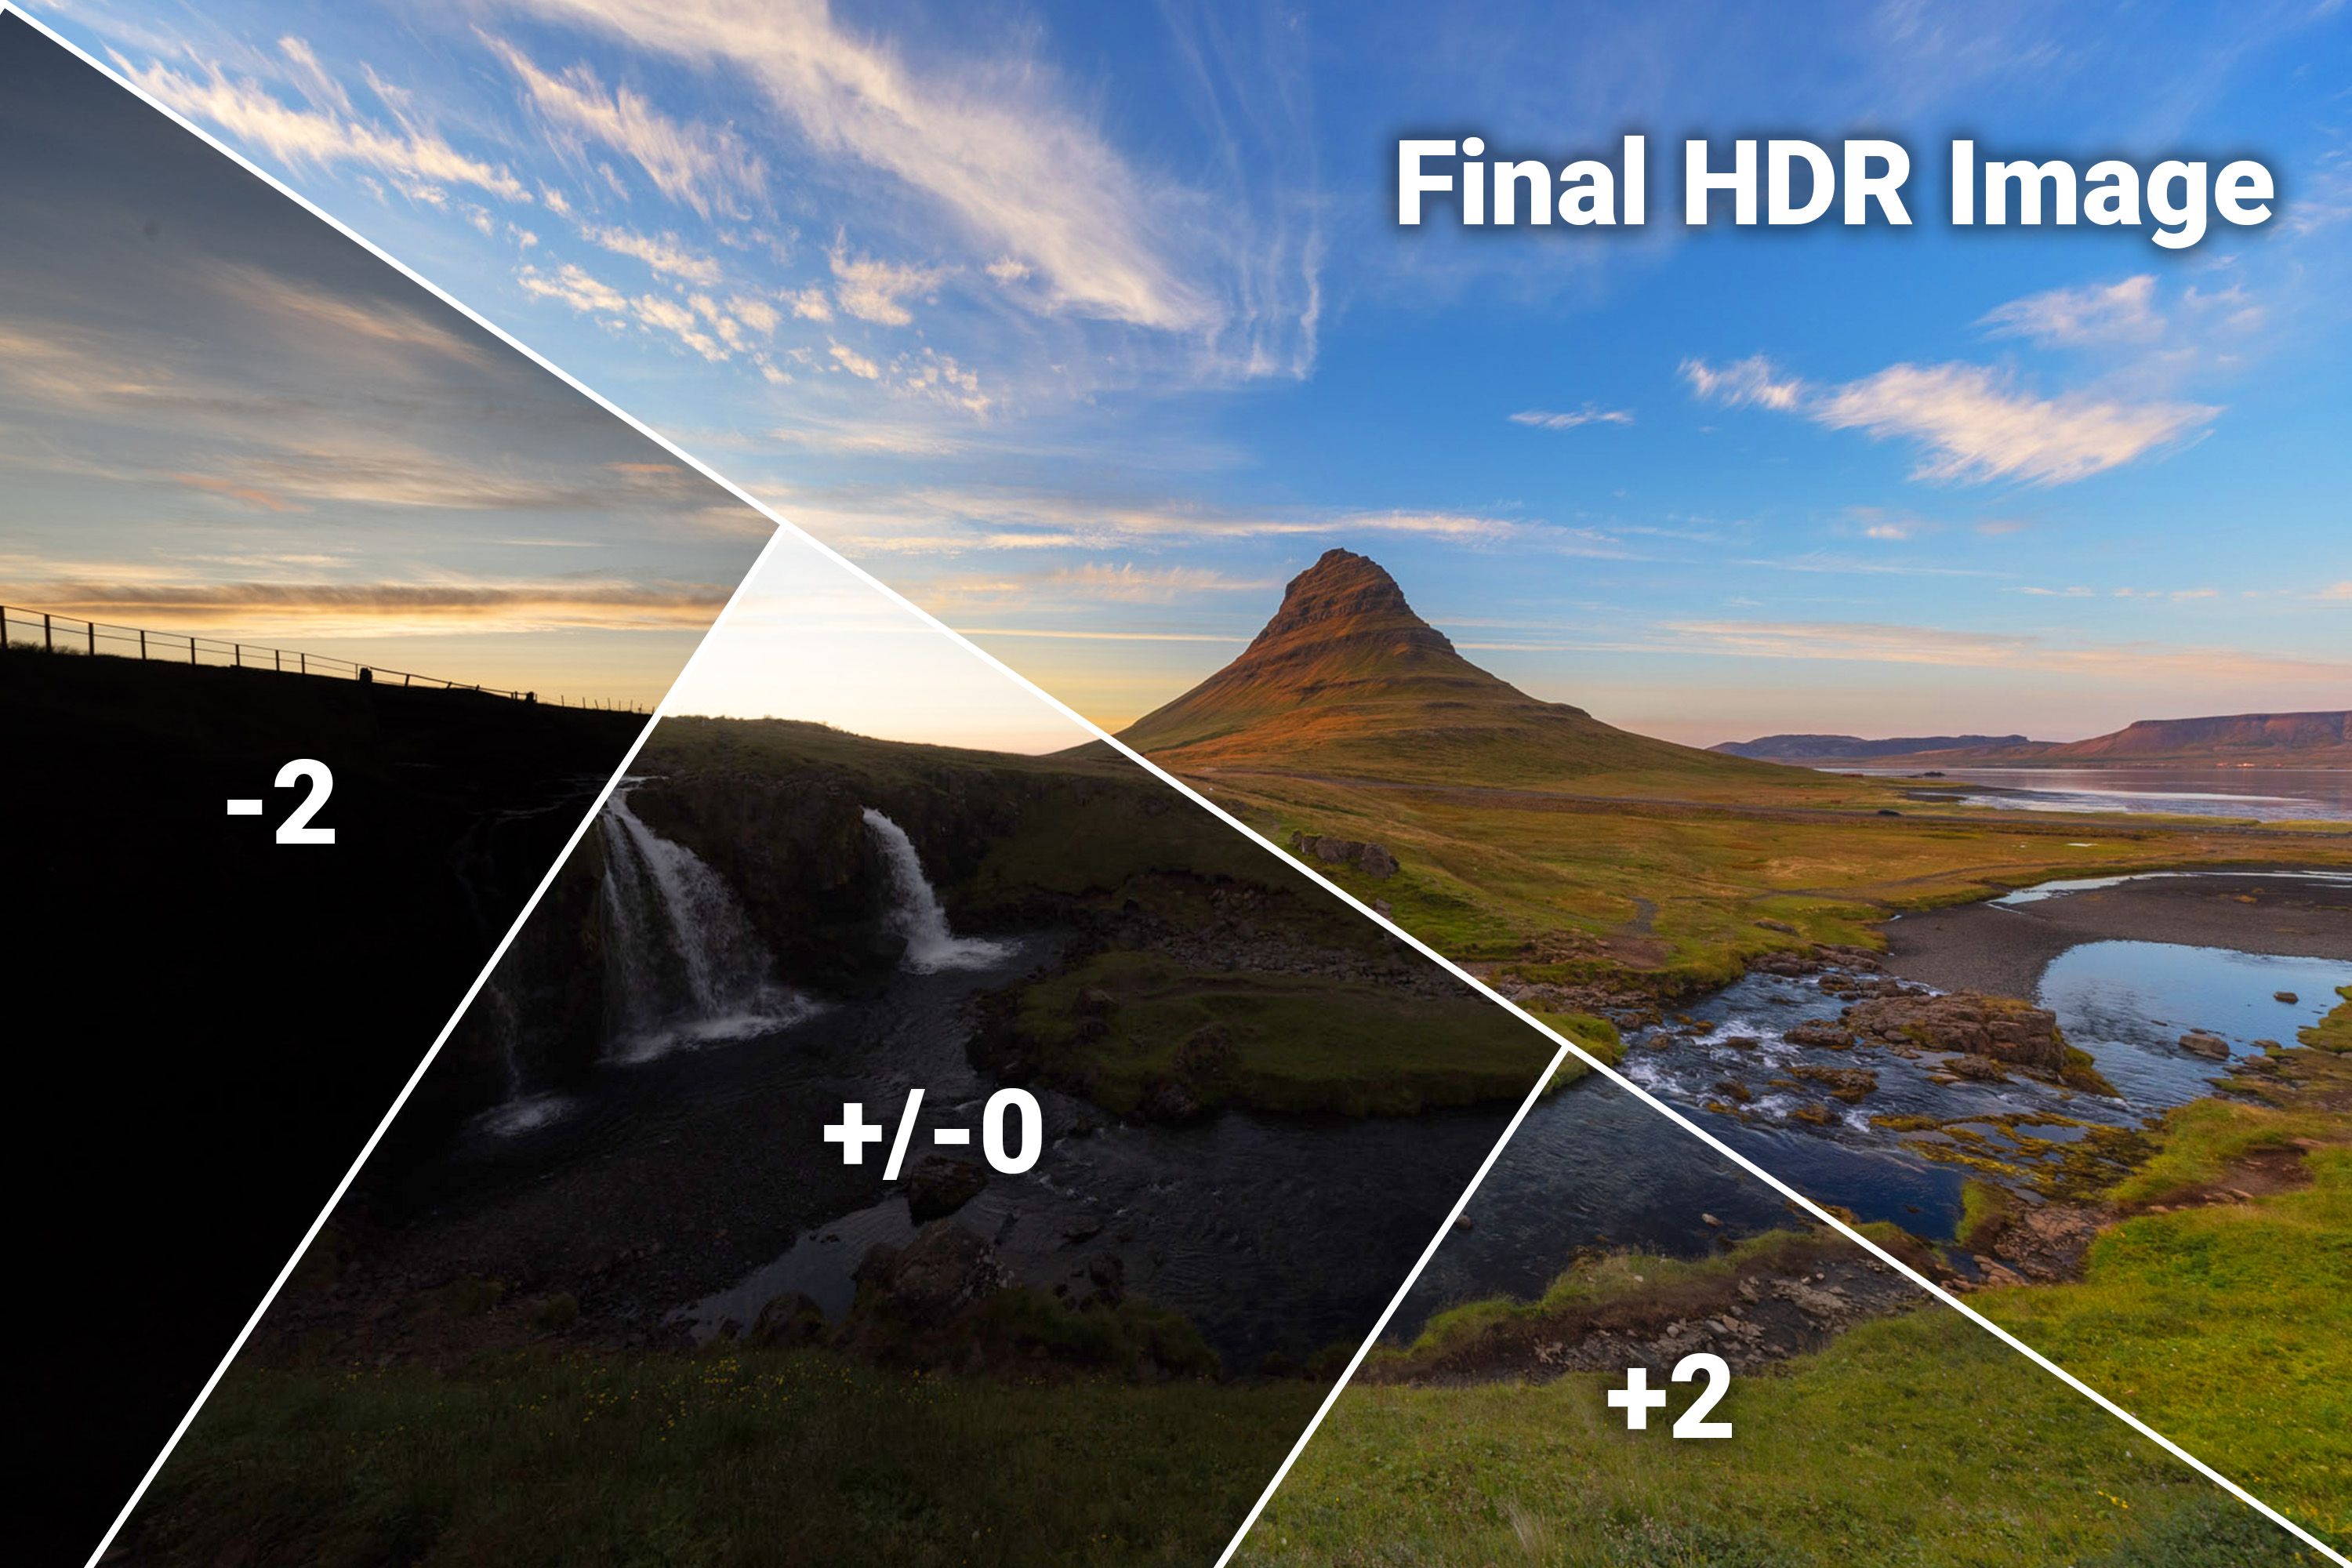
HDR is the process of combining multiple exposures of the same scene into a single image containing a broader range of tonal information. An image with a higher or greater dynamic range.
So, for example, you’ve captured the following three photographs:
A dark exposure: Primarily preserves the brightest highlights.
A middle exposure: Captures the majority of the scene's mid-tones.
A bright exposure: Recovers detail in the darkest shadows.
When those images are combined, the resulting HDR file contains selective information from all three exposures. The editing software effectively preserves the right information from each exposure creating a much more balanced and usable/workable file.
Another way to visualize this is to think about your histogram. An HDR images is essentially stretching or expanding the width of the histogram so that all of the information fits within and is no longer going beyond the edges of the frame.
With an HDR Image, instead of trying to squeeze an enormous range of brightness into one camera exposure and inevitably losing information, you're combining multiple exposures that collectively cover a much wider range. The result is an image that can retain detail in the shadows, mid-tones, and highlights simultaneously.
Creating HDR Images in Lightroom
The good news is that combining bracketed exposures is incredibly easy with modern photo editing software. Adobe Lightroom, for example, has a built-in HDR merge function that makes the process extremely straightforward.
Once you've imported your bracketed images into Lightroom, simply select the exposures you want to combine, choose Photo > Photo Merge > HDR, and Lightroom will create an HDR image from the selected files.
That's essentially it.
Lightroom analyzes the exposures, aligns them, and combines the available tonal information into a single HDR image. You can then continue editing the resulting file just as you would any other photograph.
This makes HDR an incredibly accessible technique for photographers of all skill levels. You don't need an advanced understanding of Photoshop or complicated masking techniques to begin experimenting with it. It’s pretty straightforward and the software does all the heavy lifting.
And, you can of course, achieve the same results with many other photo editing software applications.
Things to Keep in Mind When Bracketing:
Use a Tripod When Possible
Although modern software does an excellent job of aligning bracketed exposures, a tripod is still highly recommended. A tripod keeps your composition consistent between frames and minimizes movement between exposures. This is particularly important for landscape photography because it gives you the cleanest possible source files for your HDR merge.
A tripod isn't always necessary, however. Modern cameras and editing software can sometimes handle small amounts of movement surprisingly well, particularly when photographing relatively static scenes.
Watch for Movement
The biggest challenge with HDR isn't necessarily the camera. It's movement within the scene. If you're photographing a landscape with trees blowing in the wind, moving water, people, wildlife, or anything else that changes position between exposures, combining multiple images can become more difficult.
Software can compensate for some movement, but it isn't magic. This is one reason why exposure bracketing is particularly effective for relatively static landscape scenes. If you're photographing wildlife or other fast-moving subjects, a single properly exposed RAW file is often preferable to a multi-frame HDR sequence.
Shoot RAW
If your camera supports RAW files, you absolutely should shoot RAW. RAW files retain considerably more information than JPEG files and give you much more flexibility when processing your images and bracketing. RAW files also provide substantially more latitude when recovering highlights and shadows during post-processing.
Exposure Bracketing vs. Simply Brightening a RAW File
At this point, you might be wondering: Why not just take one dark exposure and brighten the shadows later? This is a very logical question to ask and in some instances this methodology may work, but in general bracketing is usually better and you will end up with more information to work with.
Modern cameras have become incredibly good at recovering shadow detail from RAW files, so this can sometimes work surprisingly well. However, there are limits. If you brighten extremely dark shadows by several stops, you may introduce excessive noise, color shifts, or other artifacts.
And, if you end up clipping your highlights or shadows when shooting, that information is gone, or rather it was never there to begin with, therefore you simply cannot recover it no matter how much editing you do.
This is where bracketing provides an advantage. Instead of asking one exposure to do everything and stretching the limits of a file, you're giving your camera separate opportunities to capture information throughout the tonal range.
A properly exposed brighter frame will contain significantly cleaner shadow information than a dark frame that you attempt to brighten dramatically later. Likewise, a darker exposure can preserve highlight detail that would otherwise be completely lost.
This gives you more flexibility during post-processing.
That being said, exposure Bracketing Is a Tool, Not a Requirement. It may be an extremely useful tool but it's important not to fall into the trap of thinking you need to bracket every photograph. You don't.
Modern camera sensors have impressive dynamic range, and many scenes can easily be captured in a single exposure. In fact, one of the most important photography skills you can develop is learning to recognize when you do and don't need to bracket.
And this all comes down to reading and understanding your histogram. If your histogram shows that your image comfortably fits within your camera's dynamic range, take the single exposure and move on. If you're photographing a scene with relatively even lighting, bracketing may provide little or no benefit. But when you encounter an extremely contrasty scene, where your histogram is stretched so far that it’s hitting either edge of its frame, exposure bracketing becomes an incredibly valuable tool.
Think of it as another option in your camera settings and photography techniques toolbox. You don't have to use it all the time, you just need to know that it's available and when to use it.
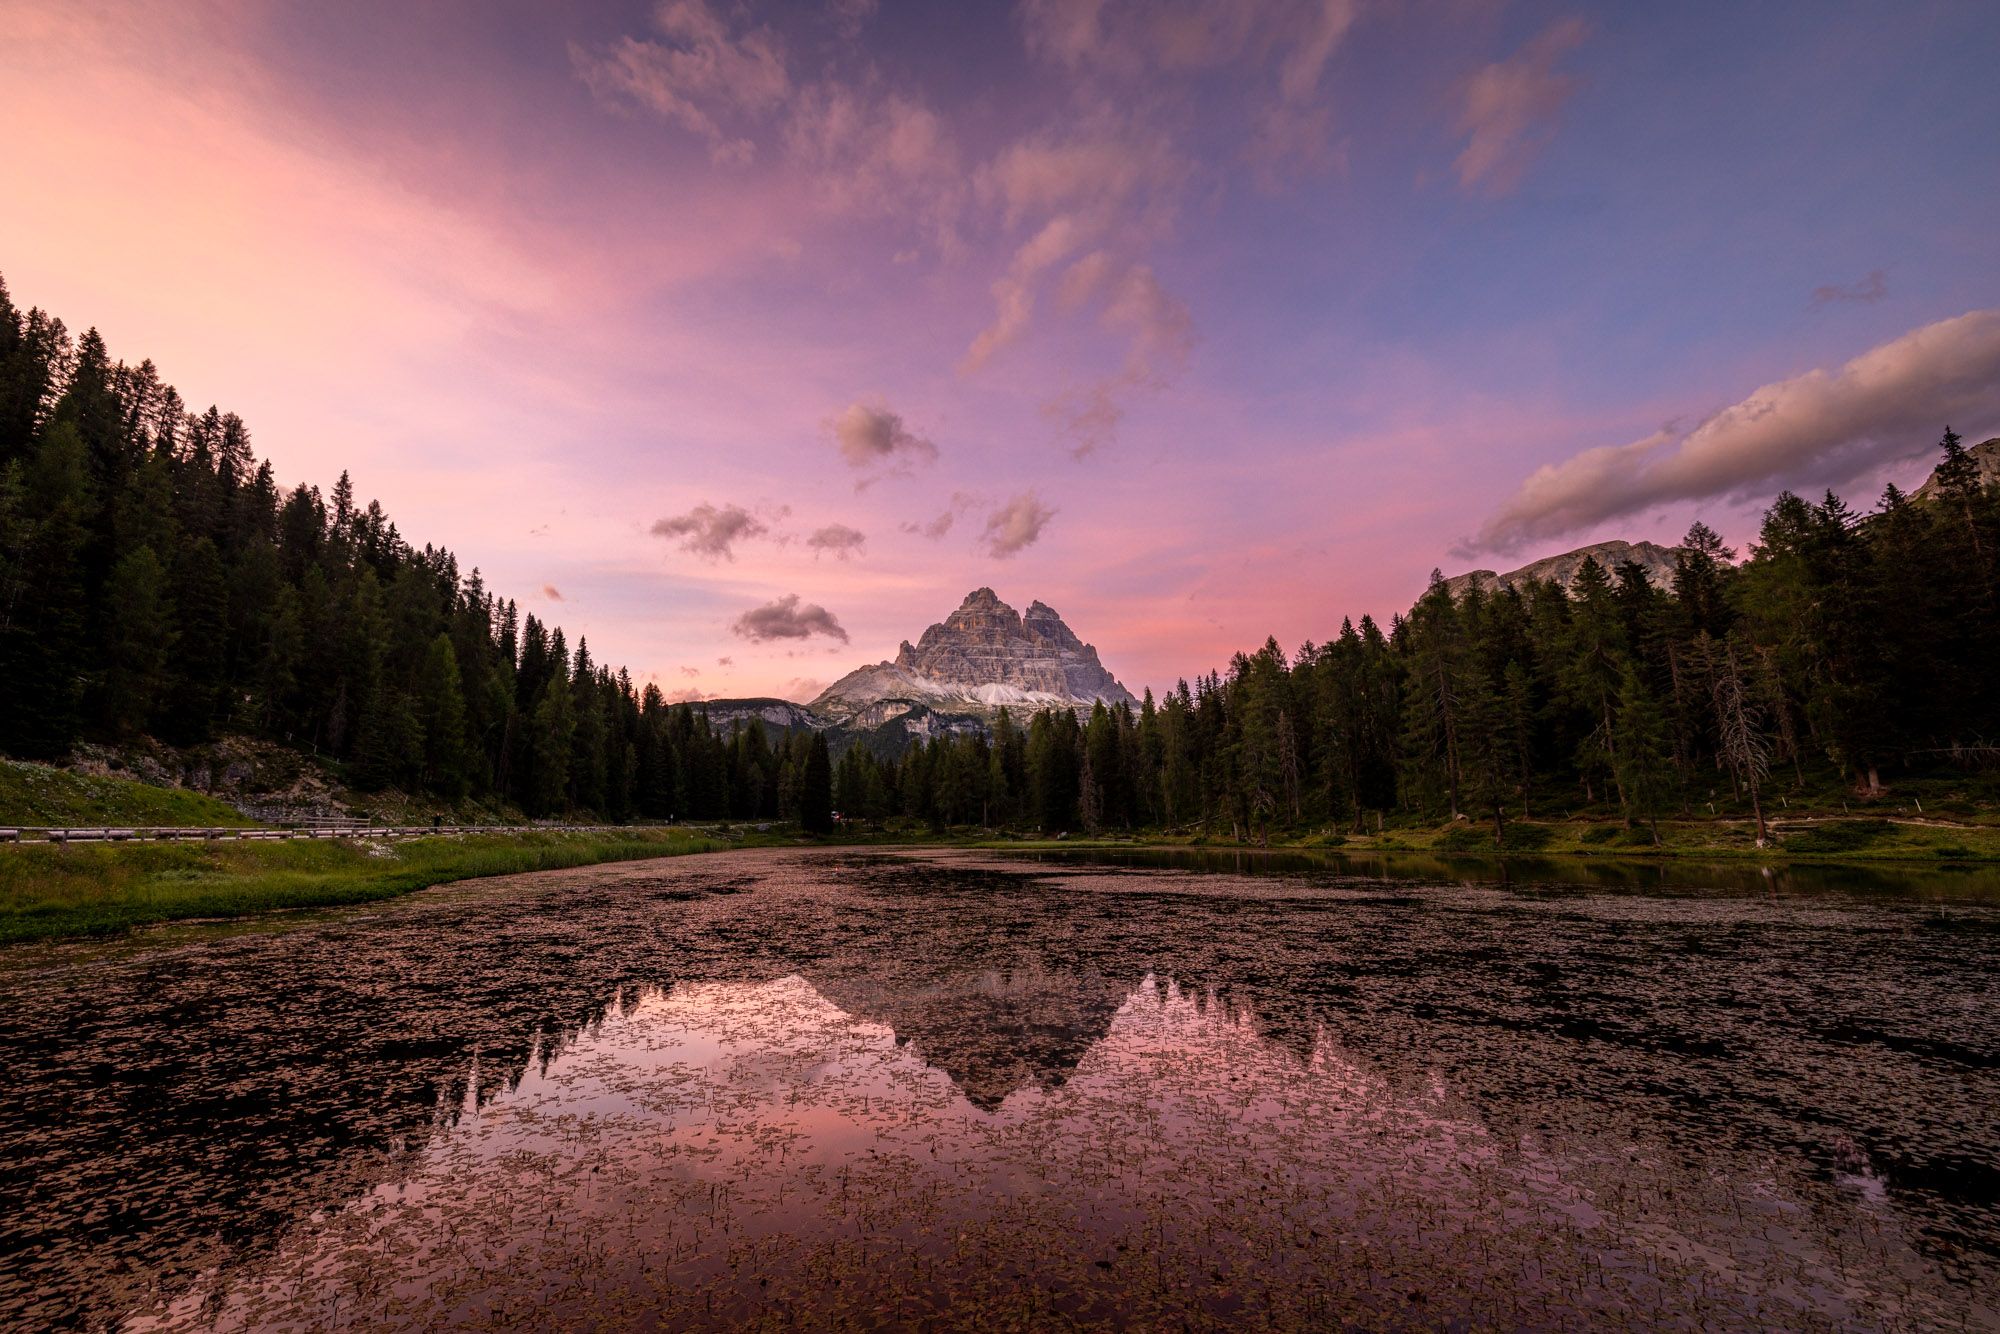
Tying It All Together
Alright, this has been a pretty in-depth and detailed article, so let's quickly review everything we've covered.
Native Dynamic Range is the range of brightness your camera can capture in a single image, from the darkest shadows to the brightest highlights.
The histogram is a visual representation of the tonal information in your photograph. It can help you determine whether you're losing information in the shadows or highlights. The histogram in essence is also a visual representation of your camera’s dynamic range.
Remember: “the histogram is your best friend,” and “the histogram doesn't lie.”
Exposure bracketing is the process of capturing multiple exposures of the same scene at different brightness levels by changing your shutter speed. These exposures allow you to separately capture information in the highlights, mid-tones, and shadows.
HDR or High Dynamic Range is the process of combining those multiple exposures into a single image with a greater usable dynamic range.
And finally, you don't need to bracket every photograph. Use it when the dynamic range of the scene exceeds what your camera can comfortably capture in a single exposure.
The next time you're out shooting, particularly on a landscape photography adventure, pay attention to your histogram. Look at the brightest highlights and darkest shadows in the scene and ask yourself:
Can I capture all of this information in one exposure?
If the answer is yes, take the shot.
If the answer is no, bracket it.
It's really that simple.
Final Thoughts
Exposure bracketing is one of those photography techniques that can dramatically expand your capabilities once you understand how and when to use it. What initially seems like a complicated process is actually a very simple concept: when a scene contains more light and contrast than your camera can capture in one exposure, capture multiple exposures and combine them later. It really is that simple.
The next time you're standing in front of a dramatic sunrise, exploring a shadowy slot canyon, photographing a snow-covered mountain, or standing beside a sunlit waterfall, take a moment to look at your histogram and decide whether or not you should be bracketing.
Don't simply rely on what you see on the back of your camera. Don’t simply rely on your exposure meter. Learn to read the histogram, understand your camera's dynamic range, and recognize when a scene is asking more from your camera than a single exposure can provide.
Like every other photography skill, the key is practice. The more you experiment with exposure bracketing, the more naturally it will become part of your workflow. Before long, you'll be able to look at a scene and immediately recognize when you need one exposure and when you should capture three, five, or even seven.
And that's ultimately what becoming a better photographer is all about: understanding your tools, developing your photography skills, and learning how to make deliberate decisions rather than simply relying on your camera to make them for you.
Thanks for reading, I hope you learned something, and best of luck on your next photography adventure!

We offer world-class travel photography
experiences around the world.
Each tour is bundled with lodging, meals, and transportation between workshops included, allowing you to focus on photography instead of the stress of traveling.
experiences around the world.
Each tour is bundled with lodging, meals, and transportation between workshops included, allowing you to focus on photography instead of the stress of traveling.
Get Our Trip Catalog
Receive a trip catalog that highlights all of our upcoming photo tours and workshops.Schedule a Trip Consultation
Meet with a photo experience coordinator, and experience a personal touch to your booking experience.Landscape Guide
Receive a FREE Landscape Cheat Sheet Written By a Pro Photographer.Webinars
Our regularly hosted webinars provide photography instruction from our own guides on a wide range of topics.Education Portal
Explore our library of articles that cover everything from common questions, to in-depth guides on how to achieve that perfect shot.
Backcountry Journeys
Connecting Passionate People To
Exceptional Experiences.
Exceptional Experiences.
Business Hours:
Mon-Fri, 8AM-4PM MT
928-478-1521
adventure@backcountryjourneys.com
Mon-Fri, 8AM-4PM MT
928-478-1521
adventure@backcountryjourneys.com
arrow_drop_down_circle
Divider Text
All Images & Content Are Property Of Backcountry Journeys Photography Tours, Workshops & Safaris LLC - Copyright 2026


About Us
Receive a Digital Trip Catalog
Find an upcoming photography tour with our interactive catalog.