2025 Travelers' Choice

About Backcountry Journeys
Why Choose Backcountry Journeys
If you're considering a photography trip, hear why Backcountry Journeys delivers the best experience in the industry.Frequently Asked Questions
If you're new to photography trips, or new to BCJ, you can find our common travel questions here.Fitness Levels
Our trips vary on physical intensity, and by reviewing our fitness levels, you can find out which trips may be more challenging, or aligned more closely with your comfort level.Meet The Crew
We've built an amazing team of experienced guides, and dedicated office staff that elevate your travel experience. Get to know their backgrounds, and hear their stories.Loyalty Program
We reward our frequent photo adventurers with exclusive discounts on amazing photography trips.Contact Us
If you need to get in touch with our office staff, or have additional business inquiries, you can find our information here.Refer a Friend
Know someone perfect for one of our tours? Recommend them through this quick form.Stay Up To Date On All Things
Backcountry Journeys
Backcountry Journeys
Our Photography Community
Our Webinars
Our regularly hosted webinars provide photography instruction from our own guides on a wide range of topics.Our Education Portal
Explore our library of articles that cover everything from common questions, to in-depth guides on how to achieve that perfect shot.Community Testimonials
We're proud to foster an amazing group of photo travelers, and here you can find their stories from their past adventures.Resources For Photographers
About Our Company
Resources For Photographers
About Our Company
Beyond the Green Glow: Three Ways to Photograph the Northern Lights
Published November 9, 2026
Photographing the Northern Lights is an experience unlike almost anything else in landscape photography. The aurora can stretch across the horizon, ripple into curtains of green light, or erupt into intricate rays that shift and disappear within minutes. Every display is different, and that unpredictability is part of what makes photographing the aurora so rewarding.
But when the lights finally appear, it is easy to fall into the same routine: point the camera north, capture a series of wide shots, and hope for the best. The result may be a collection of beautiful images that look remarkably similar to one another.
A more intentional approach can turn a single night of aurora photography into an opportunity to build a diverse portfolio. By pursuing three distinct types of images; a detailed study of the aurora, a landscape that establishes a sense of place, and a creative composition that uses reflections or silhouettes, you can explore different ways of interpreting the same display in a myriad of ways!
Each approach presents its own photographic challenges, from freezing the movement of the lights to balancing the exposure between the sky and the landscape. Learning to recognize these opportunities can help you make better decisions in the field and come away with images that tell different stories.

Photograph 1: Capture the Details of the Aurora
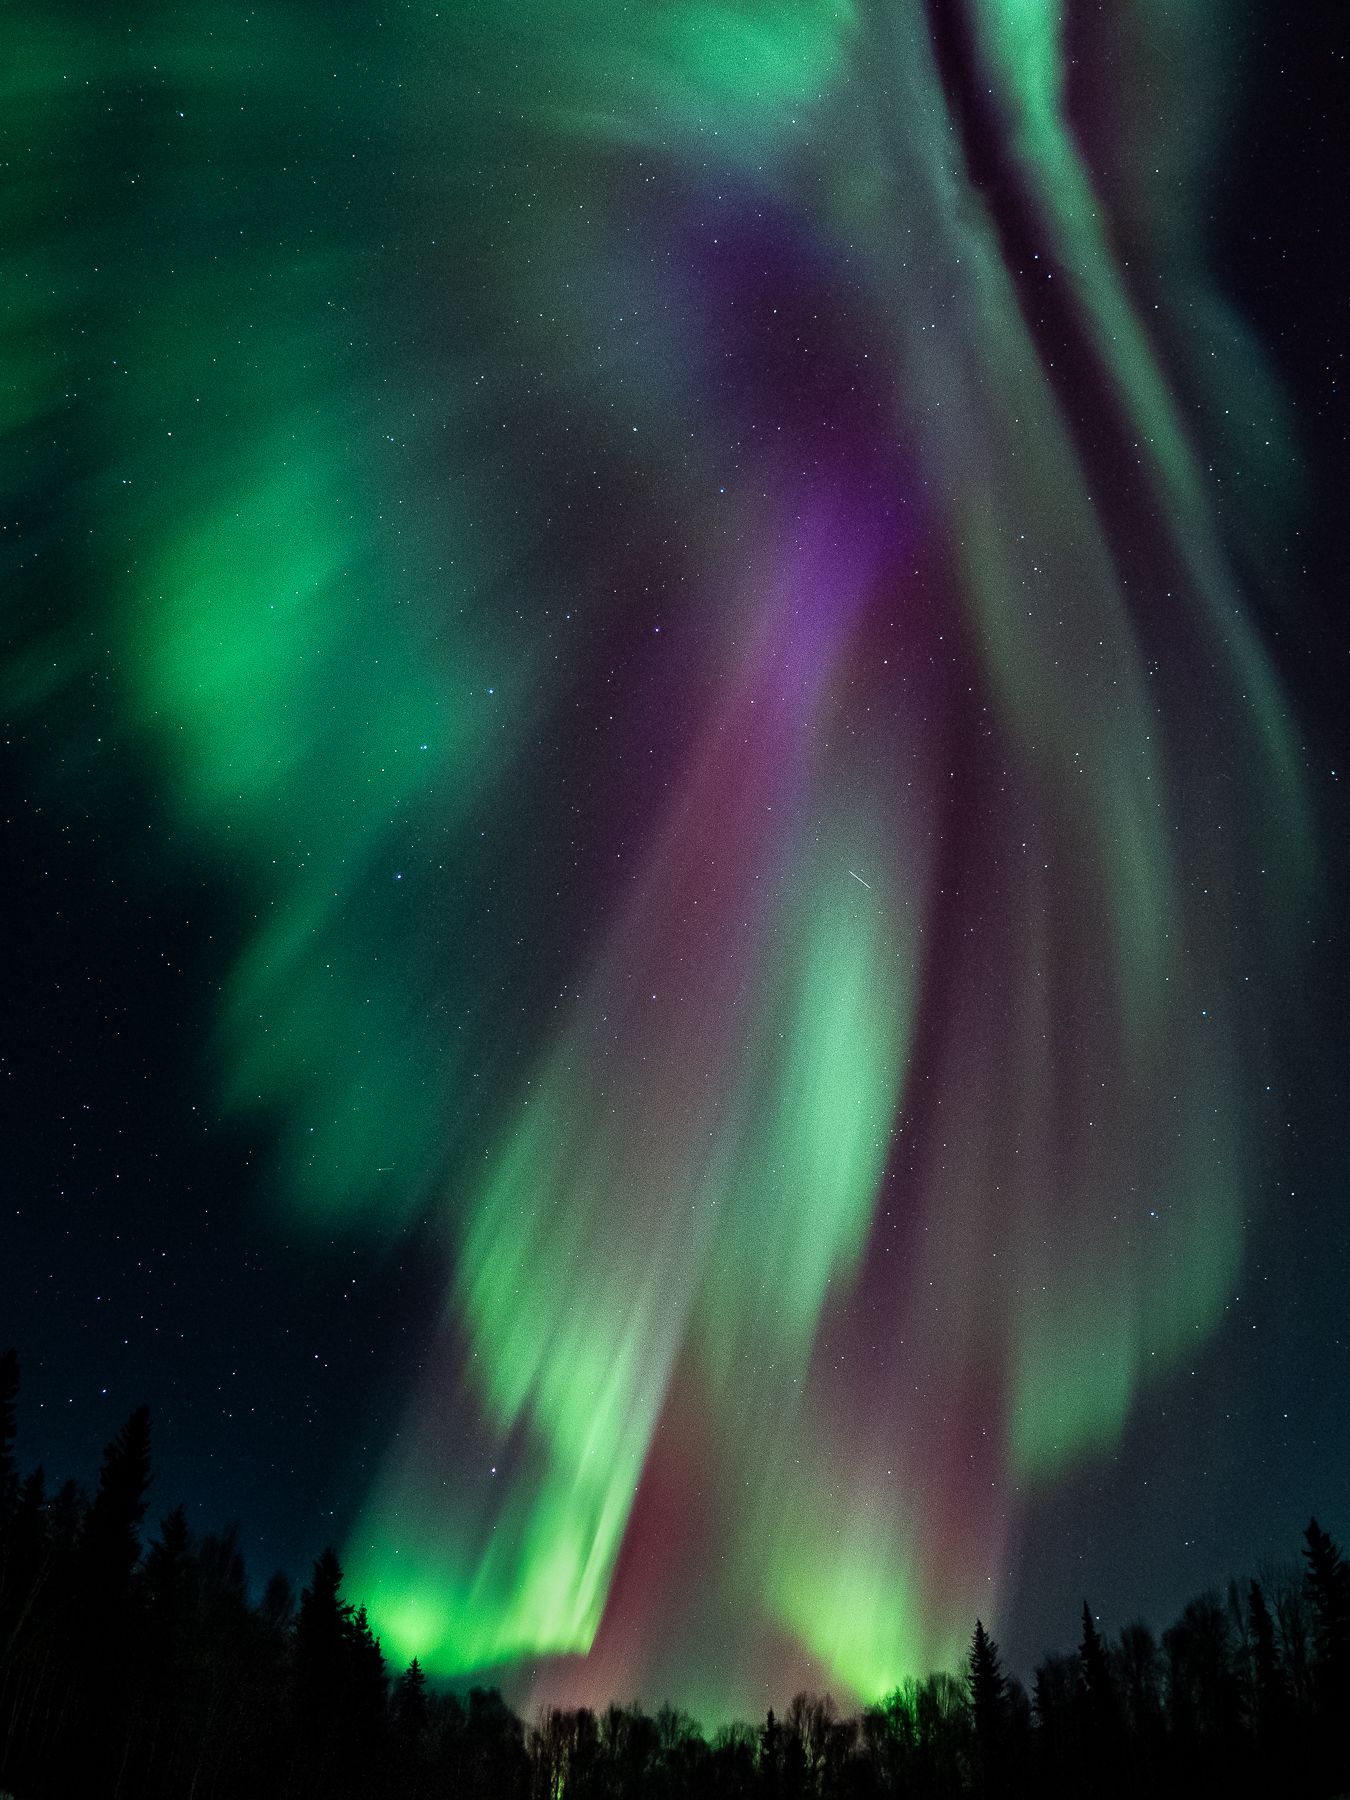
The first approach is to make the aurora itself the primary subject. Rather than trying to capture the entire sky, concentrate on the structure, movement, and color of the lights.
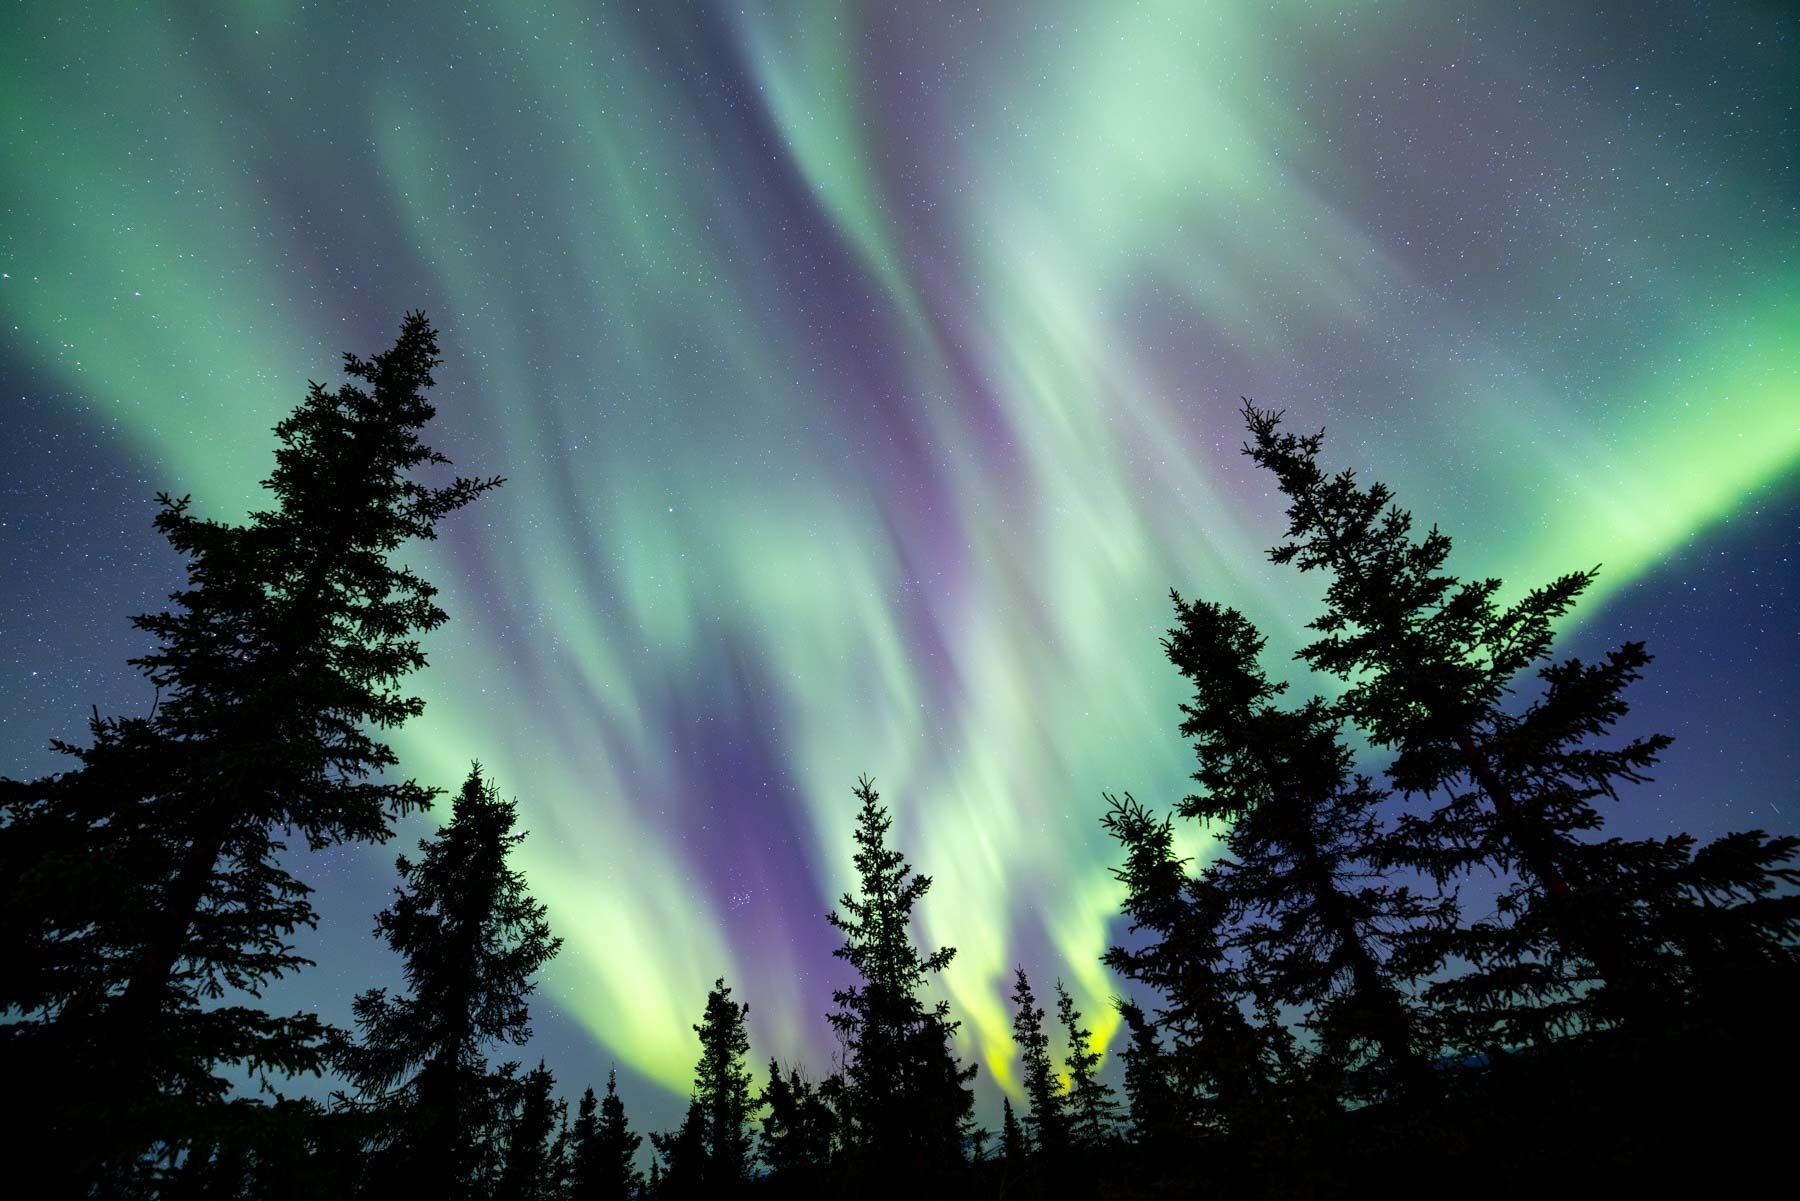
Active auroras can produce intricate patterns, including vertical rays, rippling curtains, and folds of light that appear to move across the sky. These details can be lost when a long exposure blends the movement into a soft, indistinct glow. A tighter composition and a carefully chosen shutter speed can help preserve the structure that makes an individual display unique.
Start by using a wide-angle or standard lens to identify an interesting section of the aurora, then consider switching to a longer focal length if the display has enough detail to support a tighter frame. A 35mm, 50mm, or even longer lens can isolate a particular formation and create a more graphic image. The trade-off is a narrower field of view, which makes it especially important to anticipate how quickly the lights may move.
Exposure settings should respond to the activity in the sky. For a bright, rapidly moving aurora, try starting with a shutter speed of one to four seconds. Use a wide aperture, such as f/1.8 or f/2.8 if your lens allows, and adjust ISO to achieve the necessary exposure. If the lights are moving particularly quickly, shorten the exposure further. If the display is faint and relatively stable, you may be able to use a longer shutter speed to collect more light.
The objective is to retain the definition of the aurora rather than simply produce the brightest possible image. Review your test shots at high magnification. If the rays appear blurred or the structure looks smeared, shorten the exposure and compensate with ISO or aperture where possible.
Focus deserves equal attention. Autofocus can struggle in darkness, so switch to manual focus and use live view to magnify a distant light or star. Check the resulting image to confirm that the details are sharp before continuing.
Composition matters just as much as exposure. Look for a distinctive curve, a fan of rays, or a band of contrasting color that gives the image a clear visual subject. Even if the landscape is mostly absent from the frame, the photograph should have a point of focus rather than simply showing a large area of green.
This type of image is particularly rewarding during periods of strong auroral activity, when the lights develop visible structure and movement. It also provides an opportunity to practice making quick exposure adjustments as conditions change.
Photograph 2: Put the Aurora in Its Landscape
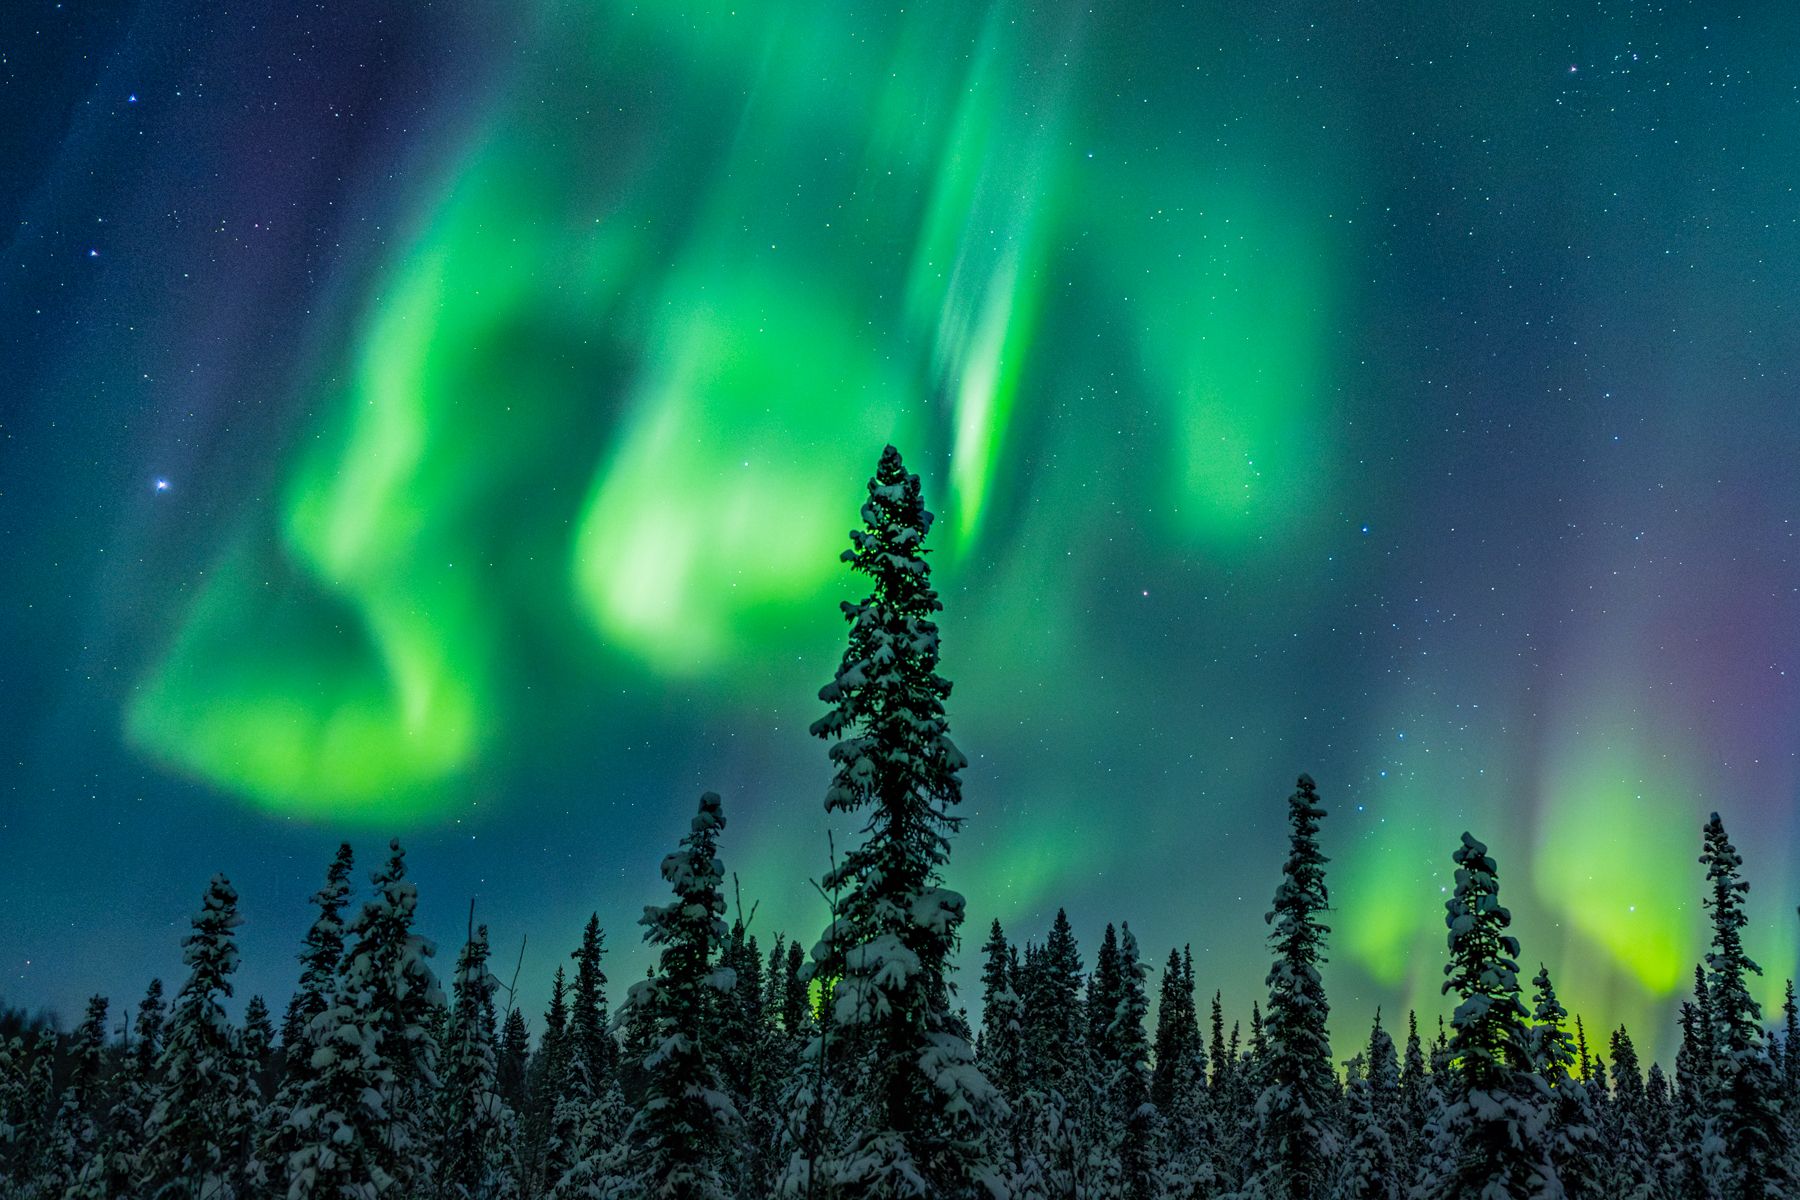
The second approach is to step back and show the aurora in relation to the landscape beneath it. Rather than treating the sky as the entire subject, use the surrounding environment to establish scale, depth, and a stronger sense of place.
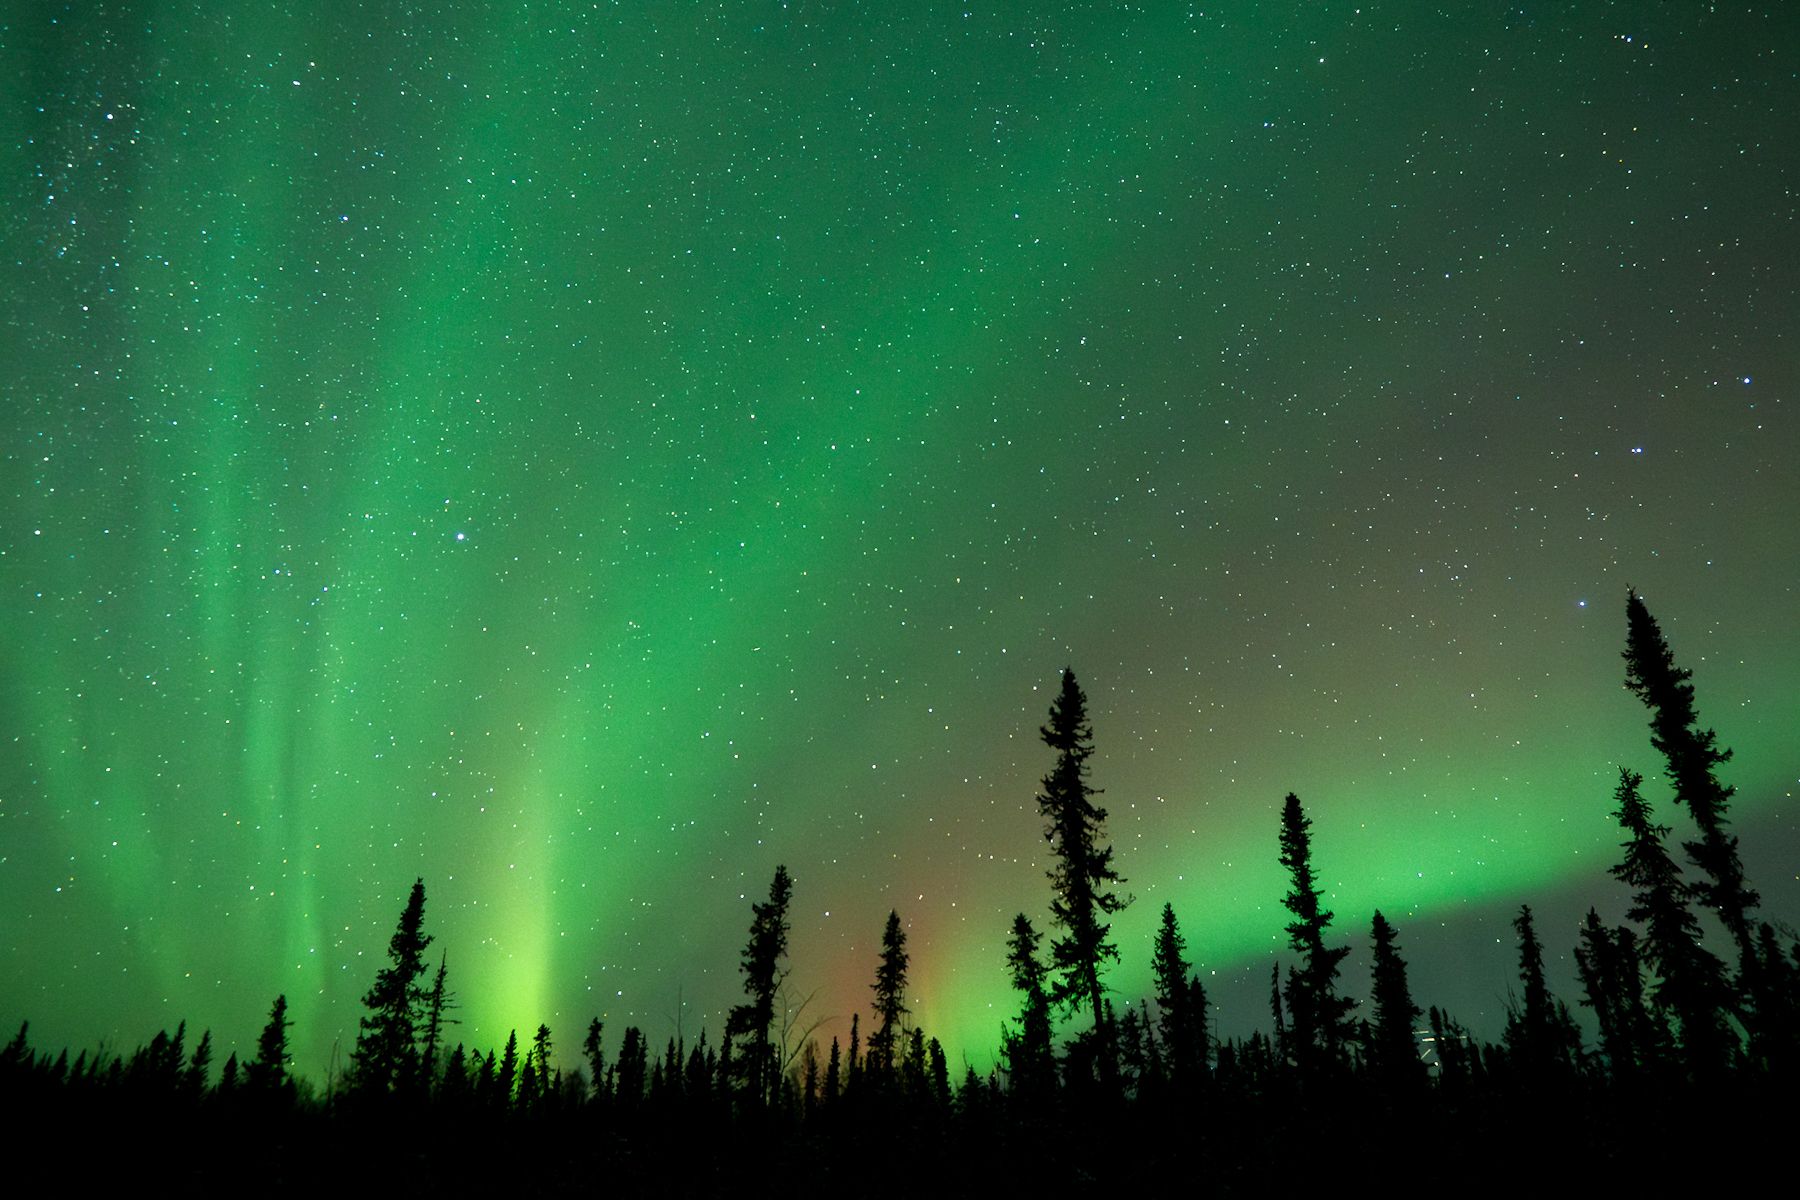
Alaska offers a variety of potential foregrounds for this type of photograph. A frozen lake can create a broad, uncluttered foreground, while a line of spruce trees can provide a dark silhouette against the lights. A distant mountain ridge or an isolated cabin can give the viewer a reference point and help communicate the scale of the scene.
The challenge is deciding how much of the landscape to include. Too little, and the image may feel disconnected from its location. Too much dark foreground, and the aurora can become a relatively small feature in an otherwise empty frame.
A wide-angle lens is a useful starting point. On a full-frame camera, a focal length between 14mm and 24mm can capture a broad section of the sky while including enough of the foreground to establish context. Before settling on a composition, check the edges of the frame for distracting branches, bright lights, or awkwardly cropped features.
Consider where the horizon belongs, too. Placing it near the lower third of the frame can emphasize the aurora when the display is particularly dramatic. If the foreground has compelling detail or the sky is relatively quiet, giving more space to the landscape may create a better balance.
Exposure becomes more complicated when the foreground is significantly darker than the aurora. Begin with a shutter speed that preserves the structure of the lights, then adjust aperture and ISO to capture the scene. For many photographers, an exposure of roughly two to eight seconds can be a useful starting point for a moderately active display, although brighter or faster-moving auroras may require much shorter exposures.
If the foreground becomes a silhouette, consider whether that strengthens the image. A dark tree line can provide a clean visual boundary and prevent the sky from feeling disconnected from the earth. If you want more foreground detail, look for available ambient light, moonlight, or reflections that reveal texture without overpowering the aurora.
The key is to make the landscape an intentional part of the photograph. Before darkness arrives, scout your surroundings and identify a few compositions that might work. Once the aurora appears, you can concentrate on adjusting exposure and responding to the changing sky instead of trying to find a foreground from scratch.
Photograph 3: Experiment With Reflections, Silhouettes, and Negative Space
The third approach is to move beyond a straightforward landscape composition and look for a more creative interpretation of the aurora.
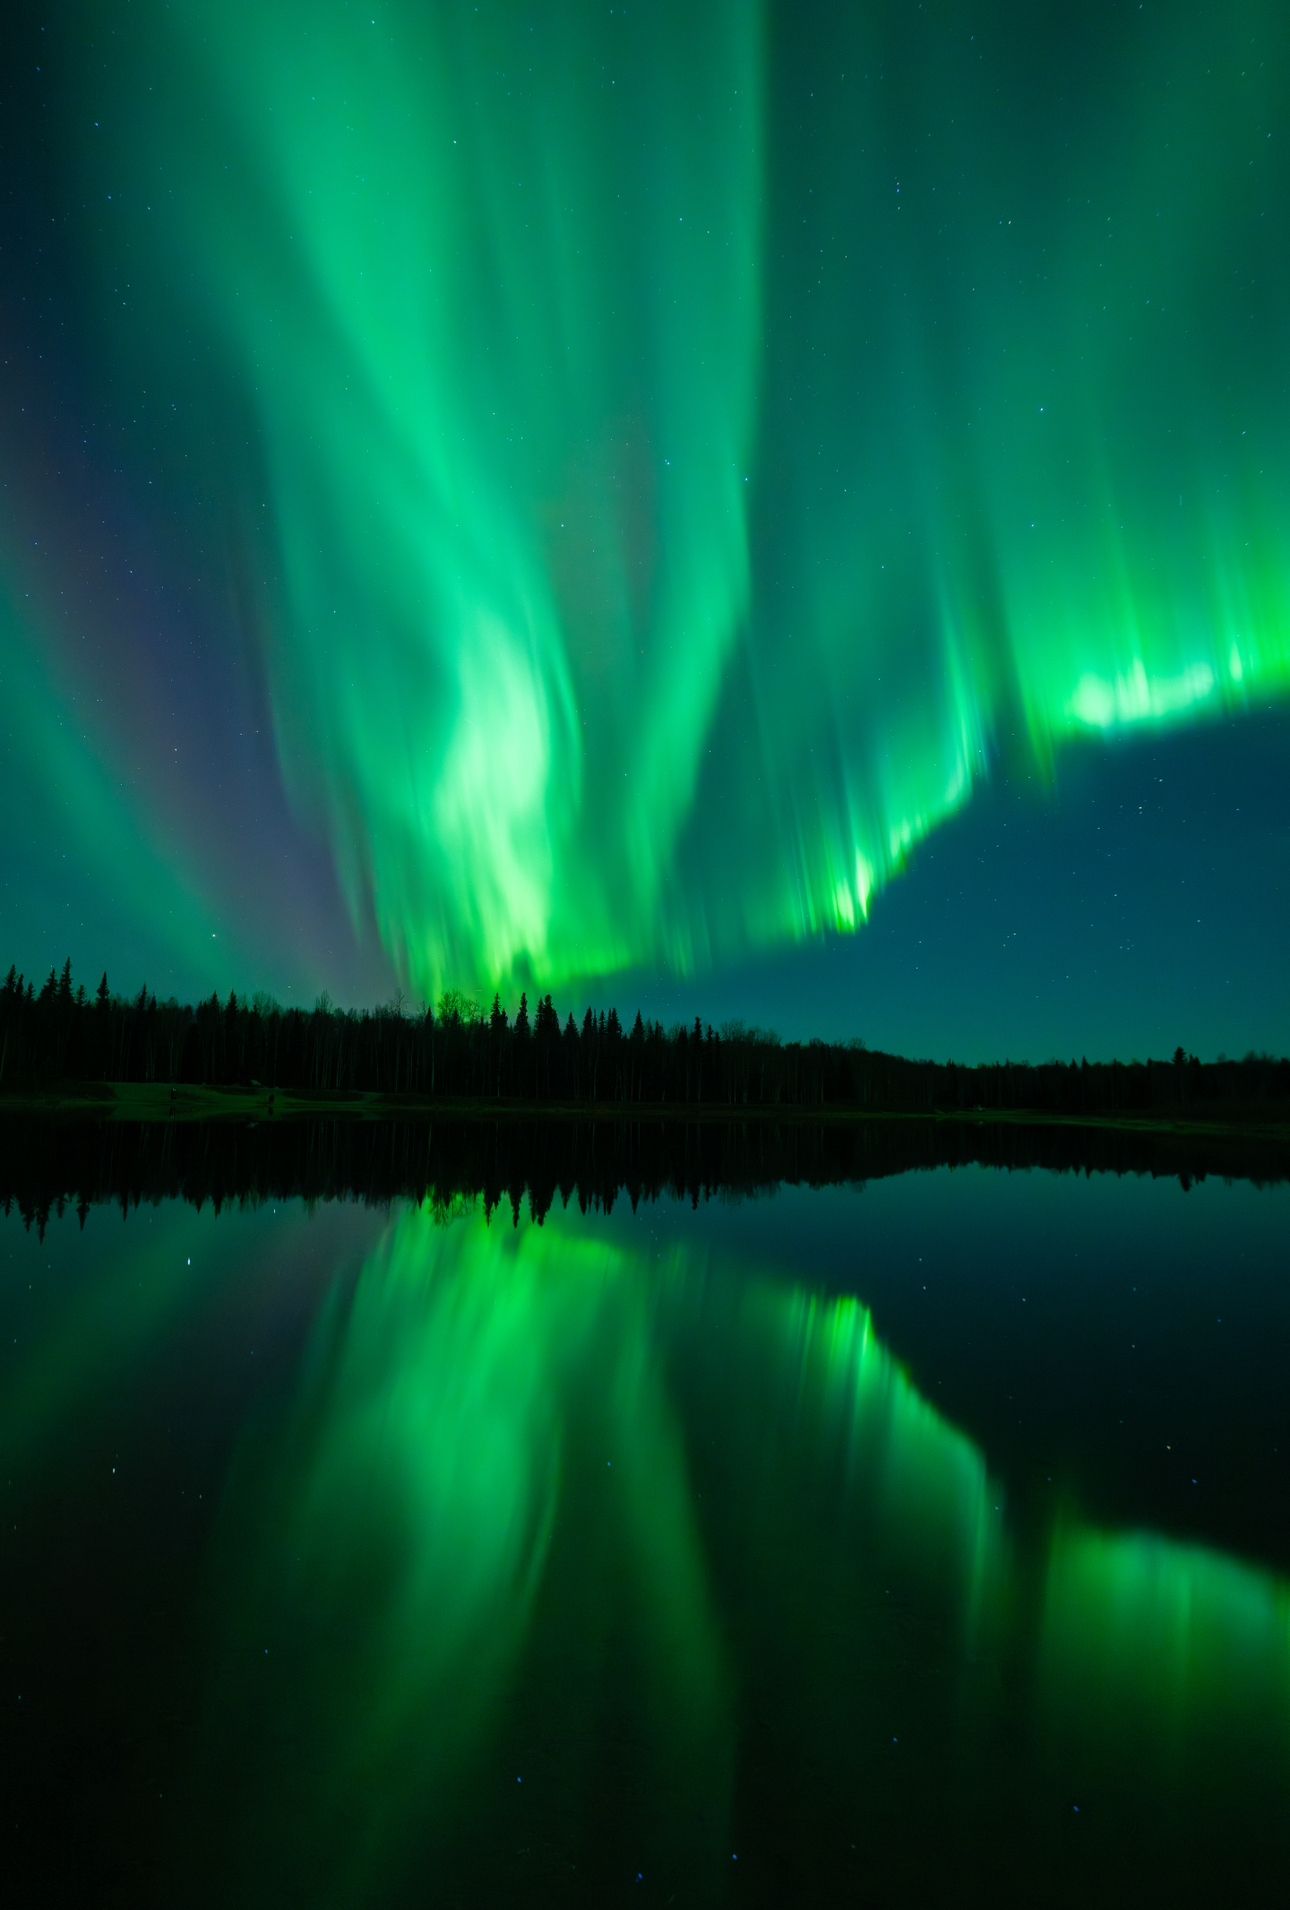
Reflections are an obvious starting point when conditions allow. A calm lake or partially frozen body of water can mirror the colors and patterns in the sky, creating a sense of symmetry. However, reflections are not guaranteed, particularly when wind disturbs the water or ice covers the surface. Rather than relying on a perfect mirror image, consider how the texture of the water or the irregular edge of the ice might contribute to the composition.
If you find a reflective surface, pay attention to the balance between the sky and its reflection. A perfectly centered horizon can work well when the reflection is strong, but it may feel less effective when the water is dark or visually cluttered. Take several test frames and adjust your position until the reflection contributes to the image rather than simply duplicating the sky.
Silhouettes offer another creative option. A distinctive tree, a mountain ridge, or another recognizable shape can anchor the frame while leaving the aurora as the dominant visual element. Try placing the silhouette off-center and allowing the lights to occupy the surrounding negative space. This can create a more deliberate composition than placing the horizon and brightest section of the aurora directly in the middle.
You can also experiment with orientation. A horizontal composition may emphasize the width of a sweeping display, while a vertical frame can draw attention to tall auroral curtains or rays extending overhead. If the aurora develops a particularly dramatic structure, rotate the camera and explore how a different framing changes the image.
Exposure settings will depend on the conditions and the creative effect you want. If the aurora is bright and active, a short shutter speed can preserve its definition. If the lights are faint and relatively stable, a longer exposure may reveal more color, though it can soften fine details. For reflections, remember that the water or ice may require a different exposure than the sky, so review both areas carefully.
Don't overlook simpler compositions, either. A narrow band of green above a dark horizon can sometimes be more effective than a frame filled with color. Leaving empty space around the aurora can emphasize its scale and make the photograph feel more atmospheric.
The purpose of this third approach is not to force an unusual composition. It is to recognize opportunities that differ from your first two photographs and make a deliberate creative choice.
Build Your Northern Lights Portfolio in Alaska
Photographing the Northern Lights presents a unique challenge: the subject is constantly changing, and the best opportunities may last only a short time.
Developing a range of photographic approaches can help you respond more confidently, make better use of each display, and create a portfolio that goes beyond the familiar image of green lights above a dark horizon.
Backcountry Journeys' Ultimate Northern Lights Photo Workshop offers photographers an opportunity to practice these skills in Alaska with professional photography instruction and dedicated opportunities to photograph the aurora. With guidance on composition, exposure, and image-making in the field, participants can work toward a more intentional approach to photographing one of nature's most dynamic displays.
Whether you are isolating the intricate structure of the lights, incorporating Alaska's landscape into a wide composition, or experimenting with reflections and silhouettes, each approach offers a different way to interpret the same phenomenon.
The next time the aurora appears, set yourself a simple challenge: create three photographs that look and feel distinctly different. You may discover that the most rewarding image of the night isn't necessarily the brightest or most dramatic display, but the one in which you make the most deliberate creative choices!

We offer world-class travel photography
experiences around the world.
Each tour is bundled with lodging, meals, and transportation between workshops included, allowing you to focus on photography instead of the stress of traveling.
experiences around the world.
Each tour is bundled with lodging, meals, and transportation between workshops included, allowing you to focus on photography instead of the stress of traveling.
Learn More About This Trip
Get Our Trip Catalog
Receive a trip catalog that highlights all of our upcoming photo tours and workshops.Schedule a Trip Consultation
Meet with a photo experience coordinator, and experience a personal touch to your booking experience.Landscape Guide
Receive a FREE Landscape Cheat Sheet Written By a Pro Photographer.Webinars
Our regularly hosted webinars provide photography instruction from our own guides on a wide range of topics.Education Portal
Explore our library of articles that cover everything from common questions, to in-depth guides on how to achieve that perfect shot.
Backcountry Journeys
Connecting Passionate People To
Exceptional Experiences.
Exceptional Experiences.
Business Hours:
Mon-Fri, 8AM-4PM MT
928-478-1521
adventure@backcountryjourneys.com
Mon-Fri, 8AM-4PM MT
928-478-1521
adventure@backcountryjourneys.com
arrow_drop_down_circle
Divider Text
All Images & Content Are Property Of Backcountry Journeys Photography Tours, Workshops & Safaris LLC - Copyright 2026


About Us
Receive a Digital Trip Catalog
Find an upcoming photography tour with our interactive catalog.