2025 Travelers' Choice

About Backcountry Journeys
Why Choose Backcountry Journeys
If you're considering a photography trip, hear why Backcountry Journeys delivers the best experience in the industry.Frequently Asked Questions
If you're new to photography trips, or new to BCJ, you can find our common travel questions here.Fitness Levels
Our trips vary on physical intensity, and by reviewing our fitness levels, you can find out which trips may be more challenging, or aligned more closely with your comfort level.Meet The Crew
We've built an amazing team of experienced guides, and dedicated office staff that elevate your travel experience. Get to know their backgrounds, and hear their stories.Loyalty Program
We reward our frequent photo adventurers with exclusive discounts on amazing photography trips.Contact Us
If you need to get in touch with our office staff, or have additional business inquiries, you can find our information here.Refer a Friend
Know someone perfect for one of our tours? Recommend them through this quick form.Stay Up To Date On All Things
Backcountry Journeys
Backcountry Journeys
Our Photography Community
Our Webinars
Our regularly hosted webinars provide photography instruction from our own guides on a wide range of topics.Our Education Portal
Explore our library of articles that cover everything from common questions, to in-depth guides on how to achieve that perfect shot.Community Testimonials
We're proud to foster an amazing group of photo travelers, and here you can find their stories from their past adventures.Resources For Photographers
About Our Company
Resources For Photographers
About Our Company
Beyond the Stars: How to Photograph the Milky Way Over Utah’s Red Rock Landscapes

Published October 30, 2026
The American Southwest is known for its towering sandstone arches, sweeping canyon views, and fiery desert sunsets. But after dark, these familiar landscapes reveal another dimension. Above the sculpted rock formations of Arches and Canyonlands National Parks, the Milky Way creates opportunities for photographs that combine the immense scale of the cosmos with the intricate details of the desert below.
Capturing these scenes takes more than a camera capable of photographing stars. It requires careful planning, an understanding of exposure, and the ability to position the Milky Way in relation to the landscape. The strongest astrophotography images do more than document the stars. They use foreground shapes, leading lines, and controlled light to tell a story about a particular place.
For photographers looking to expand their creative skills, Utah’s red rock country offers an extraordinary setting to explore the relationship between landscape photography and astrophotography.

Start With the Landscape, Not Just the Stars
A photograph of the Milky Way can be technically impressive without being particularly compelling. Sharp stars and a visible galactic core are important, but a strong foreground gives the image context, depth, and a sense of place.
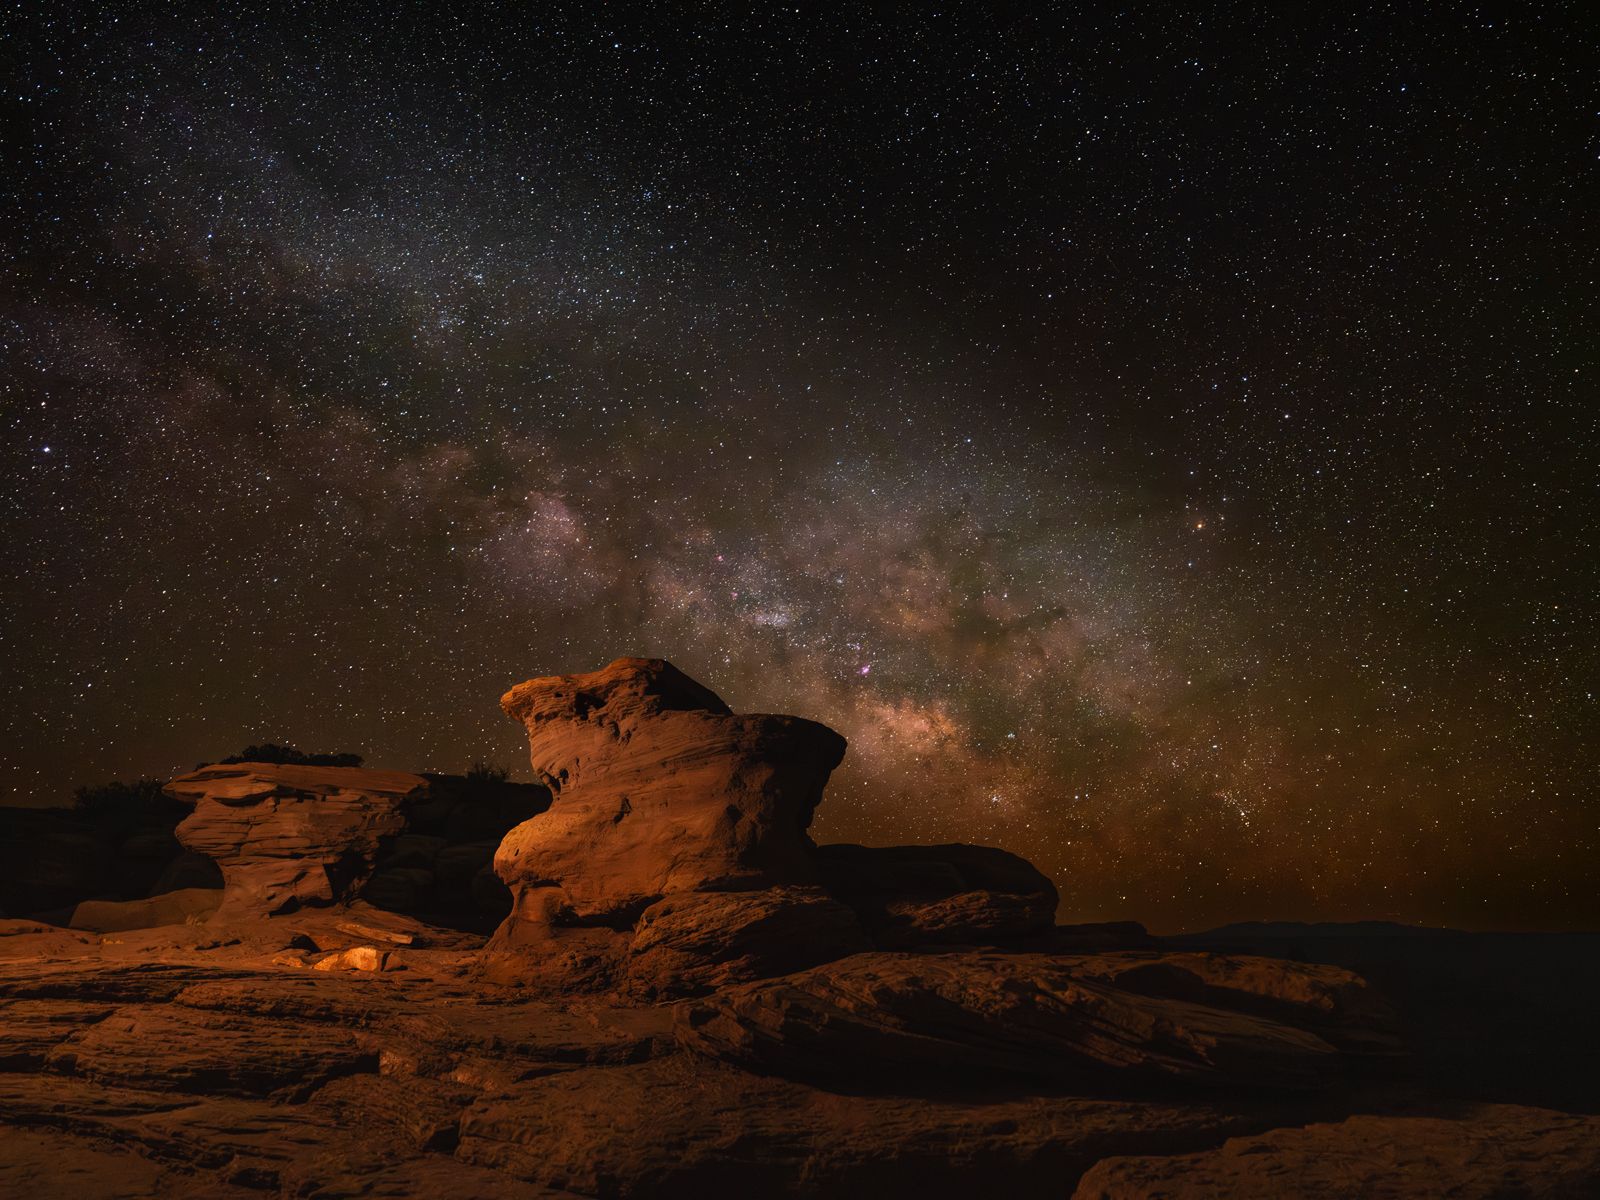
Arches and Canyonlands offer an abundance of natural features to work with, from curved sandstone formations and narrow rock fins to layered canyon walls and distant mesas. Each presents a different compositional opportunity.
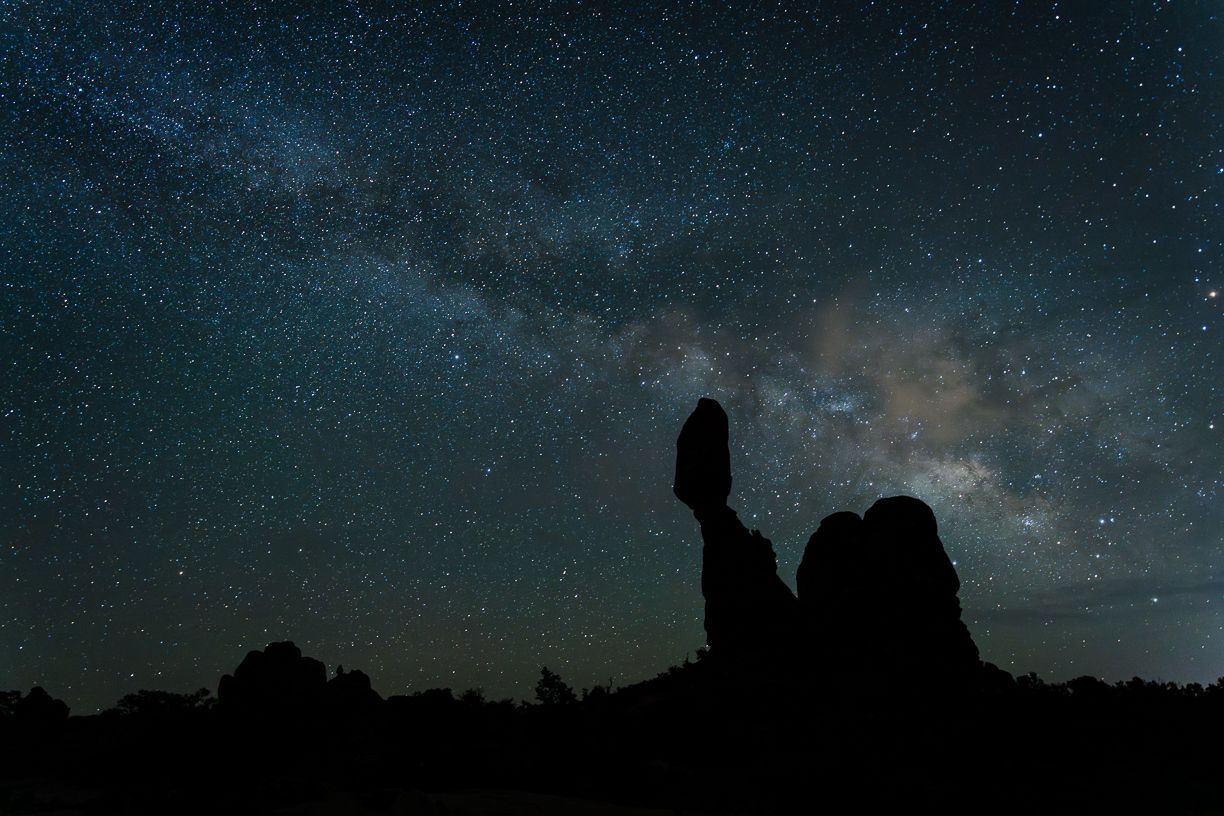
When scouting a location, look for foreground shapes that complement the Milky Way rather than compete with it. A sweeping rock formation can echo the curve of the galaxy, while a narrow sandstone fin can create a vertical element that draws the eye toward the sky. A canyon rim can provide a clean horizon, allowing the Milky Way to become the dominant subject without leaving the lower half of the frame visually empty.
Consider how much of the foreground you actually need. Including too much dark, featureless ground can weaken the composition. Moving closer to a foreground subject or lowering the camera may help emphasize its shape, while stepping back can reveal more of the surrounding landscape and establish a greater sense of scale.
A wide-angle lens is often useful for these scenes. On a full-frame camera, a focal length between 14mm and 24mm provides a broad field of view and makes it easier to include both a foreground formation and a substantial portion of the night sky. An ultra-wide lens can exaggerate the size of nearby objects, so pay attention to how close foreground elements appear relative to the distant sky.
Before nightfall, take a few test compositions in daylight or twilight. Identify a foreground subject, determine where the horizon should sit, and leave room in the frame for the Milky Way's expected position. Once darkness arrives, you will be able to concentrate on exposure and focus instead of trying to build an entirely new composition by headlamp.
Plan the Milky Way's Position Before You Arrive
Unlike a mountain or rock formation, the Milky Way does not remain in one position throughout the year. Its orientation changes with the season and time of night, which means a composition that works in June may look entirely different in September.
The bright central region of the galaxy, known as the galactic core, is particularly popular in astrophotography. In the Northern Hemisphere, it is generally a seasonal subject, becoming visible in the evening and nighttime sky during the warmer months. Its exact position depends on the date, time, and your location.
This is where planning apps such as PhotoPills or Stellarium can help. Before your shoot, enter your location and date to see where the galactic core will appear. Check its altitude and direction at the time you expect to photograph, then compare that information with the orientation of your chosen foreground.
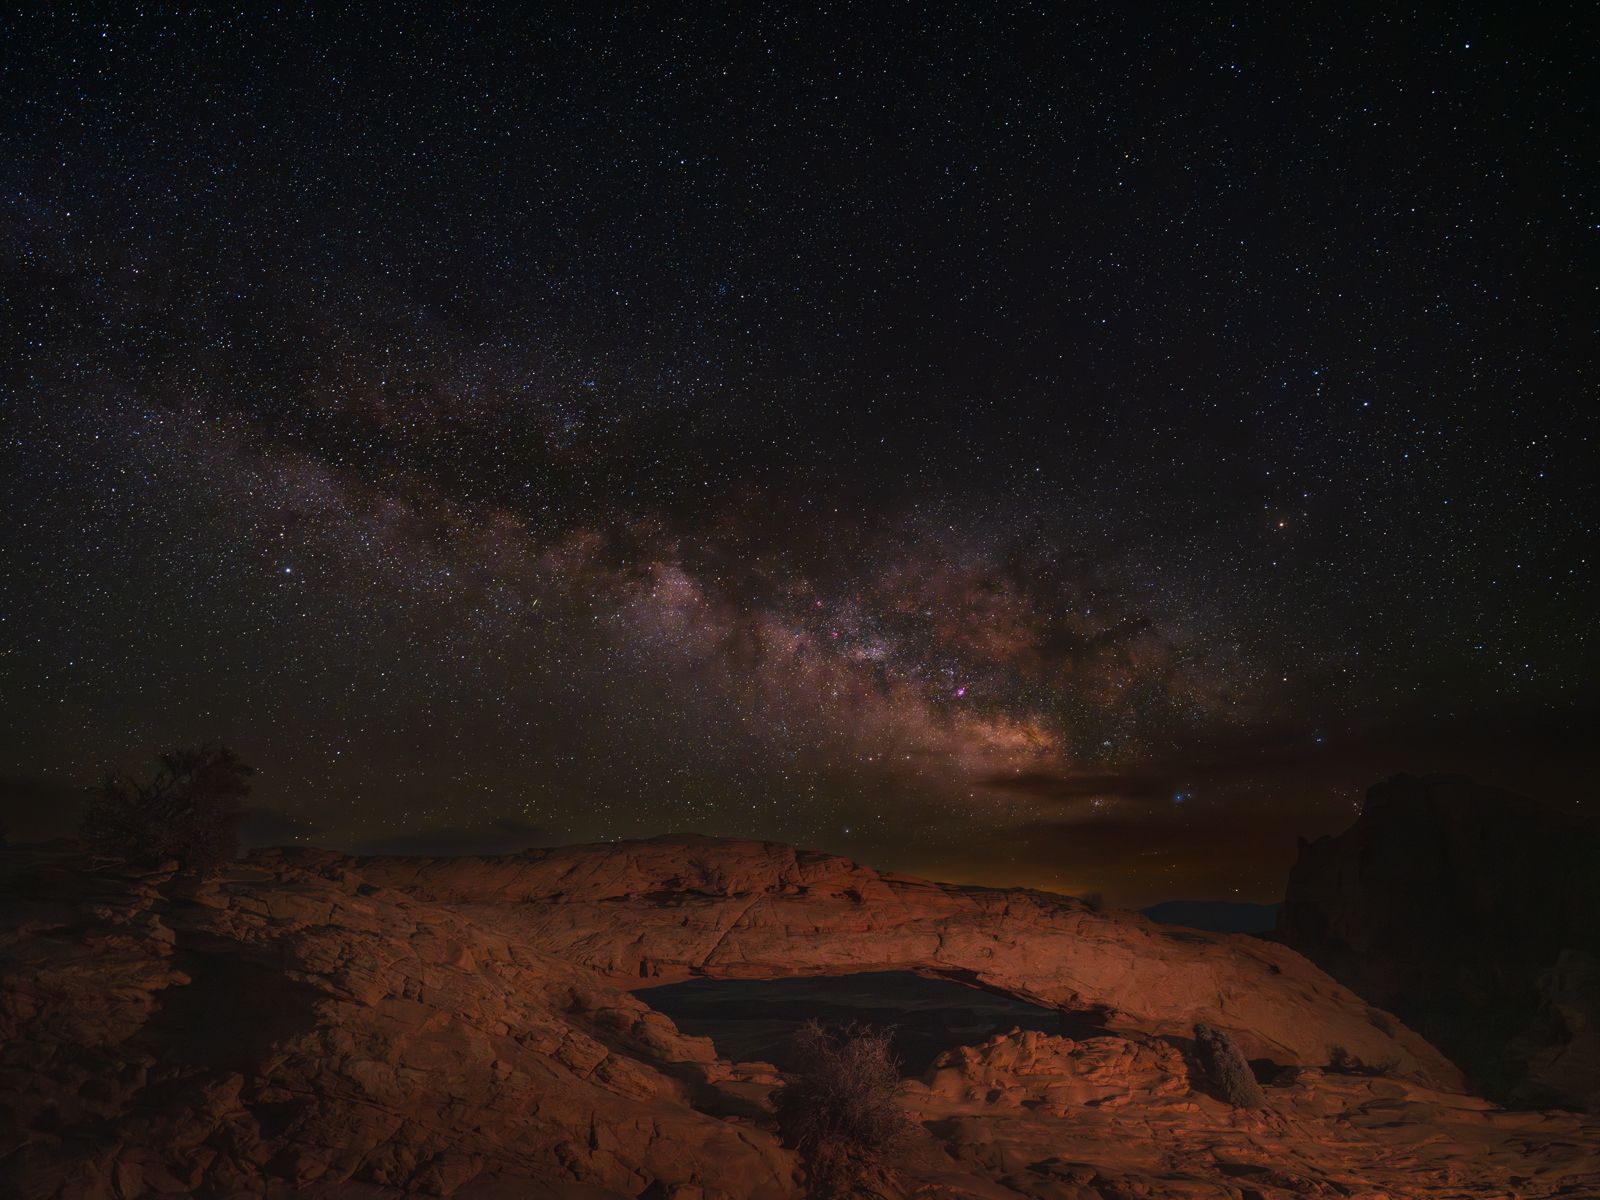
For example, if you want to photograph the Milky Way above a sandstone arch, check whether the galactic core will rise behind the formation or sit off to one side. If the alignment does not work, consider a different shooting position or a composition that emphasizes the broader sweep of the galaxy instead.
The moon deserves equal attention. A new moon or a period close to it generally provides darker skies and stronger contrast between the Milky Way and the surrounding stars. A bright moon can wash out faint galactic detail, although moonlight can also illuminate the foreground and reveal sandstone texture. The best conditions depend on whether your priority is a highly detailed Milky Way or a more evenly illuminated landscape.
Weather and visibility can change quickly, so check cloud cover, atmospheric haze, and the forecast before heading out. If the sky is partly cloudy, identify alternative compositions that allow you to work around gaps in the clouds. Building flexibility into your plan can be just as important as choosing the right camera settings.

Dial In Your Camera Settings for Sharp Stars
Once you have found a composition, the next challenge is gathering enough light to reveal the Milky Way without turning the stars into streaks. Because Earth rotates, shutter speed must be controlled carefully, especially when using wide-angle lenses.
For a typical full-frame camera and a fast wide-angle lens, the following settings provide a useful starting point:
Aperture: Use a wide aperture, often between f/1.4 and f/2.8, depending on your lens. A wider aperture collects more light, which is especially helpful when photographing faint stars. If your lens produces significant coma or distorted stars near the edges when used wide open, stopping down slightly may improve image quality.
Shutter speed: Start around 5–15 seconds, depending on your focal length, camera resolution, and how much star movement you can tolerate. At 14mm, you may be able to use a longer exposure than at 24mm, but inspect the stars at high magnification rather than assuming a particular shutter speed will guarantee sharp points.
ISO: Try ISO 1600–6400 as a starting range. The appropriate setting depends on your camera's sensor, aperture, sky brightness, and exposure time. Review the histogram and test images to make sure you are capturing enough detail without unnecessarily overexposing the brightest areas.
File format: Photograph in RAW to preserve greater flexibility when adjusting exposure, white balance, shadows, and color during editing.
White balance: A setting around 3500–4000K can be a useful starting point for a natural-looking night sky, although the ideal color depends on your conditions and creative preference. Shooting RAW allows you to fine-tune this later.
These settings are starting points, not a fixed recipe. A 14mm lens at f/1.8 behaves differently from a 24mm lens at f/2.8, and a high-resolution camera may reveal star movement that is less noticeable in a smaller image.
A practical approach is to begin with a short test exposure, zoom in on the stars, and adjust your shutter speed until the stars remain acceptably sharp. If the image is too dark, consider raising ISO or opening the aperture before extending the exposure enough to introduce visible trails.
It is also worth checking your camera's histogram rather than relying exclusively on the brightness of the LCD screen. In a dark environment, the display can make an image appear brighter or darker than it actually is. Review the histogram, inspect the highlights, and make adjustments based on the captured data.

Focus Precisely in the Dark
Autofocus often struggles when pointed at a dark sky, and focusing at infinity is not as simple as turning the lens all the way to its infinity marking. Many lenses can focus beyond infinity, so that marking is not always accurate enough for sharp stars.
Instead, switch to manual focus and use your camera's live-view display. Magnify a bright star or distant point of light as much as possible, then adjust the focus ring until the star appears as small and precise as possible. Take a test exposure and zoom in on the resulting image to confirm that the stars are sharp.
Once focus is established, avoid accidentally moving the focus ring while adjusting other settings. Some photographers use a small piece of removable tape to keep the ring in place during a session, particularly when working in the dark.
If you are photographing a close foreground subject as well as the stars, remember that the focus position that produces sharp stars may not render a nearby rock equally sharp. This is one reason foreground distance matters in astrophotography. A subject several feet from the lens can be much more difficult to keep sharp throughout the frame than a formation farther away.
Take time to test focus before committing to a series of exposures. A photograph can have excellent composition and exposure yet lose much of its impact if the stars are soft.

Balance Foreground Detail With the Night Sky
One of the most common challenges in Milky Way photography is capturing enough detail in the landscape without sacrificing the stars. The foreground may be several stops darker than the sky, especially on a moonless night.
There are several ways to approach this, and the right choice depends on the conditions and the final image you want to create.
Option 1: Photograph everything in one exposure. This is often the simplest approach when the foreground is not too dark or when a silhouette suits the composition. Use your widest practical aperture and a shutter speed that keeps the stars sharp, then adjust ISO to capture the available light. If the landscape remains dark, that may be an intentional part of the image rather than a problem to correct.
Option 2: Use natural or moonlight to illuminate the landscape. A small amount of moonlight can reveal sandstone textures, canyon walls, and foreground details. The trade-off is that brighter lunar conditions can reduce the contrast of the Milky Way. Check the moon's phase, altitude, and direction before choosing this approach.
Option 3: Capture separate exposures for the sky and foreground. In some conditions, the Milky Way requires a short exposure to preserve sharp stars, while the foreground benefits from a longer exposure to reveal detail. You can photograph each separately and blend them during post-processing. If you use this technique, a tripod helps keep the compositions aligned, and the two exposures should be planned to preserve consistent perspective and lighting.
For example, you might capture the sky at 10 seconds, f/2, and ISO 3200, then take a separate foreground exposure lasting 30–60 seconds at a lower ISO or narrower aperture if the scene permits. These are illustrative settings rather than a universal formula; the foreground exposure will depend on the actual light available.
Avoid using a longer sky exposure simply to brighten the foreground. That can cause stars to trail, particularly with longer focal lengths. Separate exposures give you more control when the difference in brightness between the sky and landscape is too great for a single frame.
Light painting is another possibility, but it requires restraint. Artificial illumination can quickly create unnatural color, uneven brightness, or distracting hotspots on sandstone. Before introducing additional light, consider whether a silhouette or naturally dark foreground might create a more compelling image.
Whatever method you choose, make the decision intentionally. A dramatic silhouette can be just as effective as a detailed foreground, provided it strengthens the overall composition.
Find More Than One Composition at Each Location
It is tempting to arrive at a famous landmark and concentrate on one familiar composition. But the most rewarding astrophotography often comes from looking beyond the obvious shot.
At Arches, a natural arch can act as a frame for the night sky, but the surrounding sandstone formations may offer equally compelling opportunities. Try photographing the arch as a recognizable subject in a wider landscape, then experiment with a tighter composition that emphasizes its shape against the stars.
In Canyonlands, expansive canyon views can provide a sense of scale that is difficult to achieve in more enclosed settings. A distant horizon and a sweeping section of the Milky Way may create a stronger image than trying to fit a large foreground feature into every frame. Look for layers of canyon walls, distinctive silhouettes, and lines that lead toward the sky.
At either park, consider taking both horizontal and vertical frames. A horizontal composition can emphasize the breadth of the landscape and the sweep of the galaxy, while a vertical frame can make the Milky Way feel taller and more imposing. The best orientation depends on the relationship between the foreground and the sky, not simply the shape of the landmark.
Experiment with different focal lengths, too. A wide-angle lens is useful for expansive scenes, but a longer focal length can isolate a section of the Milky Way or emphasize the relationship between a distant formation and the stars. The key is to identify a clear subject and build the frame around it.
Remember that darkness also changes the way you work. Give your eyes time to adjust, use a dim red light when practical, and avoid shining bright lights into other photographers' scenes. Check your surroundings before moving your tripod, and remain aware of uneven terrain and park restrictions. A little preparation helps you work safely and concentrate on the creative decisions that matter.
Put Your Night Photography Skills Into Practice
Photographing the Milky Way over Utah's red rock landscapes brings together several disciplines: landscape composition, celestial planning, manual focusing, exposure control, and thoughtful post-processing. Each influences the final result, and improving one skill can make the entire process more rewarding.
Arches and Canyonlands National Parks are particularly appealing settings for this work because their distinctive geology offers an extraordinary variety of foreground subjects. Their recognized dark-sky status also makes the region well suited to exploring the night sky when conditions cooperate.
Backcountry Journeys' Milky Way Magic: Arches & Canyonlands photography workshop offers an opportunity to practice these techniques in the field, with professional photography instruction and time dedicated to night-sky photography across two remarkable national parks. Rather than simply photographing the Milky Way, participants can work on anticipating its position, building stronger compositions, and making informed exposure decisions as conditions change.
The experience can also help photographers develop a more repeatable approach to astrophotography. Learning how to scout a foreground, plan a celestial alignment, establish critical focus, and evaluate test exposures are skills that can be applied to night photography well beyond the American Southwest.
Ultimately, the most memorable Milky Way photographs are not simply images of distant stars. They connect the vastness of the universe with the distinctive shapes and textures of the landscape below. By treating the sky and the earth as equal parts of the composition, photographers can create images that go beyond documenting the night and begin to capture its sense of wonder.

 Milky Way Magic: Arches & Canyonlands
Lodge-Based Photo Workshop
From $5,995.00
Up To 7 Guests
Fitness Level 2 - What's This?
Wanna Get Away?
Starts
Current Price:$0.00
Start: Moab, UT
Led By
Start: Moab, UT
Led By

Backcountry Journeys
Connecting Passionate People To
Exceptional Experiences.
Exceptional Experiences.
Business Hours:
Mon-Fri, 8AM-4PM MT
928-478-1521
adventure@backcountryjourneys.com
Mon-Fri, 8AM-4PM MT
928-478-1521
adventure@backcountryjourneys.com
arrow_drop_down_circle
Divider Text
All Images & Content Are Property Of Backcountry Journeys Photography Tours, Workshops & Safaris LLC - Copyright 2026


About Us
Receive a Digital Trip Catalog
Find an upcoming photography tour with our interactive catalog.