Mon - Fri: 8 am - 4 pm MT

About Backcountry Journeys
Why Choose Backcountry Journeys
If you're considering a photography trip, hear why Backcountry Journeys delivers the best experience in the industry.Frequently Asked Questions
If you're new to photography trips, or new to BCJ, you can find our common travel questions here.Fitness Levels
Our trips vary on physical intensity, and by reviewing our fitness levels, you can find out which trips may be more challenging, or aligned more closely with your comfort level.Meet The Crew
We've built an amazing team of experienced guides, and dedicated office staff that elevate your travel experience. Get to know their backgrounds, and hear their stories.Loyalty Program
We reward our frequent photo adventurers with exclusive discounts on amazing photography trips.Contact Us
If you need to get in touch with our office staff, or have additional business inquiries, you can find our information here.Refer a Friend
Know someone perfect for one of our tours? Recommend them through this quick form.Stay Up To Date On All Things
Backcountry Journeys
Backcountry Journeys
Our Photography Community
Our Webinars
Our regularly hosted webinars provide photography instruction from our own guides on a wide range of topics.Our Education Portal
Explore our library of articles that cover everything from common questions, to in-depth guides on how to achieve that perfect shot.Community Testimonials
We're proud to foster an amazing group of photo travelers, and here you can find their stories from their past adventures.Resources For Photographers
About Our Company
Resources For Photographers
About Our Company
How to Photograph a Solar Eclipse: A Comprehensive Guide
Published March 25, 2024
There are many incredible natural phenomena out there that are just waiting to be photographed. Our world is full of spectacles and wonders that defy the imagination and seem to come straight out of fairy tales. One such event that occurs every now and then is a solar eclipse. If you’re at just the right place at just the right time, the sun can become fully blocked by the moon casting a dark shadow onto the earth’s surface for a few brief minutes. Events like this are a magical way to experience the dynamics and inner workings of our solar system and have inspired humans for millennia.
A solar eclipse, with its celestial dance of shadows and light, presents a captivating spectacle that sparks the imagination and mind. Whether you're just getting started on your photographic journey or a seasoned photographer, capturing the elusive beauty of a solar eclipse requires meticulous planning, specialized equipment, and a deep understanding of both the astronomical event and the intricacies of photography.
In this extensive guide, we will dive into every aspect of photographing a solar eclipse, from understanding different types of eclipses to mastering camera settings, selecting the right equipment, ensuring safety, and optimizing your chances of capturing stunning images of this rare cosmic event.
Let’s get into it and discuss everything you’ll need to capture your own images of a solar eclipse!

Understanding Solar Eclipses
Before diving into the technicalities of photography, let's explore the phenomenon of solar eclipses. A solar eclipse occurs when the moon passes between the sun and the Earth, casting its shadow on our planet. Due to the physics of our solar system, the moon happens to be just the right size and distance from Earth that it can fully block the sun's light if you’re observing it from the path of totality. I find it absolutely incredible that we happen to live on a planet where this phenomenon is even possible. And that’s not all, depending on environmental situations, there are actually three main types or classifications of solar eclipses, and understanding these different types of solar eclipses is crucial for planning your photography efforts and choosing the right equipment and settings.
The Three Different Types of Solar Eclipses:
Partial Solar Eclipse:
During a partial solar eclipse, only a portion of the sun is obscured by the moon's shadow. This occurs when the alignment of the sun, moon, and Earth is such that only a fraction of the sun's disk is covered.
Total Solar Eclipse:
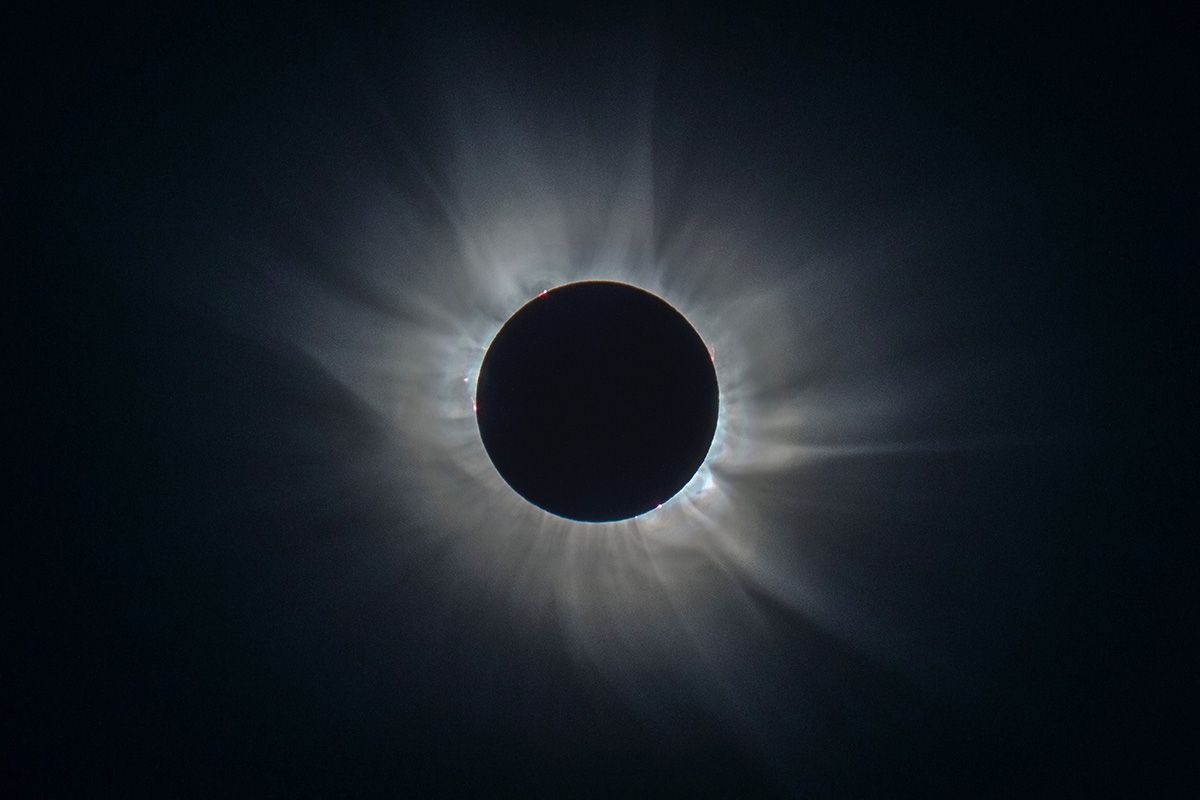
A total solar eclipse occurs when the moon completely blocks the sun's disk, casting a shadow known as the umbra on the Earth's surface. Totality, the brief period when the sun is completely obscured, unveils the ethereal solar corona, offering a rare and awe-inspiring sight. The upcoming eclipse on April 8th, 2024 is indeed a total solar eclipse meaning that if you’re in the path of totality the sun will be fully blocked.
Annular Solar Eclipse:
An annular solar eclipse happens when the moon is too far from the Earth to completely cover the sun's disk, resulting in a ring of sunlight known as the "ring of fire" or annulus around the moon's silhouette. The last solar eclipse that occurred in 2023 was indeed an annular eclipse.

Phases of a Solar Eclipse
Solar eclipses occur over a period of time and throughout that period they go through several distinct and separate phases. Understanding these phases is crucial to understanding what’s going on and to capture stellar images. Let’s break it down and take a look at the phases of an eclipse:
First Contact:
First contact occurs when the moon first makes contact with or starts to block the sun. This is the very first stage of a solar eclipse and marks the beginning of an incredible event and will last for quite a while. Be sure to capture a few images before first contact if you want to portray the entire sequence of events.
Second Contact:
Second contact is the point in time when the sun begins to be fully obscured or covered by the moon. This is the beginning of totality, and this is also the point when you can remove your solar filter and begin to capture images of the sun’s corona. This phase will only last a few short minutes until the sun starts to re-emerge and you’ll need to put your solar filter back on.
Third Contact:
Third contact is officially the end of totality and marks the point at which the sun begins to re-emerge. You must put your solar glasses and solar filters back on before we reach third contact. At this point light will begin to return to the surface of the earth and totality has officially ended.
Fourth Contact:
Fourth contact is when the moon stops blocking the sun altogether and is officially the end of the eclipse.

Safety Precautions
Before we take a look at the technical aspects of photography, it's absolutely essential to prioritize safety when observing or photographing a solar eclipse.
Looking directly at the sun, even during an eclipse, can cause permanent eye damage. Therefore, it's imperative to use proper eye protection such as solar glasses or solar filters designed specifically for viewing and photography. These filters effectively block harmful ultraviolet and infrared radiation, safeguarding your eyes from potentially permanent damage. You only have one set of eyes so be sure to take this very seriously.
And just like protecting your eyes, when photographing a solar eclipse, always use a certified solar filter to protect your camera equipment. Without a solar filter, the intense sunlight can damage your camera's sensor, aperture diaphragm, and parts of your lenses. A lens is essentially a giant magnifying glass that will amplify the sun's light, and this can easily damage or destroy your expensive gear. Additionally, be cautious when setting up your equipment, ensuring it is securely mounted and won't be knocked over or damaged throughout the eclipse.
And Finally, It’s worth mentioning again, that you should ABSOLUTELY NEVER look directly at the sun without proper protection. The only exception to this is when you experience totality. When the sun's light is entirely 100% blocked by the moon it is then safe to remove solar glasses and filters to observe and photograph the sun. Totality will only last a few short minutes, however, so be sure to dawn your safety equipment before totality ends.

Choosing the Right Equipment
Photographing a solar eclipse requires specialized equipment to capture the event safely and effectively. Here's a list of the essential gear you’ll need:
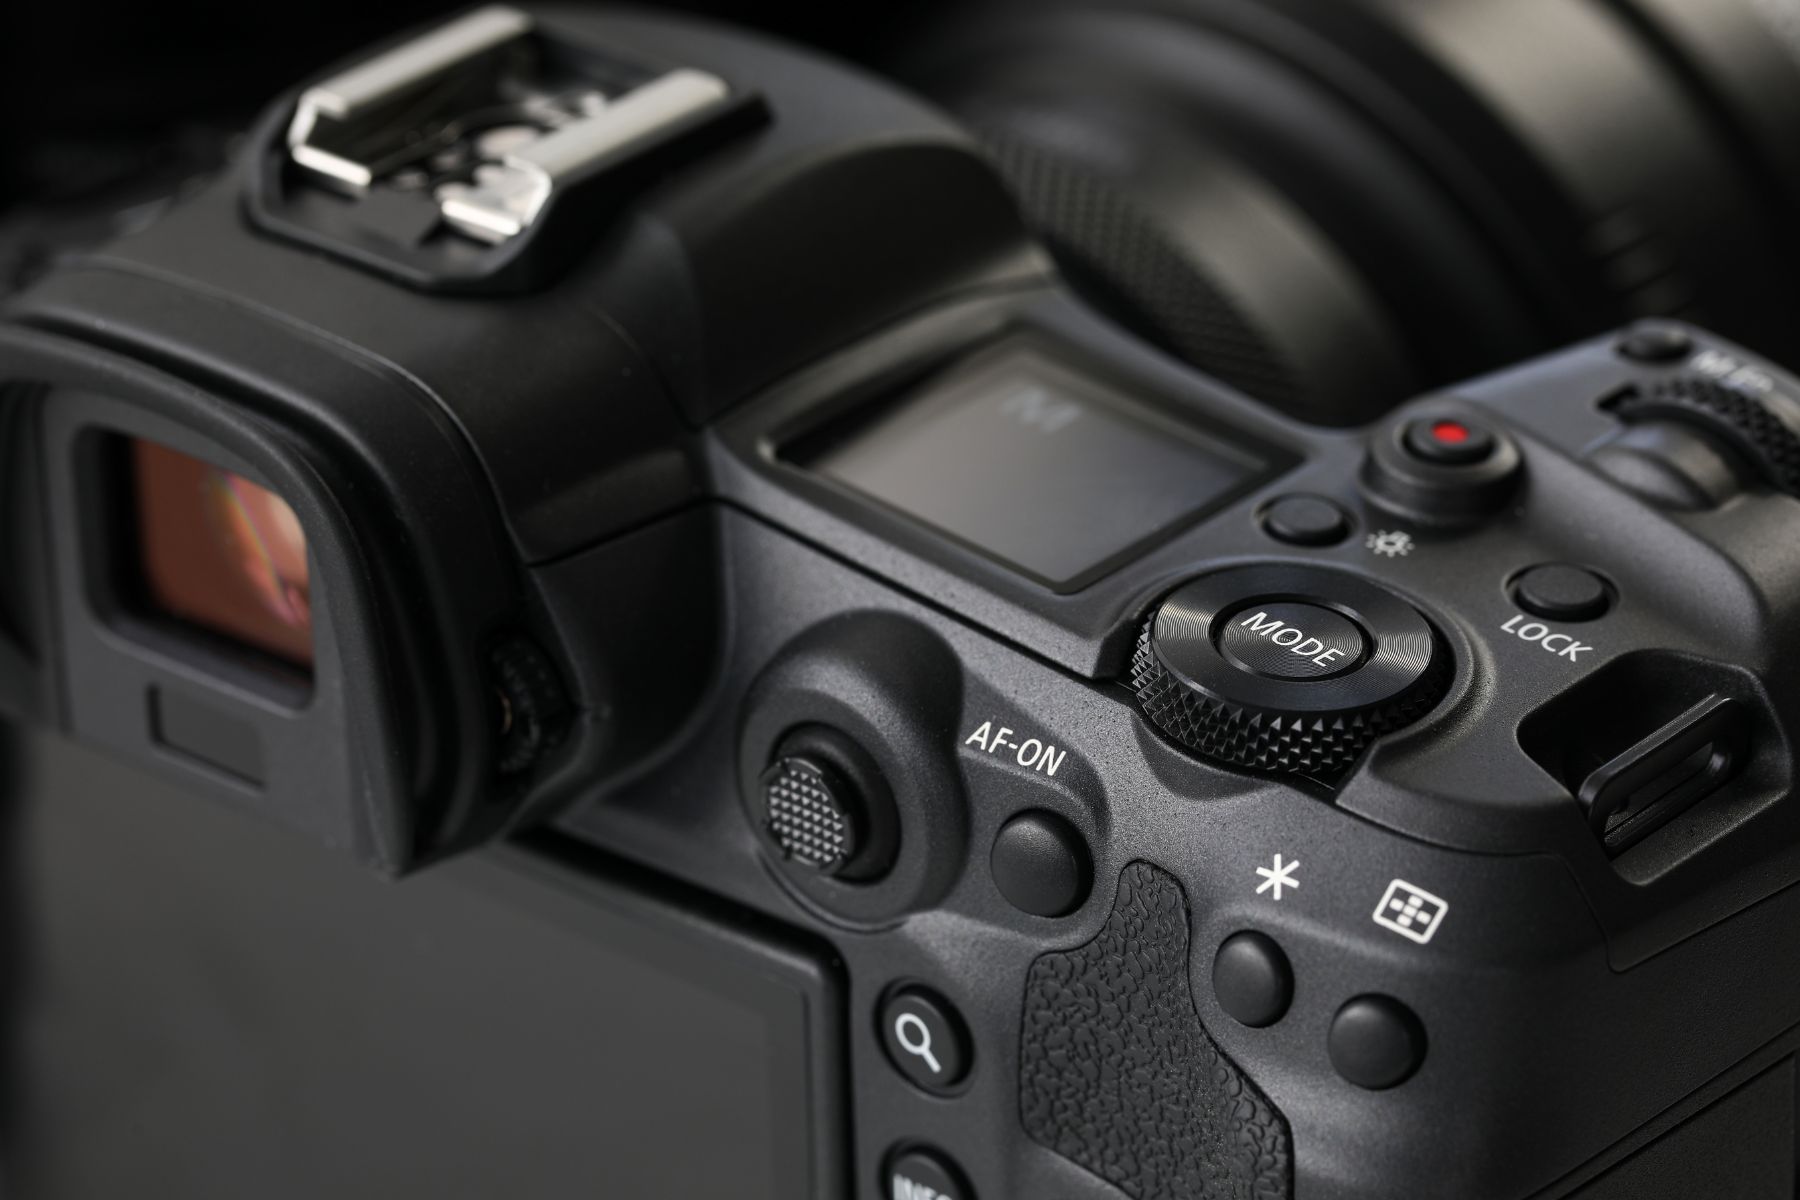
Camera:
Whether you prefer DSLRs or mirrorless cameras you’ll need to choose a model with manual control over exposure settings. This allows you to adjust aperture, shutter speed, and ISO for optimal results. We’ll get into specific settings a bit farther down. I would also strongly recommend using a camera with interchangeable lenses for more creative control.
Lens:
When it comes to lenses there is actually quite a bit of flexibility depending on the style of shot you want to capture. If you want the classic zoomed-in shot of the sun and the corona (strings of light being emitted from the sun that can be seen during totality) you’ll want to use a telephoto or super-telephoto lens with a focal length of at least 200mm. Anything from 200-600mm should work great depending on how much of your frame you want the sun to occupy. Longer focal lengths allow for closer views of the eclipse, revealing intricate details such as sunspots and solar prominences. On the other hand, if you want a more zoomed-out shot portraying environmental elements and the sun as a small and distant object, you’ll want to opt for a wide-angle lens. Anything from 16mm-70mm should work great for this but ultimately, it’s up to you. I would recommend doing some research and looking at images people have captured in the past.
Tripod:
A sturdy tripod is essential for stable shots, especially when using telephoto lenses at high magnifications. Choose a tripod with adjustable legs and a robust mounting system to ensure stability and minimize vibrations. Having a quality tripod is essential for many styles of photography and an eclipse is no exception.
Solar Filter:
Invest in a high-quality solar filter to protect your camera sensor and lenses from the intense sunlight during the eclipse. You’ll want the correct size filter for optimal coverage and safety, ensuring the entire lens is protected. That being said there are different types of filters that one can use. A very popular and often more affordable option is a Mylar filter. These filters contain very thin sheets of a reflective and metallic substance called mylar which filters out harmful UV and infrared light that could damage our eyes or cameras. This is the same material that’s used in many solar glasses. You can also opt to use more expensive and durable solar filters that screw directly onto your lens. In this case, many of these filters are simply very dark or high-stop neutral density filters. If you opt to go this route, make sure that your filter is rated for at least 16-stops if not more. Regardless of which route you pursue be sure to do some research and make sure that the filter you select is indeed rated and approved for photographing the sun.
Solar Glasses:
And while we’re on the subject be sure to have solar glasses as well so that you can observe this incredible event with your own eyes and not just through your camera. All of the same principles apply here and it’s never a bad idea to buy a few extras so that you have backups. Solar glasses are quite affordable and readily available.
Star Tracker (Optional):
Although it isn’t necessary by any means, many photographers opt to use star trackers or other tracking devices to keep their camera and lens pointed at the sun throughout the eclipse. This can help a ton and will allow you to worry more about camera settings and actually capturing images as opposed to constantly reorientating your gear and pointing your camera at the sun as it moves throughout the sky. Trackers become more helpful at higher focal lengths as the sun will be moving across your frame faster.
Shutter Release (Optional):
Use a remote shutter release or a delayed shutter setting to trigger your camera's shutter without touching it. This will minimize camera shake and help to ensure sharp images. I simply set a 2-second delay on my shutter and this usually does this trick but for superior control and even less interference and potential motion, a remote shutter release is a great idea.
Backup Power and Memory:
As always, it’s never a bad idea to carry extra batteries and memory cards to avoid missing crucial moments during the eclipse. Solar eclipses are rare events, so it's essential to have sufficient power and storage capacity to capture the entire event.
Camera Settings
Alright, now that we’ve discussed what you’ll need let’s go over the camera settings you’ll need to use. This section is of course very subjective and camera settings will likely be different depending on the gear you’re using and the environmental conditions around you. I strongly encourage you to check your histograms and meters and review your images when photographing the eclipse to make sure you’re capturing the images you want. That being said, here are some general guidelines for setting up your camera and lens:
Focus:
You will definitely want to manually focus your lens to ensure sharpness, especially when using telephoto lenses. Autofocus may struggle to lock onto the sun and get the focus nice and sharp, so manual focus is strongly recommended. Once you have placed a solar filter on your lens you can then point your camera towards the sun and start to find a nice sharp focal point. To do this I usually go into live view so that the image is being shown on my camera's LCD screen. I then zoom in on the image and slowly start rotating my focus ring back and forth until I get a nice sharp image. You can either focus on the edge of the sun or perhaps some obvious sun spots to dial everything in. Now that we have our focus set it’s time to get our exposure settings dialed in.
Aperture:
Let’s start out by discussing aperture. As with any style of photography, the “correct” aperture ultimately depends on the scene before you. For instance, if you’re capturing the classic zoomed-in shot with a telephoto lens you will likely want to use a wider aperture ranging anywhere from your lens's maximum aperture to let’s say f/8 or f/11. I have seen many great results captured using a solar filter at around f/5.6-f/11. Additionally, using an aperture between f/5.6 and f/8 can help to minimize chromatic aberrations and ensure sharpness.
During totality, when you can safely remove your solar filter, you will need to drastically change some of your settings but your aperture shouldn't change too much. If you’re using a telephoto lens, it is recommended that you use a range of anywhere between f/5.6 to f/11 to capture the full range of solar phenomena. And of course, if you’re using a wide-angle lens you will likely want to opt for a narrower aperture to make sure your foreground and the distant sun are both in focus.
Shutter Speed:
Shutter speed will also depend on the image you’re capturing. If you’re using a super-telephoto lens and higher focal lengths, you’ll need to use faster shutter speeds to reduce unwanted motion. While utilizing a solar filter, anything faster than 1/1000 of a second is a good starting place but be sure to review your images and compensate as needed. And, if you’re using a wider-angle lens you have much more flexibility and can often use much slower shutter speeds.
During totality, when you can remove your solar filter, things are very different. I would recommend bracketing your shutter speed so that you can capture a sequence of images at different exposures. During totality, the scene before you will have a massive dynamic range from the darkest shadows to the brightest highlights so bracketing is strongly recommended. You can then combine these into an HDR image in post-processing to bring out all the details. Many experts recommend bracketing from 1/8000 of a second all the way to roughly half a second.
ISO:
As with any style of photography, it’s a good idea to keep your ISO low to minimize noise while maintaining adequate shutter speed and aperture. Start with a low ISO setting, such as ISO 100 or 200, and adjust as needed based on lighting conditions and exposure requirements. Keep an eye on your histogram and review images frequently to make sure your results turn out how you expect.

Photographing the Eclipse
Now that we’ve gone over settings, let’s walk through the actual process of capturing images and tracking the sun throughout this journey. During the partial phases of a solar eclipse, use solar filters to capture detailed shots of the sun's crescent without risking sensor damage. I strongly recommend conducting exposure tests prior to the eclipse to determine the optimal settings for your camera and lighting conditions. It’s also a great idea to bracket your exposures to ensure you have all your bases covered and are capturing every bit of detail, especially if conditions change unexpectedly.
During totality, remove all filters to capture the mesmerizing sight of the solar corona. For this stage you’ll want to aggressively bracket exposures to accommodate for the massive dynamic range of the corona's brightness, ensuring you capture its intricate details. Keep in mind that totality is a brief and fleeting moment, so be prepared to make the most of this extraordinary opportunity, and be sure to dawn all safety equipment and filters before it’s too late.

Practice, Practice, Practice
Photographing a solar eclipse can be a very challenging, involving, and complex process. And, on top of that, these events only happen every now and then. Because of this, you’ll want to do everything you can to set yourself up for success. I strongly recommend watching videos, reading articles, and familiarizing yourself with this process, but by far the best thing you can do is practice. Once you get all the gear, head out on a bright sunny day and start capturing images of the sun. Experiment with different settings and see what works best with your setup. Pull images up on your computer and further check which settings worked the best. It’s also a great idea to do a test run through the whole entire process to make sure there are no surprises on eclipse day. It can’t be overstated just how important it is to practice this process before the actual event rolls around.

Conclusion
Photographing a solar eclipse is a thrilling and rewarding experience that requires careful planning, specialized equipment, and a commitment to safety. By understanding the different types and phases of eclipses, prioritizing safety precautions, mastering camera settings, and practicing, you can capture breathtaking images of this rare cosmic event. Remember to prepare in advance, stay flexible during the event, and above all, enjoy the awe-inspiring beauty of nature's cosmic dance.
I hope this article has been helpful and informative and I’ll see you on the next one. Until then, happy shooting!

We offer world-class travel photography
experiences around the world.
Each tour is bundled with lodging, meals, and transportation between workshops included, allowing you to focus on photography instead of the stress of traveling.
experiences around the world.
Each tour is bundled with lodging, meals, and transportation between workshops included, allowing you to focus on photography instead of the stress of traveling.
Get Our Trip Catalog
Receive a trip catalog that highlights all of our upcoming photo tours and workshops.Schedule a Trip Consultation
Meet with a photo experience coordinator, and experience a personal touch to your booking experience.Landscape Guide
Receive a FREE Landscape Cheat Sheet Written By a Pro Photographer.Webinars
Our regularly hosted webinars provide photography instruction from our own guides on a wide range of topics.Education Portal
Explore our library of articles that cover everything from common questions, to in-depth guides on how to achieve that perfect shot.
Backcountry Journeys
Connecting Passionate People To
Exceptional Experiences.
Exceptional Experiences.
Business Hours:
Mon-Fri, 8AM-4PM MT
928-478-1521
adventure@backcountryjourneys.com
Mon-Fri, 8AM-4PM MT
928-478-1521
adventure@backcountryjourneys.com
arrow_drop_down_circle
Divider Text
All Images & Content Are Property Of Backcountry Journeys Photography Tours, Workshops & Safaris LLC - Copyright 2026
About Us
Receive a Digital Trip Catalog
Find an upcoming photography tour with our interactive catalog.