Mon - Fri: 8 am - 4 pm MT

About Backcountry Journeys
Why Choose Backcountry Journeys
If you're considering a photography trip, hear why Backcountry Journeys delivers the best experience in the industry.Frequently Asked Questions
If you're new to photography trips, or new to BCJ, you can find our common travel questions here.Fitness Levels
Our trips vary on physical intensity, and by reviewing our fitness levels, you can find out which trips may be more challenging, or aligned more closely with your comfort level.Meet The Crew
We've built an amazing team of experienced guides, and dedicated office staff that elevate your travel experience. Get to know their backgrounds, and hear their stories.Loyalty Program
We reward our frequent photo adventurers with exclusive discounts on amazing photography trips.Contact Us
If you need to get in touch with our office staff, or have additional business inquiries, you can find our information here.Refer a Friend
Know someone perfect for one of our tours? Recommend them through this quick form.Stay Up To Date On All Things
Backcountry Journeys
Backcountry Journeys
Our Photography Community
Our Webinars
Our regularly hosted webinars provide photography instruction from our own guides on a wide range of topics.Our Education Portal
Explore our library of articles that cover everything from common questions, to in-depth guides on how to achieve that perfect shot.Community Testimonials
We're proud to foster an amazing group of photo travelers, and here you can find their stories from their past adventures.Resources For Photographers
About Our Company
Resources For Photographers
About Our Company
Mastering The Basics of Night Sky Photography
Published April 10, 2023
I’m constantly blown away by just how powerful modern digital cameras have become. From new and upgraded features to increased megapixels to incredibly high ISOs and lowlight performance, it’s pretty crazy to witness all this technological advancement. In today’s article, we’re going to focus on that last piece, increased lowlight performance, and more specifically the opportunities this can create in astrophotography and photographing the night sky.
Ever since I got my first DSLR and a tripod I fell in love with this unique style of photography and all the challenges it provides. Going out into the darkness with my camera felt like playing a complex game or solving a puzzle. You had to do several key things just right to get the results you were after.
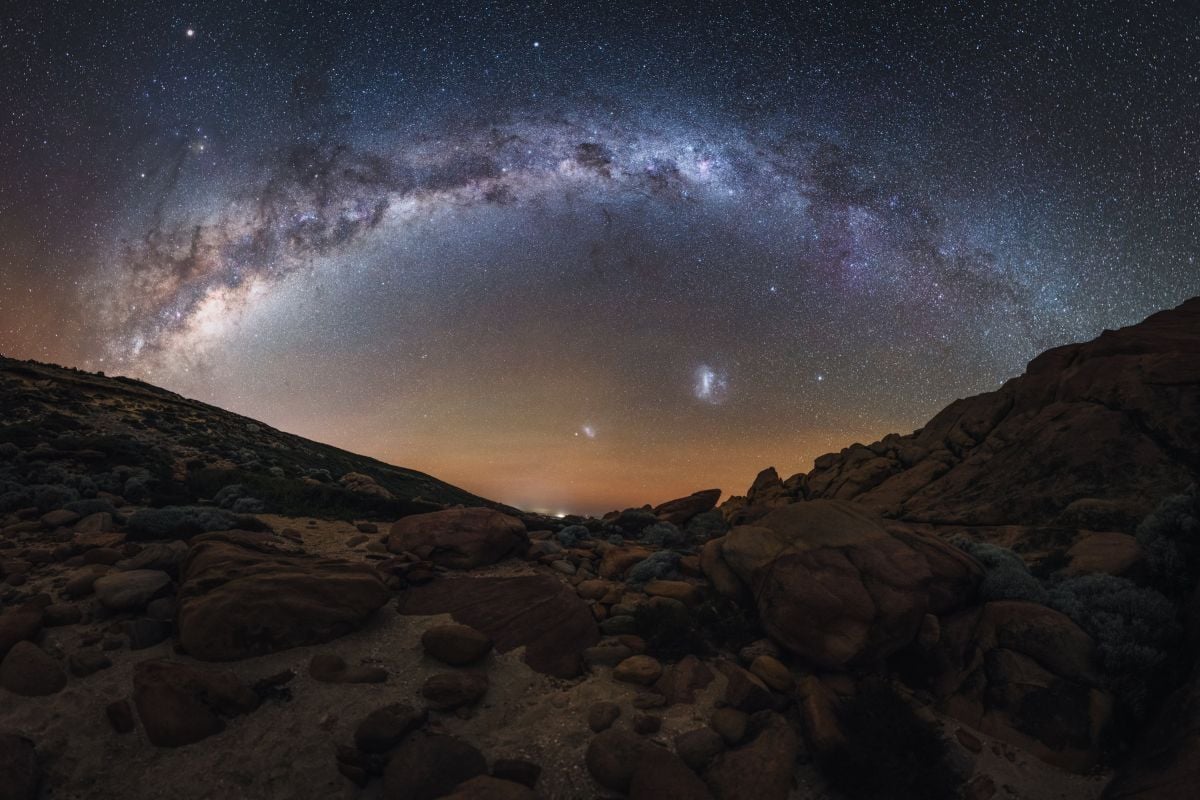
Bottom line, photographing the night sky can be a magical and awe-inspiring experience. Capturing stunning images of stars, the Milky Way galaxy, and other celestial objects is something truly magical that we can achieve relatively easily with the cameras available today and the right expertise. This style of photography requires specialized gear, knowledge, and techniques. In today’s article, we’ll be discussing all of the basic information you’ll need to get started in photographing the night sky.
Ever since I got my first DSLR and a tripod I fell in love with this unique style of photography and all the challenges it provides. Going out into the darkness with my camera felt like playing a complex game or solving a puzzle. You had to do several key things just right to get the results you were after.
Bottom line, photographing the night sky can be a magical and awe-inspiring experience. Capturing stunning images of stars, the Milky Way galaxy, and other celestial objects is something truly magical that we can achieve relatively easily with the cameras available today and the right expertise. This style of photography requires specialized gear, knowledge, and techniques. In today’s article, we’ll be discussing all of the basic information you’ll need to get started in photographing the night sky.
Equipment You’ll Need
To start, let’s take a look at the necessary equipment you’ll need to pull this off and capture some awesome long-exposure photographs of the night sky. This is simply a basic list of all the key pieces of equipment you’ll need. For more advanced photographers, there are plenty of additional accessories out there, but we'll focus on the basics in today's article.
A Camera
I’m sure this comes as no surprise but having a camera with manually adjustable settings is an absolute must. I’m sorry, but a simple point-and-shoot probably won’t cut it when shooting astrophotography. Any DSLR or mirrorless camera that allows you to manually control the shutter speed, aperture, and ISO will be able to get the job done. Even relatively affordable crop-sensor and micro four-thirds cameras will work just fine.
A Lens
Now that you have a camera that’ll get the job done, you’re going to need a lens. When it comes to ideal lenses for night sky photography, we’re going to need to get a little more specific. Ideally, you’ll want a wide-angle lens (anything under 35-45mm is preferable) that can achieve very wide apertures (under f/4 is great) and that you’re able to manually focus. A wide-angle lens is ideal because you’ll likely want to capture a wide field of view and more importantly avoid the shake/motion blur and star-trailing effects you may get with a higher focal length. Additionally, having a lower f-stop or aperture is key because this allows more light into your camera and you’re going to need to maximize this to capture images of the night sky. And finally, you’ll need to manually set your focus so that the stars themselves are the focal point of your image. It’s pretty much impossible for a camera to automatically focus on stars by itself.
A tripod
With the right camera and lens, you’ll now need a way to keep them perfectly still and stable while you capture images. One of the most important pieces of gear for astrophotography is a sturdy tripod. You can even hang some weight from the center of your tripod for added stability. Once you’ve found a composition you like make sure everything on your tripod is secured and you’re ready to start shooting.
A Remote Shutter Release or Delayed Shutter
Another very important key to long-exposure photography is to eliminate the tiny shaking that occurs when you press your shutter button. This may seem ridiculous as the action of your finger pressing a tiny button is so insignificant, but this can easily ruin a photograph. I would recommend using either a remote shutter or using your camera's built-in delayed shutter to eliminate this problem altogether. When shooting astrophotography, I always set a 2-second delay so that my camera has time to fully stabilize before releasing the shutter. If your camera has an electronic shutter (most new mirrorless cameras have this), I’d recommend using it to eliminate the motion created by a mechanical shutter opening and closing.
Always Bring a Headlamp
And finally, beyond camera equipment, you should make sure you always bring a headlamp. The best times to photograph the stars are on the darkest of nights when there’s reduced moonlight and pretty much no environmental light at all. Because of this, you’ll need to create your own light to get to where you’ll be shooting, change your camera settings, and potentially illuminate your foreground. A headlamp is an absolute must.
Mastering Your Camera Settings
Another important aspect of capturing night sky images is to select the correct manual camera settings. This is a very precise style of photography and you’ll need to choose the right ISO, aperture, and shutter speed to pull it off.
ISO
You’ll want to set your ISO high to make your sensor more sensitive to light, but, as usual, you never want to go too high as this will add unwanted digital noise to your images. You’ll have to experiment with this setting to get it just right and make sure to review your images at 100% zoom to make sure there isn’t a ton of noise ruining your image.
Aperture
As I mentioned when discussing what type of lens you’ll need, it’s important to choose a very wide aperture to let in as much light as possible. I pretty much always try to keep my aperture below f/4 when shooting astrophotography and if you can go even lower that’s probably ideal. The one downside to this is that if you have something relatively close to you in the foreground and you’re focusing on the stars it will be out of focus. You can always try to take multiple exposures and focus stack, but this can be difficult if you haven’t done it before. Regardless, you’ll need as much light as you can get so a nice wide aperture is recommended.
Shutter Speed
To complete the exposure triangle, we’ll discuss shutter speed. Just like before you’ll have to play around with this in comparison to other settings. You’ll need a longer shutter speed to let more light into your sensor but if you choose something too long (maybe over 15 seconds) you might get the star trail effect. Because the earth is rotating and the stars are constantly moving across the sky, opening your shutter for too long will capture this movement making the stars in your image appear as small streaks instead of dots. So, choose a shutter speed that lets enough light in but doesn’t cause this effect.
Low LCD Brightness
This is another very important setting to change on your camera that I didn’t know about for the longest time. Since you will be shooting in complete darkness it is very important to turn down the brightness of your camera's LCD screen if possible. This is to ensure that when you review your images in the dark, they will look similar to when you view them in daylight. The number of times I’ve had my LCD brightness turned all the way up and thought an image was perfectly exposed only to discover it’s hardly visible at all when I got home is absurd. Do yourself a favor and avoid the mistakes I, and many other photographers, have made.
Tips and Tricks
Now that we’ve gone over equipment and camera settings let's discuss some effective tips and tricks that will increase your chances of success when photographing the night sky.
Plan Ahead
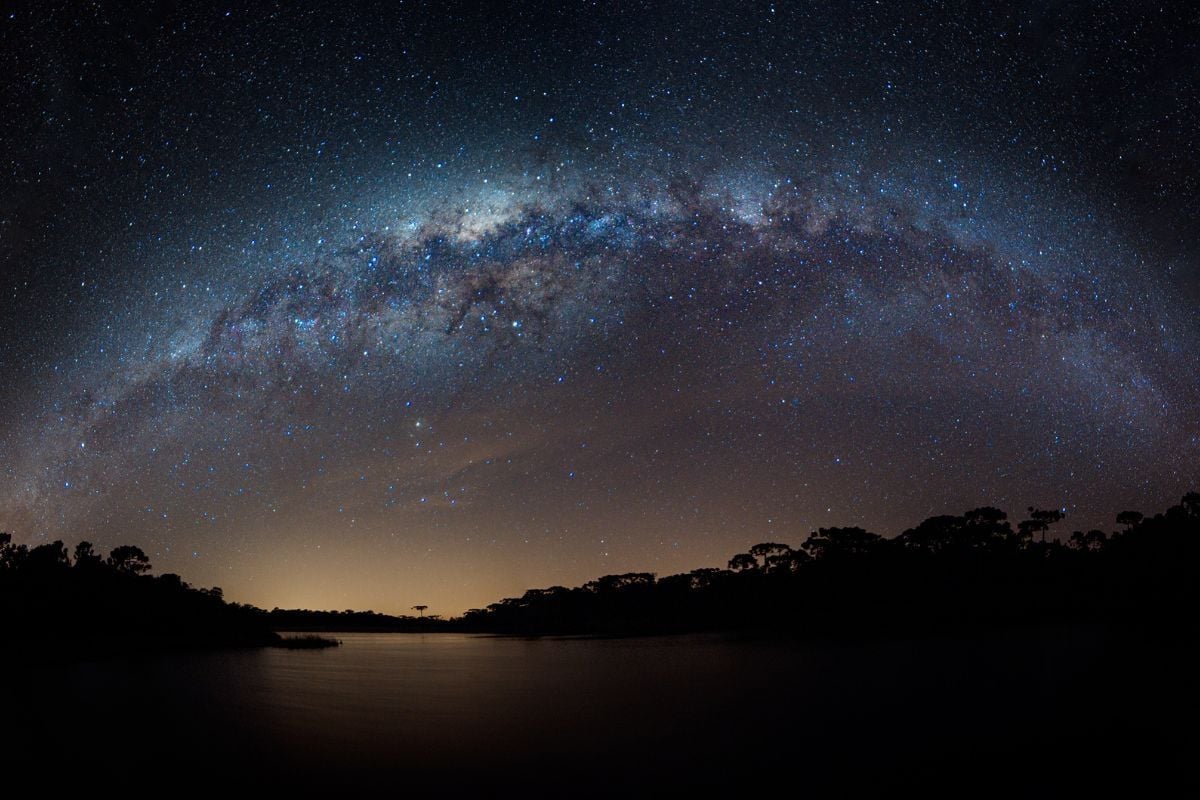
Just like anything in photography, and life for that matter, it’s never a bad idea to plan ahead. I’m a huge proponent of spontaneity and often say “the best plan is no plan” but when it comes to astrophotography this is not the case. You should find a location that is far away from any sources of light pollution. The farther away you are from a city or town the better. If you can put a ridge or mountain between you and a distant source of light, that's icing on the cake. In addition, you’ll want to do some research to make sure that you’ll have a nice clear sky with no clouds, fog, or air pollution and that there isn’t going to be a full moon drowning out the starlight you’re trying to capture. Some moonlight isn’t necessarily an issue and can even illuminate your foreground nicely, but a full moon will likely ruin your chances of capturing a stunning image. Set yourself up for success before you put all the effort in.
Use the Rule of 500
As I mentioned before, having too long of a shutter speed can cause the star trail effect in your images. The maximum shutter speed you can use, of course, depends on the focal length of your lens. A great rule of thumb to avoid this is the Rule of 500. to determine the maximum shutter speed you can use, simply divide 500 by your focal length to get the maximum shutter speed in seconds. For example, if you are using a 24mm lens, the maximum shutter speed is 20 seconds (500/24=20.83). This is another thing I didn’t know for a long time that will save you from unnecessary suffering. It's worth mentioning that this only applies to full-frame cameras. With crop-sensor or micro four-thirds sensors, you'll need to use a number lower than 500 as these sensors are more zoomed in and replicate a larger focal length lens.
Experiment with Illuminating your Foreground
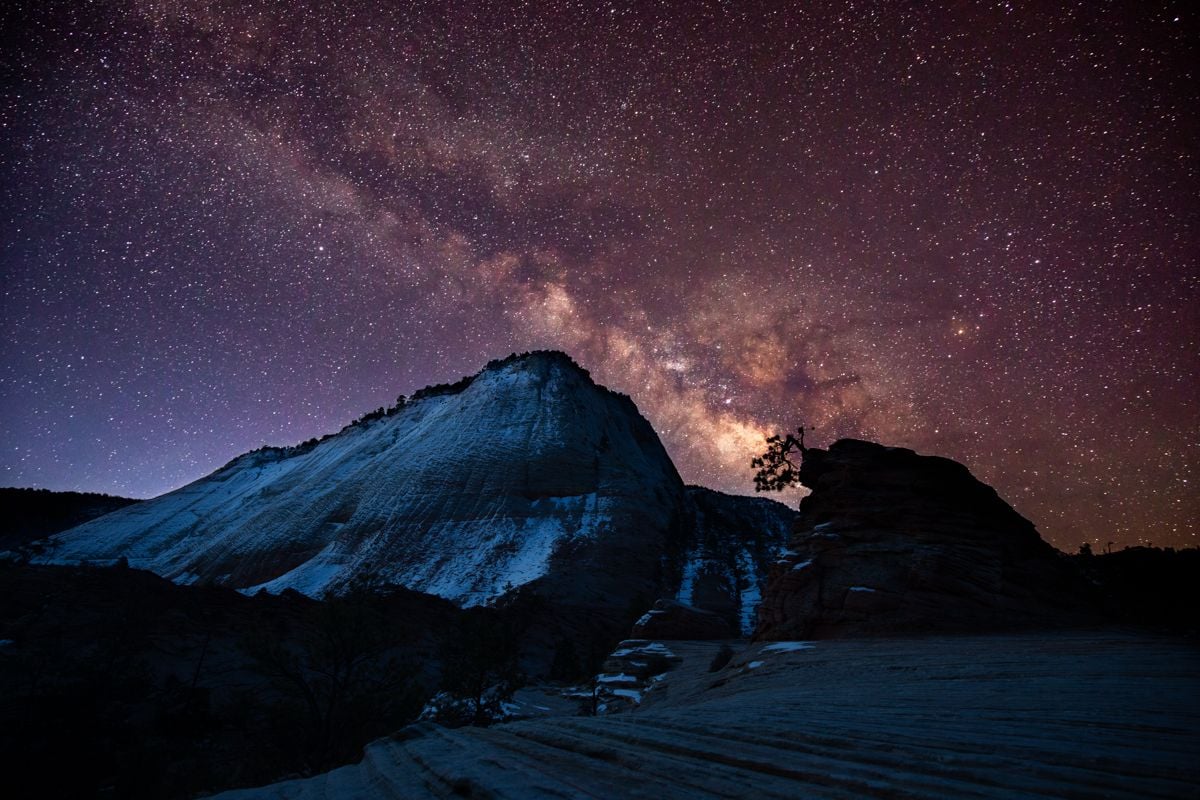
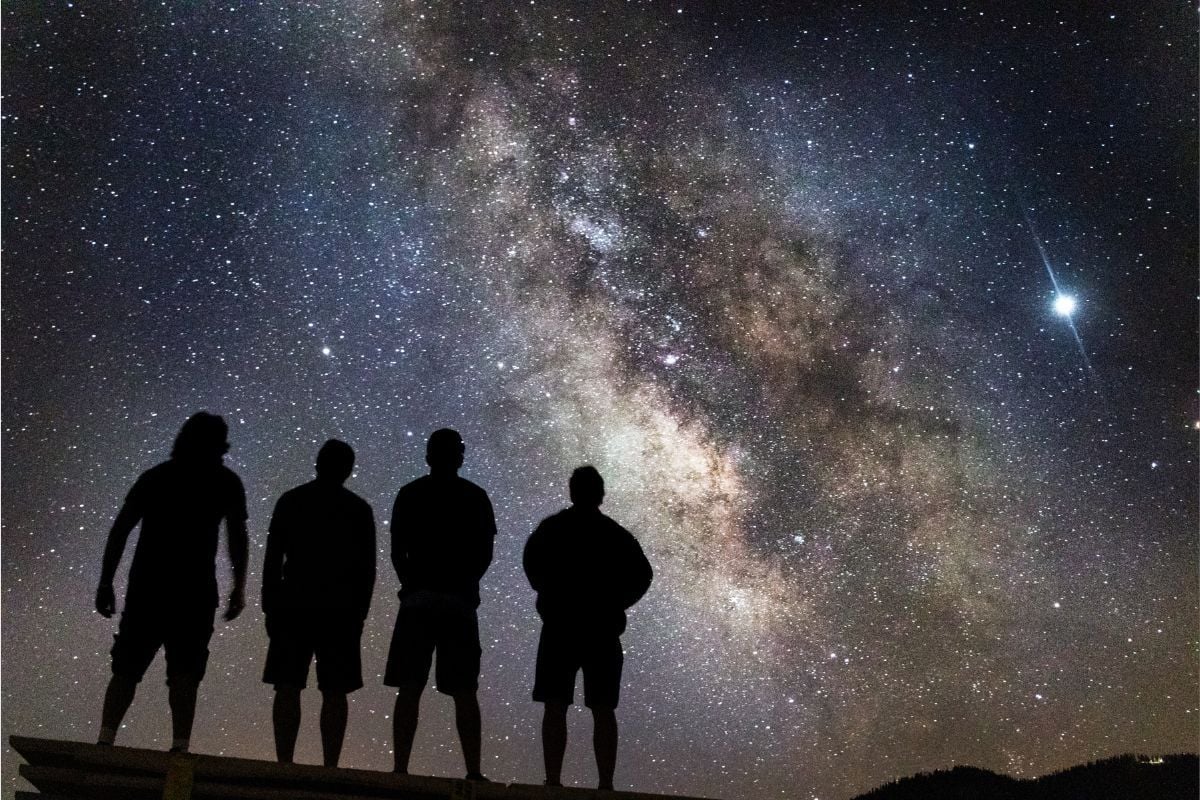
When shooting the night sky, it’s very common for any foreground elements in your image to be completely dark silhouettes. Sometimes this is desired, but if not, it’s always fun to experiment with illuminating your foreground. You can use your phone, a flashlight, a headlamp, or really any light source to do this. I’ll usually take multiple images and illuminate my foreground for different amounts of time until I capture an image I’m satisfied with. This can be an easy way to create a more interesting image.
Now that we’ve gone over equipment and camera settings let's discuss some effective tips and tricks that will increase your chances of success when photographing the night sky.
Plan Ahead
Just like anything in photography, and life for that matter, it’s never a bad idea to plan ahead. I’m a huge proponent of spontaneity and often say “the best plan is no plan” but when it comes to astrophotography this is not the case. You should find a location that is far away from any sources of light pollution. The farther away you are from a city or town the better. If you can put a ridge or mountain between you and a distant source of light, that's icing on the cake. In addition, you’ll want to do some research to make sure that you’ll have a nice clear sky with no clouds, fog, or air pollution and that there isn’t going to be a full moon drowning out the starlight you’re trying to capture. Some moonlight isn’t necessarily an issue and can even illuminate your foreground nicely, but a full moon will likely ruin your chances of capturing a stunning image. Set yourself up for success before you put all the effort in.
Use the Rule of 500
As I mentioned before, having too long of a shutter speed can cause the star trail effect in your images. The maximum shutter speed you can use, of course, depends on the focal length of your lens. A great rule of thumb to avoid this is the Rule of 500. to determine the maximum shutter speed you can use, simply divide 500 by your focal length to get the maximum shutter speed in seconds. For example, if you are using a 24mm lens, the maximum shutter speed is 20 seconds (500/24=20.83). This is another thing I didn’t know for a long time that will save you from unnecessary suffering. It's worth mentioning that this only applies to full-frame cameras. With crop-sensor or micro four-thirds sensors, you'll need to use a number lower than 500 as these sensors are more zoomed in and replicate a larger focal length lens.
Experiment with Illuminating your Foreground
When shooting the night sky, it’s very common for any foreground elements in your image to be completely dark silhouettes. Sometimes this is desired, but if not, it’s always fun to experiment with illuminating your foreground. You can use your phone, a flashlight, a headlamp, or really any light source to do this. I’ll usually take multiple images and illuminate my foreground for different amounts of time until I capture an image I’m satisfied with. This can be an easy way to create a more interesting image.
Conclusion
Well, there you have it. In writing this article, I tried to think of all the things I wish I knew when I was first getting started in astrophotography. I learned so much through trial and error and I hope this article can help to spare some of you from any unnecessary frustration. Photographing the night sky is an incredibly special and magical style of photography. I strongly recommend that anyone with the capability gets out there and tries it for themselves. It’s pretty incredible that we can capture the beauty of the night sky with a small metal and plastic box and a few pieces of glass. I hope this article has been informative and I wish you all the best of luck the next time you head out in the dead of night with your cameras and tripods. Until next time.
Well, there you have it. In writing this article, I tried to think of all the things I wish I knew when I was first getting started in astrophotography. I learned so much through trial and error and I hope this article can help to spare some of you from any unnecessary frustration. Photographing the night sky is an incredibly special and magical style of photography. I strongly recommend that anyone with the capability gets out there and tries it for themselves. It’s pretty incredible that we can capture the beauty of the night sky with a small metal and plastic box and a few pieces of glass. I hope this article has been informative and I wish you all the best of luck the next time you head out in the dead of night with your cameras and tripods. Until next time.

We offer world-class travel photography
experiences around the world.
Each tour is bundled with lodging, meals, and transportation between workshops included, allowing you to focus on photography instead of the stress of traveling.
experiences around the world.
Each tour is bundled with lodging, meals, and transportation between workshops included, allowing you to focus on photography instead of the stress of traveling.
Get Our Trip Catalog
Receive a trip catalog that highlights all of our upcoming photo tours and workshops.Schedule a Trip Consultation
Meet with a photo experience coordinator, and experience a personal touch to your booking experience.Landscape Guide
Receive a FREE Landscape Cheat Sheet Written By a Pro Photographer.Webinars
Our regularly hosted webinars provide photography instruction from our own guides on a wide range of topics.Education Portal
Explore our library of articles that cover everything from common questions, to in-depth guides on how to achieve that perfect shot.
Backcountry Journeys
Connecting Passionate People To
Exceptional Experiences.
Exceptional Experiences.
Business Hours:
Mon-Fri, 8AM-4PM MT
928-478-1521
adventure@backcountryjourneys.com
Mon-Fri, 8AM-4PM MT
928-478-1521
adventure@backcountryjourneys.com
arrow_drop_down_circle
Divider Text
All Images & Content Are Property Of Backcountry Journeys Photography Tours, Workshops & Safaris LLC - Copyright 2026
About Us
Receive a Digital Trip Catalog
Find an upcoming photography tour with our interactive catalog.