Mon - Fri: 8 am - 4 pm MT

About Backcountry Journeys
Why Choose Backcountry Journeys
If you're considering a photography trip, hear why Backcountry Journeys delivers the best experience in the industry.Frequently Asked Questions
If you're new to photography trips, or new to BCJ, you can find our common travel questions here.Fitness Levels
Our trips vary on physical intensity, and by reviewing our fitness levels, you can find out which trips may be more challenging, or aligned more closely with your comfort level.Meet The Crew
We've built an amazing team of experienced guides, and dedicated office staff that elevate your travel experience. Get to know their backgrounds, and hear their stories.Loyalty Program
We reward our frequent photo adventurers with exclusive discounts on amazing photography trips.Contact Us
If you need to get in touch with our office staff, or have additional business inquiries, you can find our information here.Refer a Friend
Know someone perfect for one of our tours? Recommend them through this quick form.Stay Up To Date On All Things
Backcountry Journeys
Backcountry Journeys
Our Photography Community
Our Webinars
Our regularly hosted webinars provide photography instruction from our own guides on a wide range of topics.Our Education Portal
Explore our library of articles that cover everything from common questions, to in-depth guides on how to achieve that perfect shot.Community Testimonials
We're proud to foster an amazing group of photo travelers, and here you can find their stories from their past adventures.Resources For Photographers
About Our Company
Resources For Photographers
About Our Company
Mastering the Art of Long Exposure Photography
Published May 19, 2023
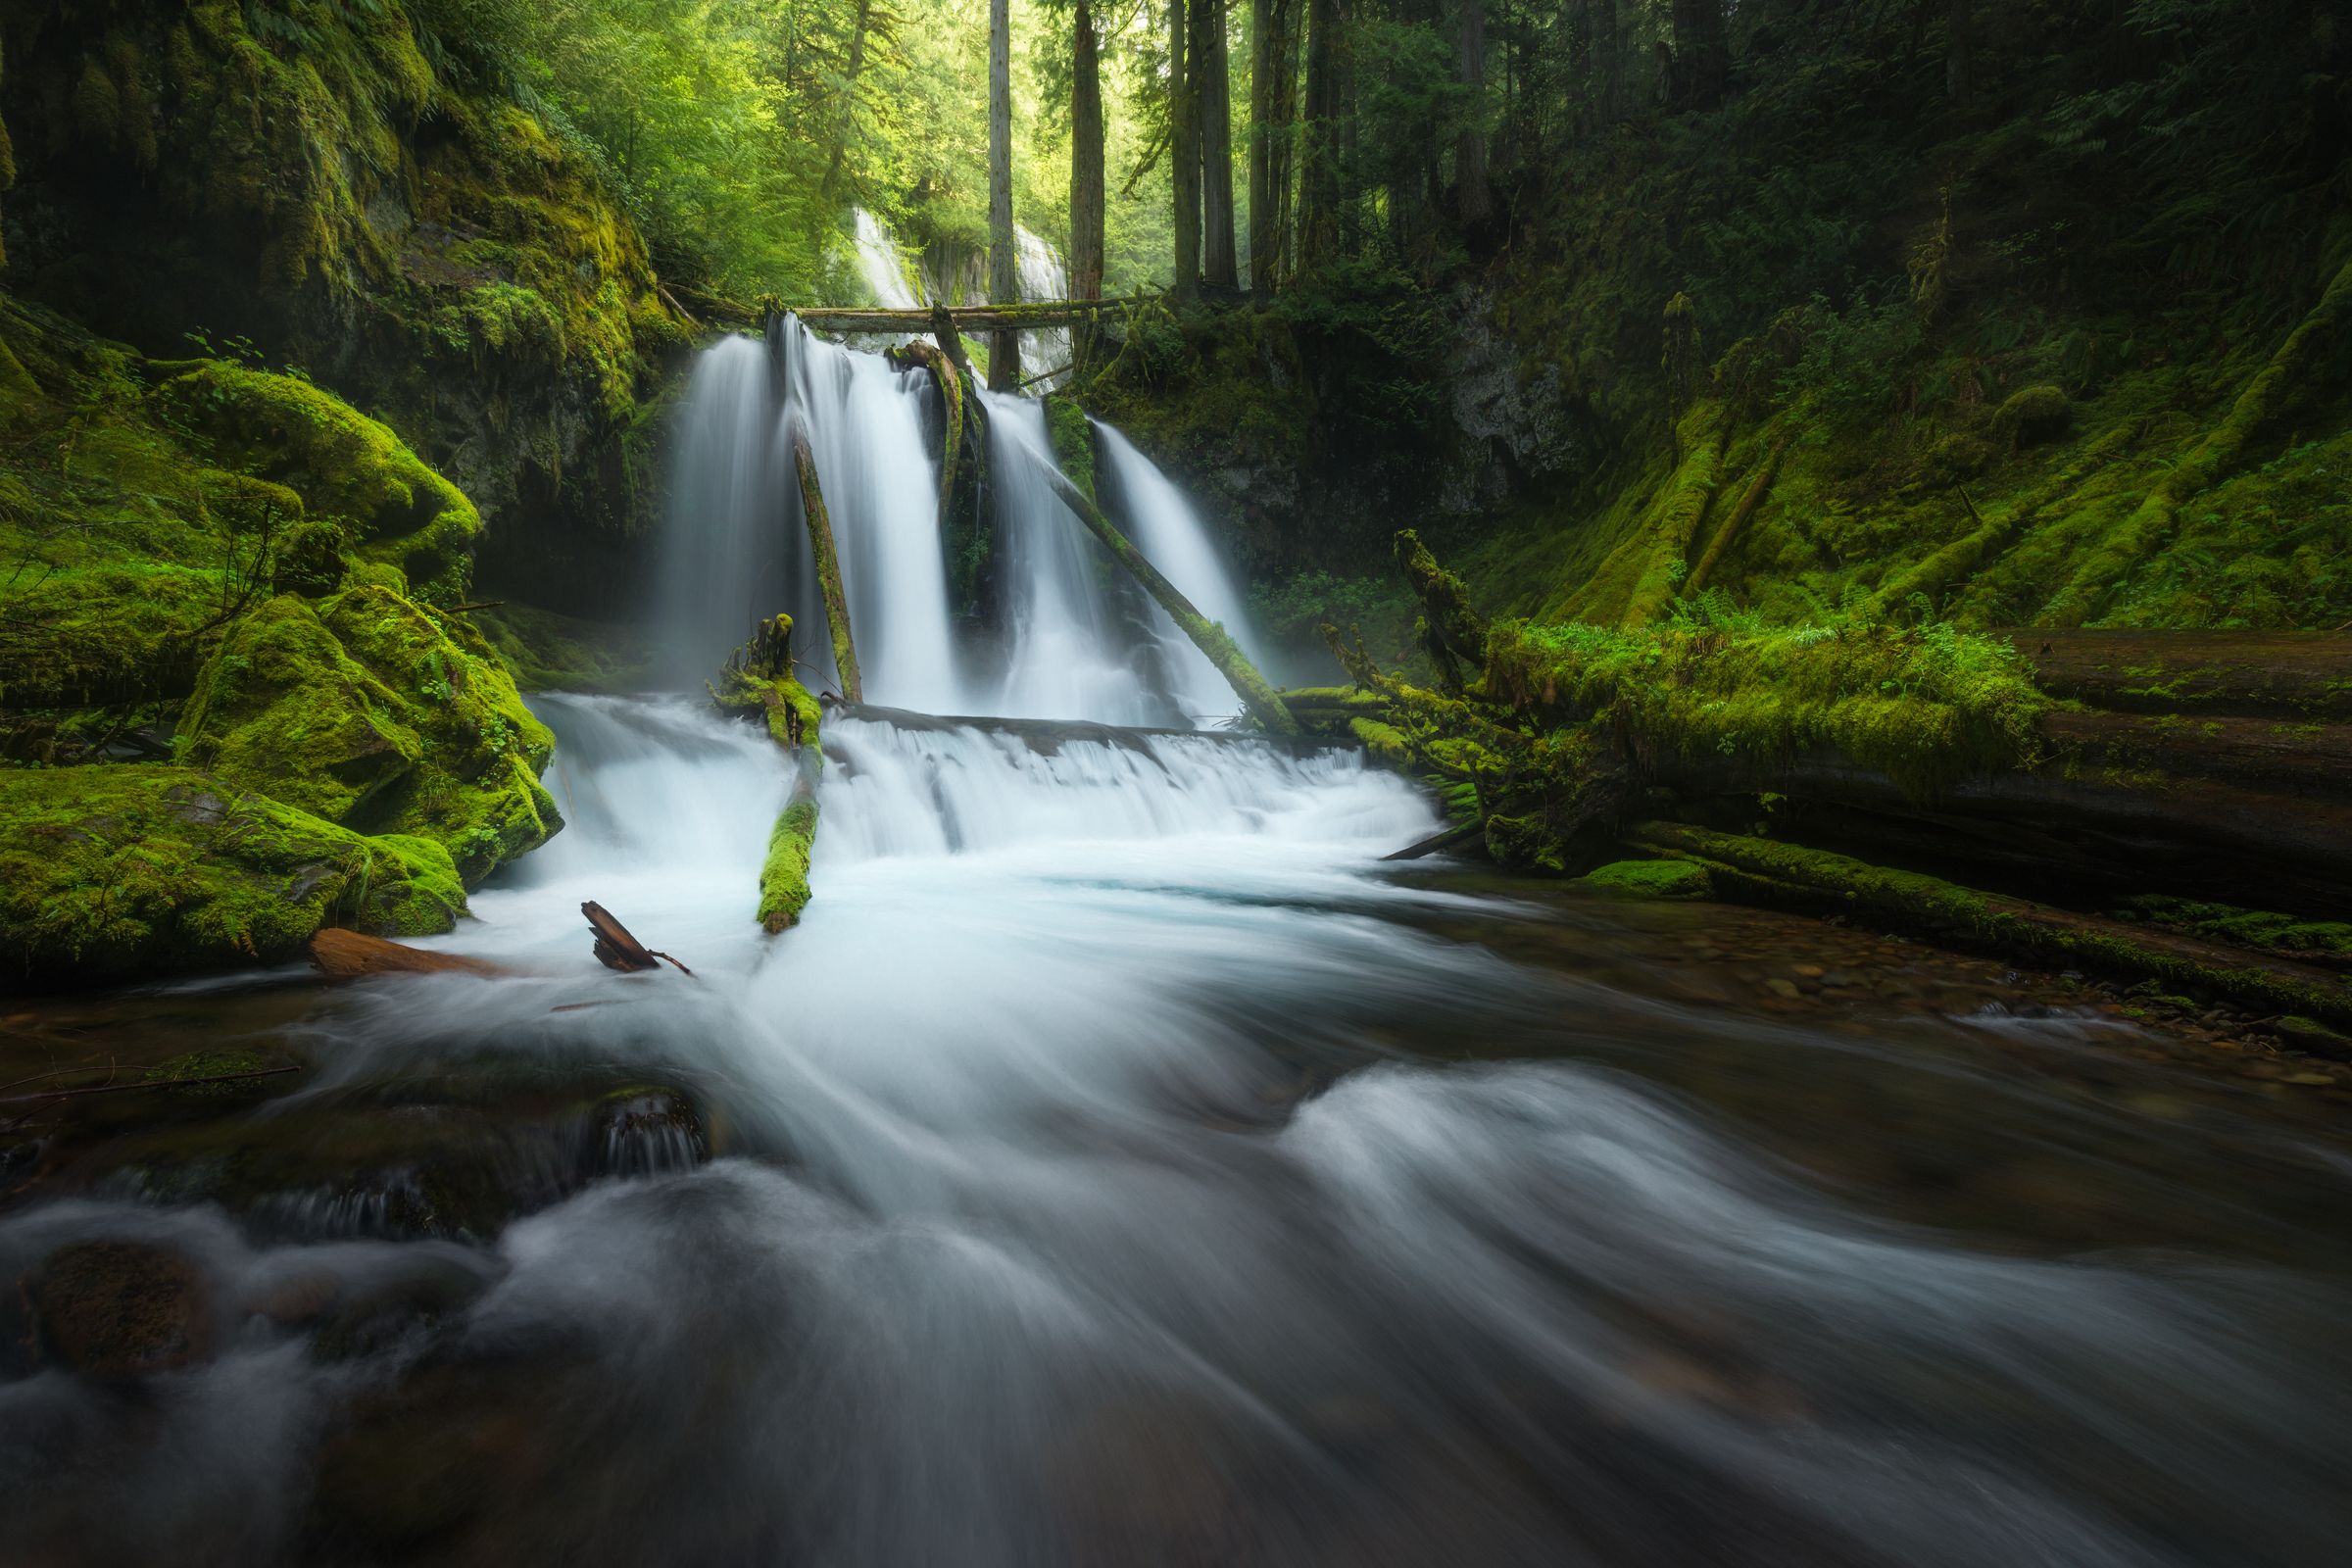
Have you ever seen an image of a waterfall or stream where the water looks like soft and silky white thread?
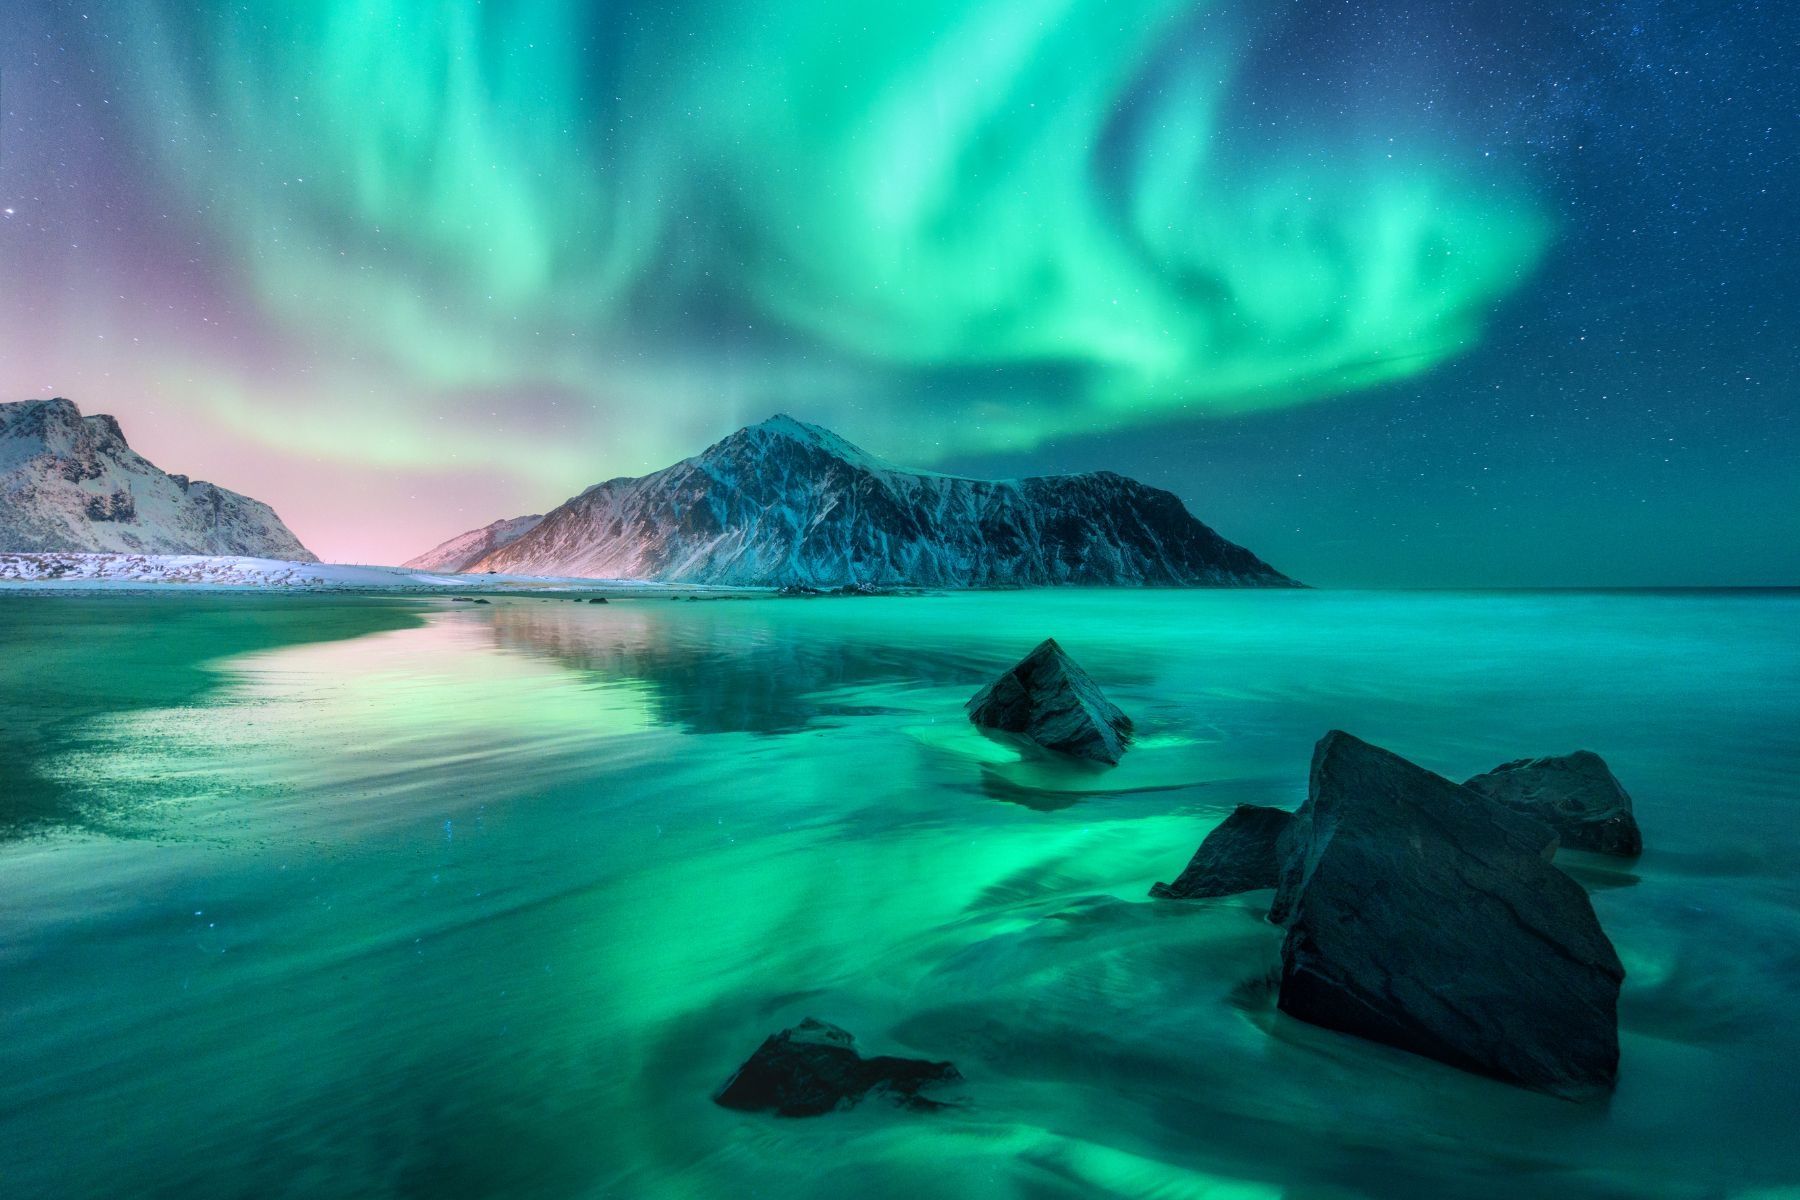
Or perhaps a photograph of the night sky with the center of the Milky Way galaxy brightly illuminated? Images like these can be absolutely stunning and intriguing but this isn’t what we see with the naked eye.
So, how is this possible? How did these photographers manage to capture these scenes in such a way? The answer is long-exposure photography. This is a concept that many of you are likely already familiar with and it’s really not too complicated when you start to break it down.
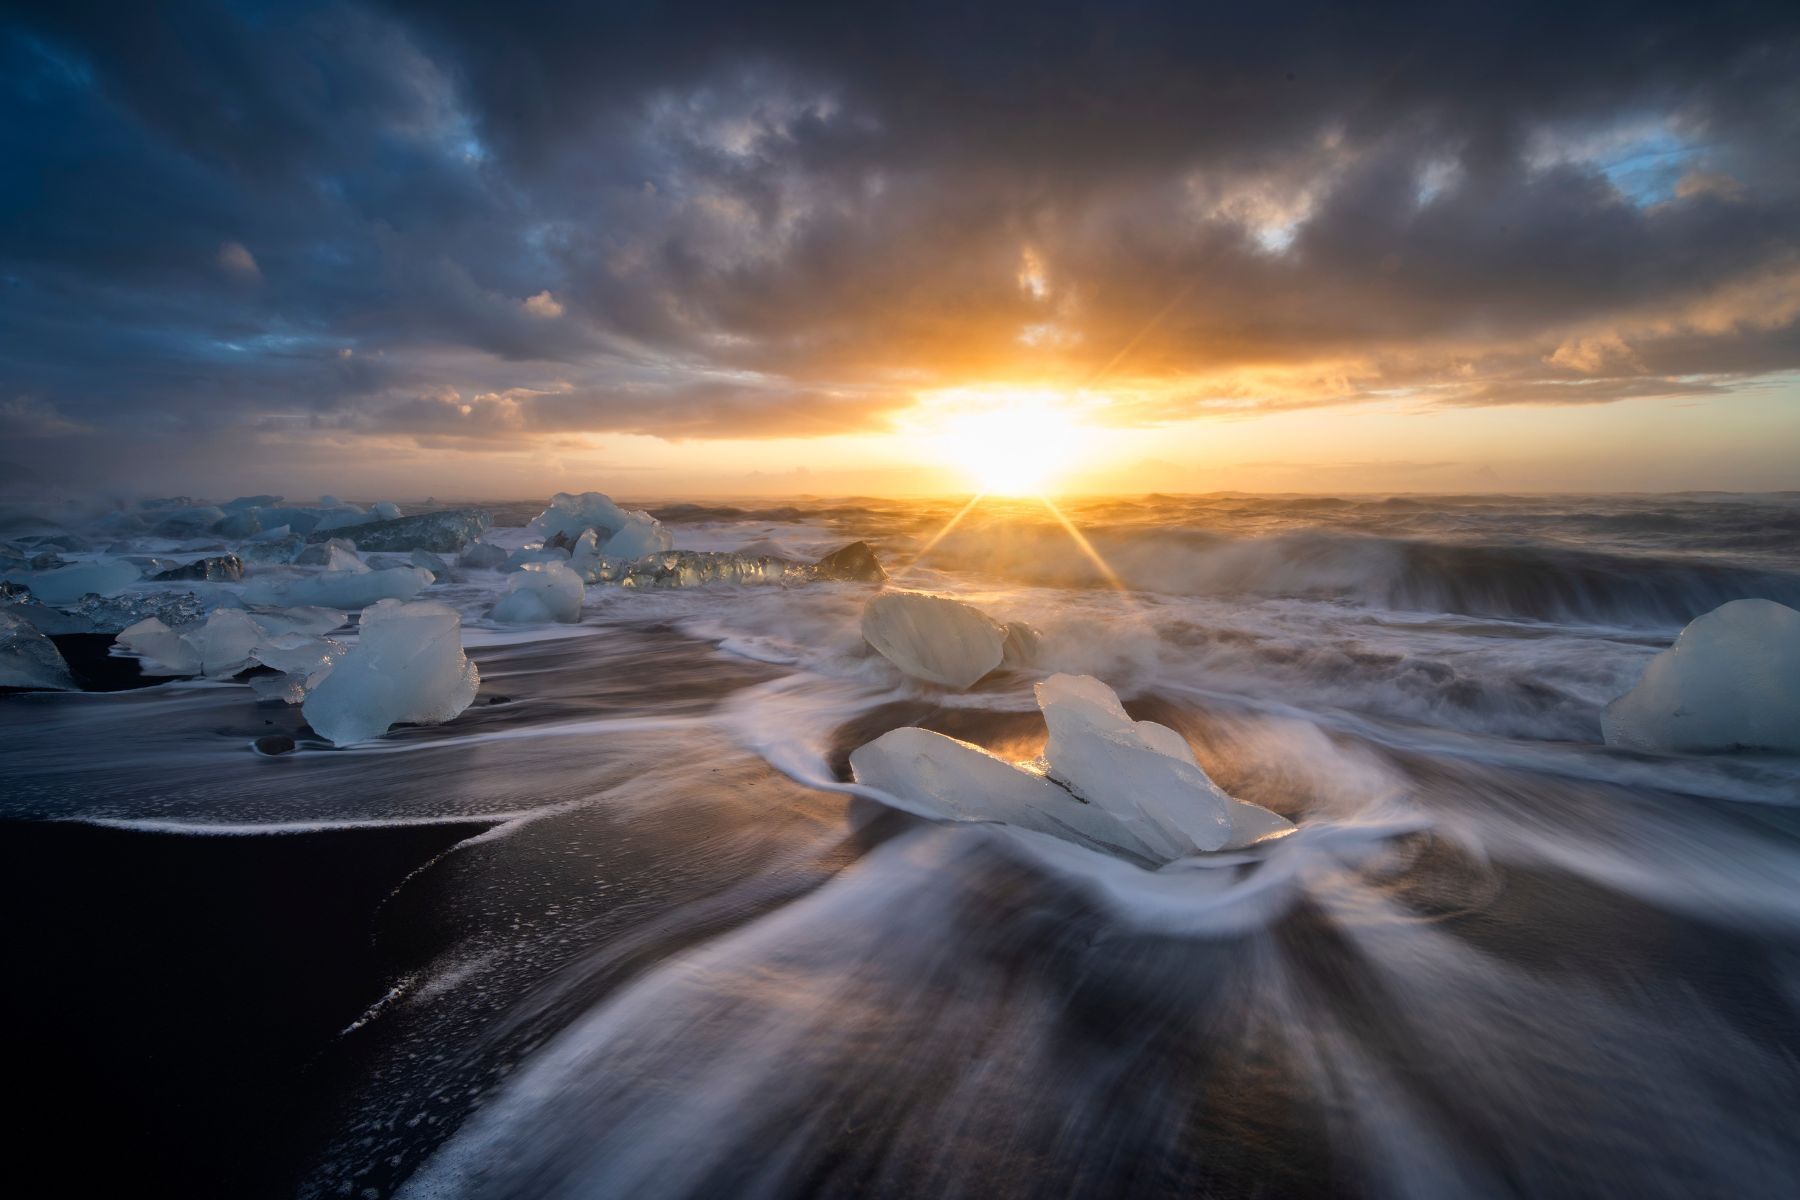
Long-exposure photography is a captivating technique that allows photographers to create stunning images by manipulating light and time. This style of photography involves using longer shutter speeds to capture the passage of time, resulting in unique and often surreal images. By exposing your sensor to light for long periods you can create images that would otherwise be impossible.
In today’s article, we’re going to delve into the world of long-exposure photography, discussing everything from the equipment you need to the techniques and creative possibilities that await you. This might seem overwhelming at first but after reading this article you’ll hopefully have a better understanding of long-exposure photography and will be ready to start experimenting yourself.
Or perhaps a photograph of the night sky with the center of the Milky Way galaxy brightly illuminated? Images like these can be absolutely stunning and intriguing but this isn’t what we see with the naked eye.
So, how is this possible? How did these photographers manage to capture these scenes in such a way? The answer is long-exposure photography. This is a concept that many of you are likely already familiar with and it’s really not too complicated when you start to break it down.
Long-exposure photography is a captivating technique that allows photographers to create stunning images by manipulating light and time. This style of photography involves using longer shutter speeds to capture the passage of time, resulting in unique and often surreal images. By exposing your sensor to light for long periods you can create images that would otherwise be impossible.
In today’s article, we’re going to delve into the world of long-exposure photography, discussing everything from the equipment you need to the techniques and creative possibilities that await you. This might seem overwhelming at first but after reading this article you’ll hopefully have a better understanding of long-exposure photography and will be ready to start experimenting yourself.
Understanding the Basics
Long exposure photography is the art of using extended shutter speeds to capture the effects of time passing in a single photograph. By allowing more light to enter the camera sensor over an extended period, you can create interesting effects such as motion blur, light trails, and smooth water surfaces. You can also make things that normally appear quite dark, such as stars in the night sky, appear much brighter. This is a technique that can completely transform your photography and that will allow you to capture images you never thought possible.
In many styles of photography, the goal is to freeze a quick moment in time. If you’re shooting handheld, you need a relatively fast shutter speed because there’s nothing to hold your camera perfectly steady relative to its surroundings. If you’re photographing wildlife, you want a very fast shutter speed to capture your subject in crystal clear sharpness. Due to the longer focal lengths that you might be shooting at and the fact that your subject is moving a fast or short shutter speed is very important. This also applies to action photography or shooting sports. And in many cases, if you’re shooting portraits or even landscapes a faster shutter speed is quite common.
Long-exposure photography is the opposite of this. Instead of freezing a crystal-clear split second in time, the aim is to portray the passage of time. I absolutely love shooting long-exposure images and this is just another skill set you can add to your arsenal. So, how does one start experimenting in long-exposure photography? Let’s break down the basics.

Equipment You’ll Need
We’ll start out with a discussion on the equipment you’ll need. Unfortunately, you can’t expect to capture a stunning long-exposure image with a handheld point-and-shoot and nothing else. There are a few key accessories you’ll need to get started.
First and foremost, you’ll need a camera that is capable of capturing long exposures. Really, any camera with manual controls such as a mirrorless or DSLR will do just fine. You’ll just want to make sure that you can manually control the shutter speed, aperture, and ISO. A camera that can use interchangeable lenses is an added bonus as this will give you much more flexibility on your composition.
You’ll also need a sturdy tripod. This is by far the most important accessory when it comes to long-exposure photography. It’s vital that your camera stays absolutely still while capturing your image and a tripod is the best way to do this while also providing flexibility in how you position your camera. I’ve wedged my camera between some rocks or on the ground and attempted to capture long-exposure images, but a tripod is the way to go without a doubt.
Another great accessory is a remote shutter release. This is a device that allows you to open and close your camera’s shutter without pressing the shutter button. Every time you press your camera’s shutter button, you’re introducing minute motion into your image which can cause it to be blurry and less sharp. If you can avoid touching your camera altogether, you can greatly reduce and eliminate this unwanted camera shake. You can alternatively use a built-in delayed shutter if your camera has this option, but a remote shutter often produces better results.
If you plan to shoot long exposure images during the day or when there is a lot of environmental light, a neutral density or ND filter is absolutely necessary. This is a filter that screws onto the front of your lens and reduces the amount of light entering your camera. There are adjustable ND filters that allow you to adjust the darkness, or you can buy ones with set darkness. I use mine all the time if I’m shooting waterfalls or streams and want to achieve longer shutter speeds sometimes up to 10 seconds long.
Camera Settings and Techniques
Now that we’ve discussed what you’ll need let’s dive into the specifics of how to use these tools to their greatest ability.
To get set up you’ll initially want to find a composition that is pleasing to the eye. I often take handheld shots before setting up my tripod to see what a specific composition will look like. through my camera and lens. Once I’ve found something that I think will work I get my tripod out and set it up so that it is on stable ground and so that my camera is exactly where I want it. If it’s a bit breezy or windy you can always hang some weight from your tripod to stabilize it even more. Now that my camera is in the desired location, I’ll start choosing the settings I need.
To set up your camera for long-exposure photography, make sure you’re in manual mode to have full control over your settings. You’ll want to first select what shutter speed you’ll be shooting at as this will alter the look and feel of your image. Once you have found a shutter speed you think will work, you’ll then adjust the other settings to create the right exposure. You’ll want to choose an aperture that creates a desired depth of field and an ISO to control the brightness of your image. I try to keep my ISO as low as possible to prevent the addition of unwanted noise. And since you have flexibility with shutter speed you no longer need to entirely compensate for a lack of environmental light with your ISO. You’ll have to mess around with your settings quite a bit to achieve your desired shot and as you change your shutter speed, you’ll have to constantly be adjusting the other settings to control your exposure. This is a bit of a balancing act but practice makes perfect.
On top of camera settings, you’ll want to make sure that you are either using a remote shutter release or at the very least a delayed shutter. As I mentioned before you don’t want any camera shake or motion introduced into your image as this will create blurriness and reduce sharpness. And if it’s bright out make sure to use your ND filter as well.
Once you’ve taken all of this into account, the rest is really up to you. Now that you know how to properly achieve long exposures, it’s time to get out there and experiment. The best way to learn anything is to practice it. I’d recommend going out during the daytime and at night to see what you can capture with your camera.
Conclusion
In conclusion, long-exposure photography allows you to create magical and unique images. By allowing light to enter your sensor for longer periods of time you can portray the passage of time itself. It’s important that you have all the right accessories and know how to use them before going out and after that it’s really about exercising the proper techniques and experimenting. I strongly recommend that every photographer tries this style out at one point or another and I hope you’re able to capture some stunning images.
In conclusion, long-exposure photography allows you to create magical and unique images. By allowing light to enter your sensor for longer periods of time you can portray the passage of time itself. It’s important that you have all the right accessories and know how to use them before going out and after that it’s really about exercising the proper techniques and experimenting. I strongly recommend that every photographer tries this style out at one point or another and I hope you’re able to capture some stunning images.

We offer world-class travel photography
experiences around the world.
Each tour is bundled with lodging, meals, and transportation between workshops included, allowing you to focus on photography instead of the stress of traveling.
experiences around the world.
Each tour is bundled with lodging, meals, and transportation between workshops included, allowing you to focus on photography instead of the stress of traveling.
Get Our Trip Catalog
Receive a trip catalog that highlights all of our upcoming photo tours and workshops.Schedule a Trip Consultation
Meet with a photo experience coordinator, and experience a personal touch to your booking experience.Landscape Guide
Receive a FREE Landscape Cheat Sheet Written By a Pro Photographer.Webinars
Our regularly hosted webinars provide photography instruction from our own guides on a wide range of topics.Education Portal
Explore our library of articles that cover everything from common questions, to in-depth guides on how to achieve that perfect shot.
Backcountry Journeys
Connecting Passionate People To
Exceptional Experiences.
Exceptional Experiences.
Business Hours:
Mon-Fri, 8AM-4PM MT
928-478-1521
adventure@backcountryjourneys.com
Mon-Fri, 8AM-4PM MT
928-478-1521
adventure@backcountryjourneys.com
arrow_drop_down_circle
Divider Text
All Images & Content Are Property Of Backcountry Journeys Photography Tours, Workshops & Safaris LLC - Copyright 2026
About Us
Receive a Digital Trip Catalog
Find an upcoming photography tour with our interactive catalog.