Mon - Fri: 8 am - 4 pm MT

About Backcountry Journeys
Why Choose Backcountry Journeys
If you're considering a photography trip, hear why Backcountry Journeys delivers the best experience in the industry.Frequently Asked Questions
If you're new to photography trips, or new to BCJ, you can find our common travel questions here.Fitness Levels
Our trips vary on physical intensity, and by reviewing our fitness levels, you can find out which trips may be more challenging, or aligned more closely with your comfort level.Meet The Crew
We've built an amazing team of experienced guides, and dedicated office staff that elevate your travel experience. Get to know their backgrounds, and hear their stories.Loyalty Program
We reward our frequent photo adventurers with exclusive discounts on amazing photography trips.Contact Us
If you need to get in touch with our office staff, or have additional business inquiries, you can find our information here.Refer a Friend
Know someone perfect for one of our tours? Recommend them through this quick form.Stay Up To Date On All Things
Backcountry Journeys
Backcountry Journeys
Our Photography Community
Our Webinars
Our regularly hosted webinars provide photography instruction from our own guides on a wide range of topics.Our Education Portal
Explore our library of articles that cover everything from common questions, to in-depth guides on how to achieve that perfect shot.Community Testimonials
We're proud to foster an amazing group of photo travelers, and here you can find their stories from their past adventures.Resources For Photographers
About Our Company
Resources For Photographers
About Our Company
Refining Your Craft: A Guide to Landscape Photography for Advanced Photographers
Published April 3, 2023
Last week I wrote an in-depth guide to landscape photography for novice photographers or those of us who are relatively new to this style of photography. In that article, I covered all the basic elements and factors that go into landscape photography from camera settings to basic compositions to what gear you’ll need. Definitely give that one a read if you’re just getting started on your photography journey or if you want some refreshers.
In today’s article, I’ll be discussing some key factors that more advanced or experienced photographers can focus on when shooting landscapes. Because more experienced photographers have likely mastered the basics and know how to regularly achieve pleasing landscape images in ideal conditions, today’s article is going to focus on areas of experimentation. Things that photographers can do to alter the look and feel of their images as well as more advanced styles and techniques of landscape photography.
That being said, although today’s article is targeted towards more experienced photographers, don’t be driven away if you’re not an expert. Even if you are relatively new to landscape photography you can still learn a thing or two and, in my opinion, it’s never too early to start experimenting with new styles of photography. So, let’s get into it and discuss some more advanced and experimental elements of landscape photography.
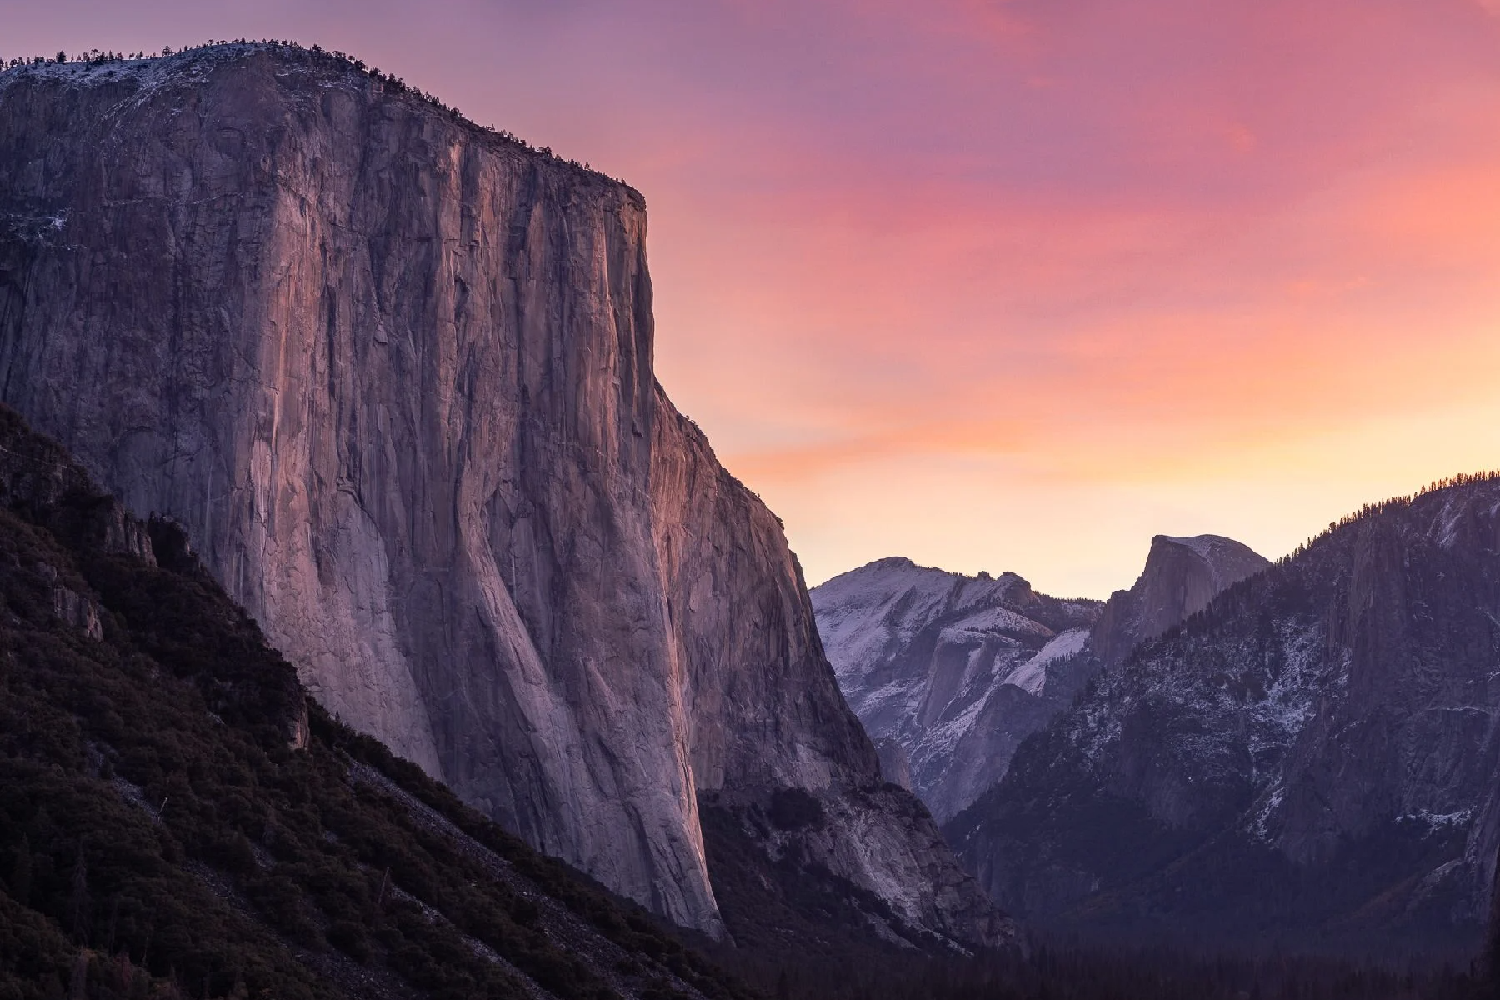
Creating Unique and Abstract Compositions
You’ve mastered the basics of composition and have used the rule of thirds more times than you can count… What’s next? What can you do to create more unique and even abstract compositions?
One of the keys to creating unique and abstract compositions in landscape photography is to break the rules. You’ve spent all this time learning to follow these rules and they have served you well, but now it’s time to break free from their limitation. While the rule of thirds and other composition techniques can be effective, I’ve found that sometimes breaking them can lead to much more creative, intriguing, and engaging images.
Try experimenting with unusual angles, perspectives, and focal lengths. Some of my favorite landscape images were taken with a big telephoto lens at around 400mm. I love capturing far ways subjects like peaks buried deep within a range or maybe specific trees on a ridgeline in the distance. I’ve also captured some great landscape images with my camera very close to the ground to provide a nice sense of depth. Sure, having your camera on a tripod is nice but this can often limit the look and feel of your images. It’s also a great idea to look for patterns, shapes, and textures in the landscape that can create abstract compositions.
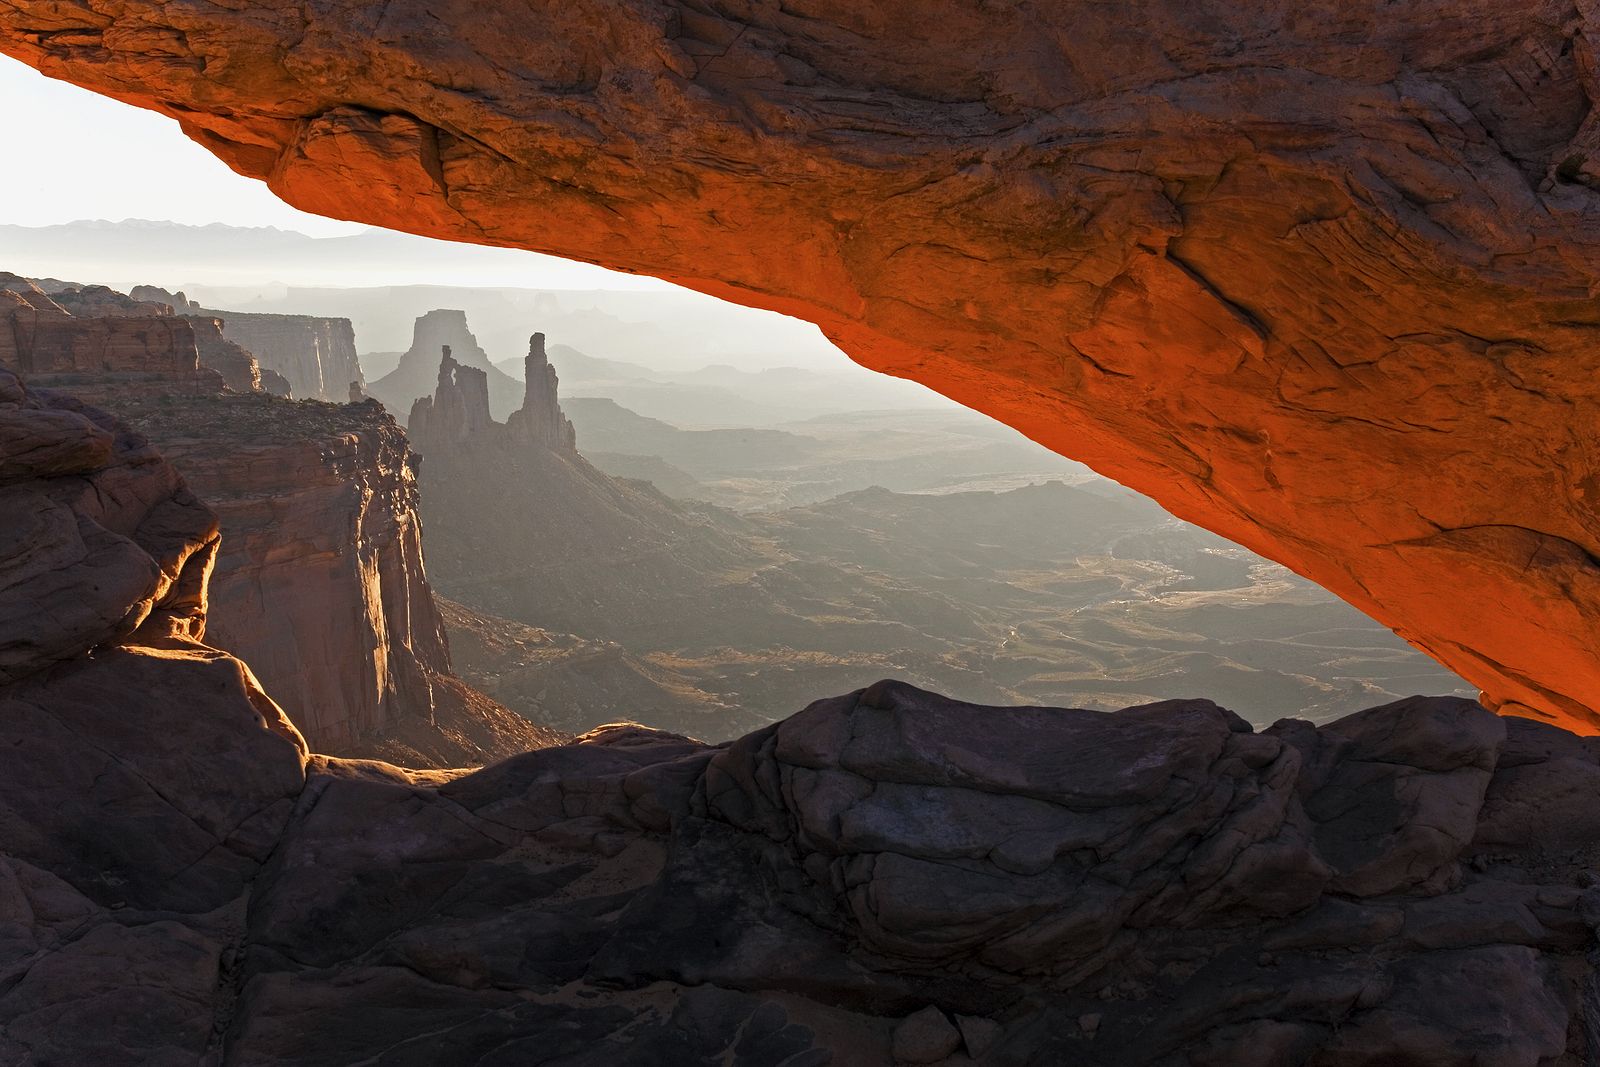
Another way to create unique compositions is to frame your subjects or key aspects of the background with elements in the foreground. I discussed this a bit in the previous article discussing adding depth by using foliage in the foreground, but as photographers, we can get much more creative than this. Maybe there’s a cave or an arch nearby that you can use to surround a subject in the distance. If you’re shooting in the winter and there’s snow on the ground you can sculpt it to your desired shape and size to create more of an abstract frame. You could even form a tunnel and shoot through that. When it comes to creating more unique and even abstract compositions the possibilities are really endless. You’ll just have to get creative, start experimenting, and figure out what works and what doesn’t.
You’ve mastered the basics of composition and have used the rule of thirds more times than you can count… What’s next? What can you do to create more unique and even abstract compositions?
One of the keys to creating unique and abstract compositions in landscape photography is to break the rules. You’ve spent all this time learning to follow these rules and they have served you well, but now it’s time to break free from their limitation. While the rule of thirds and other composition techniques can be effective, I’ve found that sometimes breaking them can lead to much more creative, intriguing, and engaging images.
Try experimenting with unusual angles, perspectives, and focal lengths. Some of my favorite landscape images were taken with a big telephoto lens at around 400mm. I love capturing far ways subjects like peaks buried deep within a range or maybe specific trees on a ridgeline in the distance. I’ve also captured some great landscape images with my camera very close to the ground to provide a nice sense of depth. Sure, having your camera on a tripod is nice but this can often limit the look and feel of your images. It’s also a great idea to look for patterns, shapes, and textures in the landscape that can create abstract compositions.
Another way to create unique compositions is to frame your subjects or key aspects of the background with elements in the foreground. I discussed this a bit in the previous article discussing adding depth by using foliage in the foreground, but as photographers, we can get much more creative than this. Maybe there’s a cave or an arch nearby that you can use to surround a subject in the distance. If you’re shooting in the winter and there’s snow on the ground you can sculpt it to your desired shape and size to create more of an abstract frame. You could even form a tunnel and shoot through that. When it comes to creating more unique and even abstract compositions the possibilities are really endless. You’ll just have to get creative, start experimenting, and figure out what works and what doesn’t.
Shooting Time-Lapses
Another great way to level up your landscape photography is to go from taking one great image to creating a series of images that portray the passage of time. I’m talking, of course, about time-lapses. Ever since I first got into photography, I’ve been obsessed with time-lapses. I find it incredible that we can bend and mold the passage of time at our own will with a camera, an intervalometer, and some basic software!
To get started in time-lapse photography you’ll need a few key things. A tripod or a method of keeping your camera completely stable is an absolute must unless you want shaky and jarring results. You can even purchase motorized tracks and dollies if you want to add some smooth and controlled motion to your timelapse. I’d also recommend checking out hyper-lapses where the camera moves significantly over time. In addition, you’ll need an intervalometer which is a device that controls how frequently your camera takes images and how many it takes. Many modern cameras have this feature built-in. And finally, you’ll need some software to combine all of your images into a final product. I use a combination of lightroom and photoshop and sometimes I’ll even use premiere pro once I have a video file to work with. There are a million different ways to edit and combine timelapse images so you’ll have to figure out what works best for you.
Now that you have all the necessary tools it’s time to get out there and start experimenting with time-lapses. Of course, you’ll need to make sure you’re shooting with the right settings. I almost always shoot on full manual to prevent flickering or changes in exposure in my final video. The number of times I’ve forgotten to do this and come back only to find a potentially seizure-inducing and unfixable video is absurd. If you’re going to have nice consistent lighting then choose your settings and keep them there. You’ll also want to make sure you’re shooting on manual focus so that your camera isn’t refocusing on every frame. This can also create a jarring effect and can make your final results unusable. If you’re shooting a sunset or a scenario where the light will be changing then you can shoot on aperture priority allowing your camera to change the shutter speed and keep the exposure of your image nice and smooth as the natural light changes.
Time-lapses are a powerful and enjoyable way to level up your landscape photography and I implore all photographers to experiment with this style of photography at some point.
Exposure Bracketing and Creating HDR Images
Let’s say you’re capturing landscape images in a setting with tricky lighting. Maybe the highlights are super bright, and the shadows are super dark. Maybe the sky is bright and the landscape is very dark which is common around sunset and sunrise. Or maybe you just want to increase your camera's dynamic range. One of the best ways to address these issues is exposure bracketing.
Exposure bracketing is very simple in practice but can lead to some incredible results. All you need for this is a tripod or a method of holding your camera still and the ability to manually change your camera's settings. To achieve exposure bracketing you’ll need to choose your composition and focus your camera. Then all you need to do is capture multiple images at different exposures. I would recommend capturing a minimum of three images, one exposed for the highlights, one exposed for the mid-tones, and one exposed for the shadows.
You can then use software, like Lightroom, to combine these photos into an HDR or high dynamic range image where the software automatically sets the correct exposure for the entire image by pulling proper exposures from specific places in the various images you captured. This increases the dynamic range of your photograph and opens up more possibilities when editing your image.
Exposure bracketing is simple to achieve and it’s an excellent way to level up your landscape photography. If you haven’t experimented with this yet, I would recommend you try it next time you come across some tricky lighting or want a dynamic range greater than what is native to your camera.
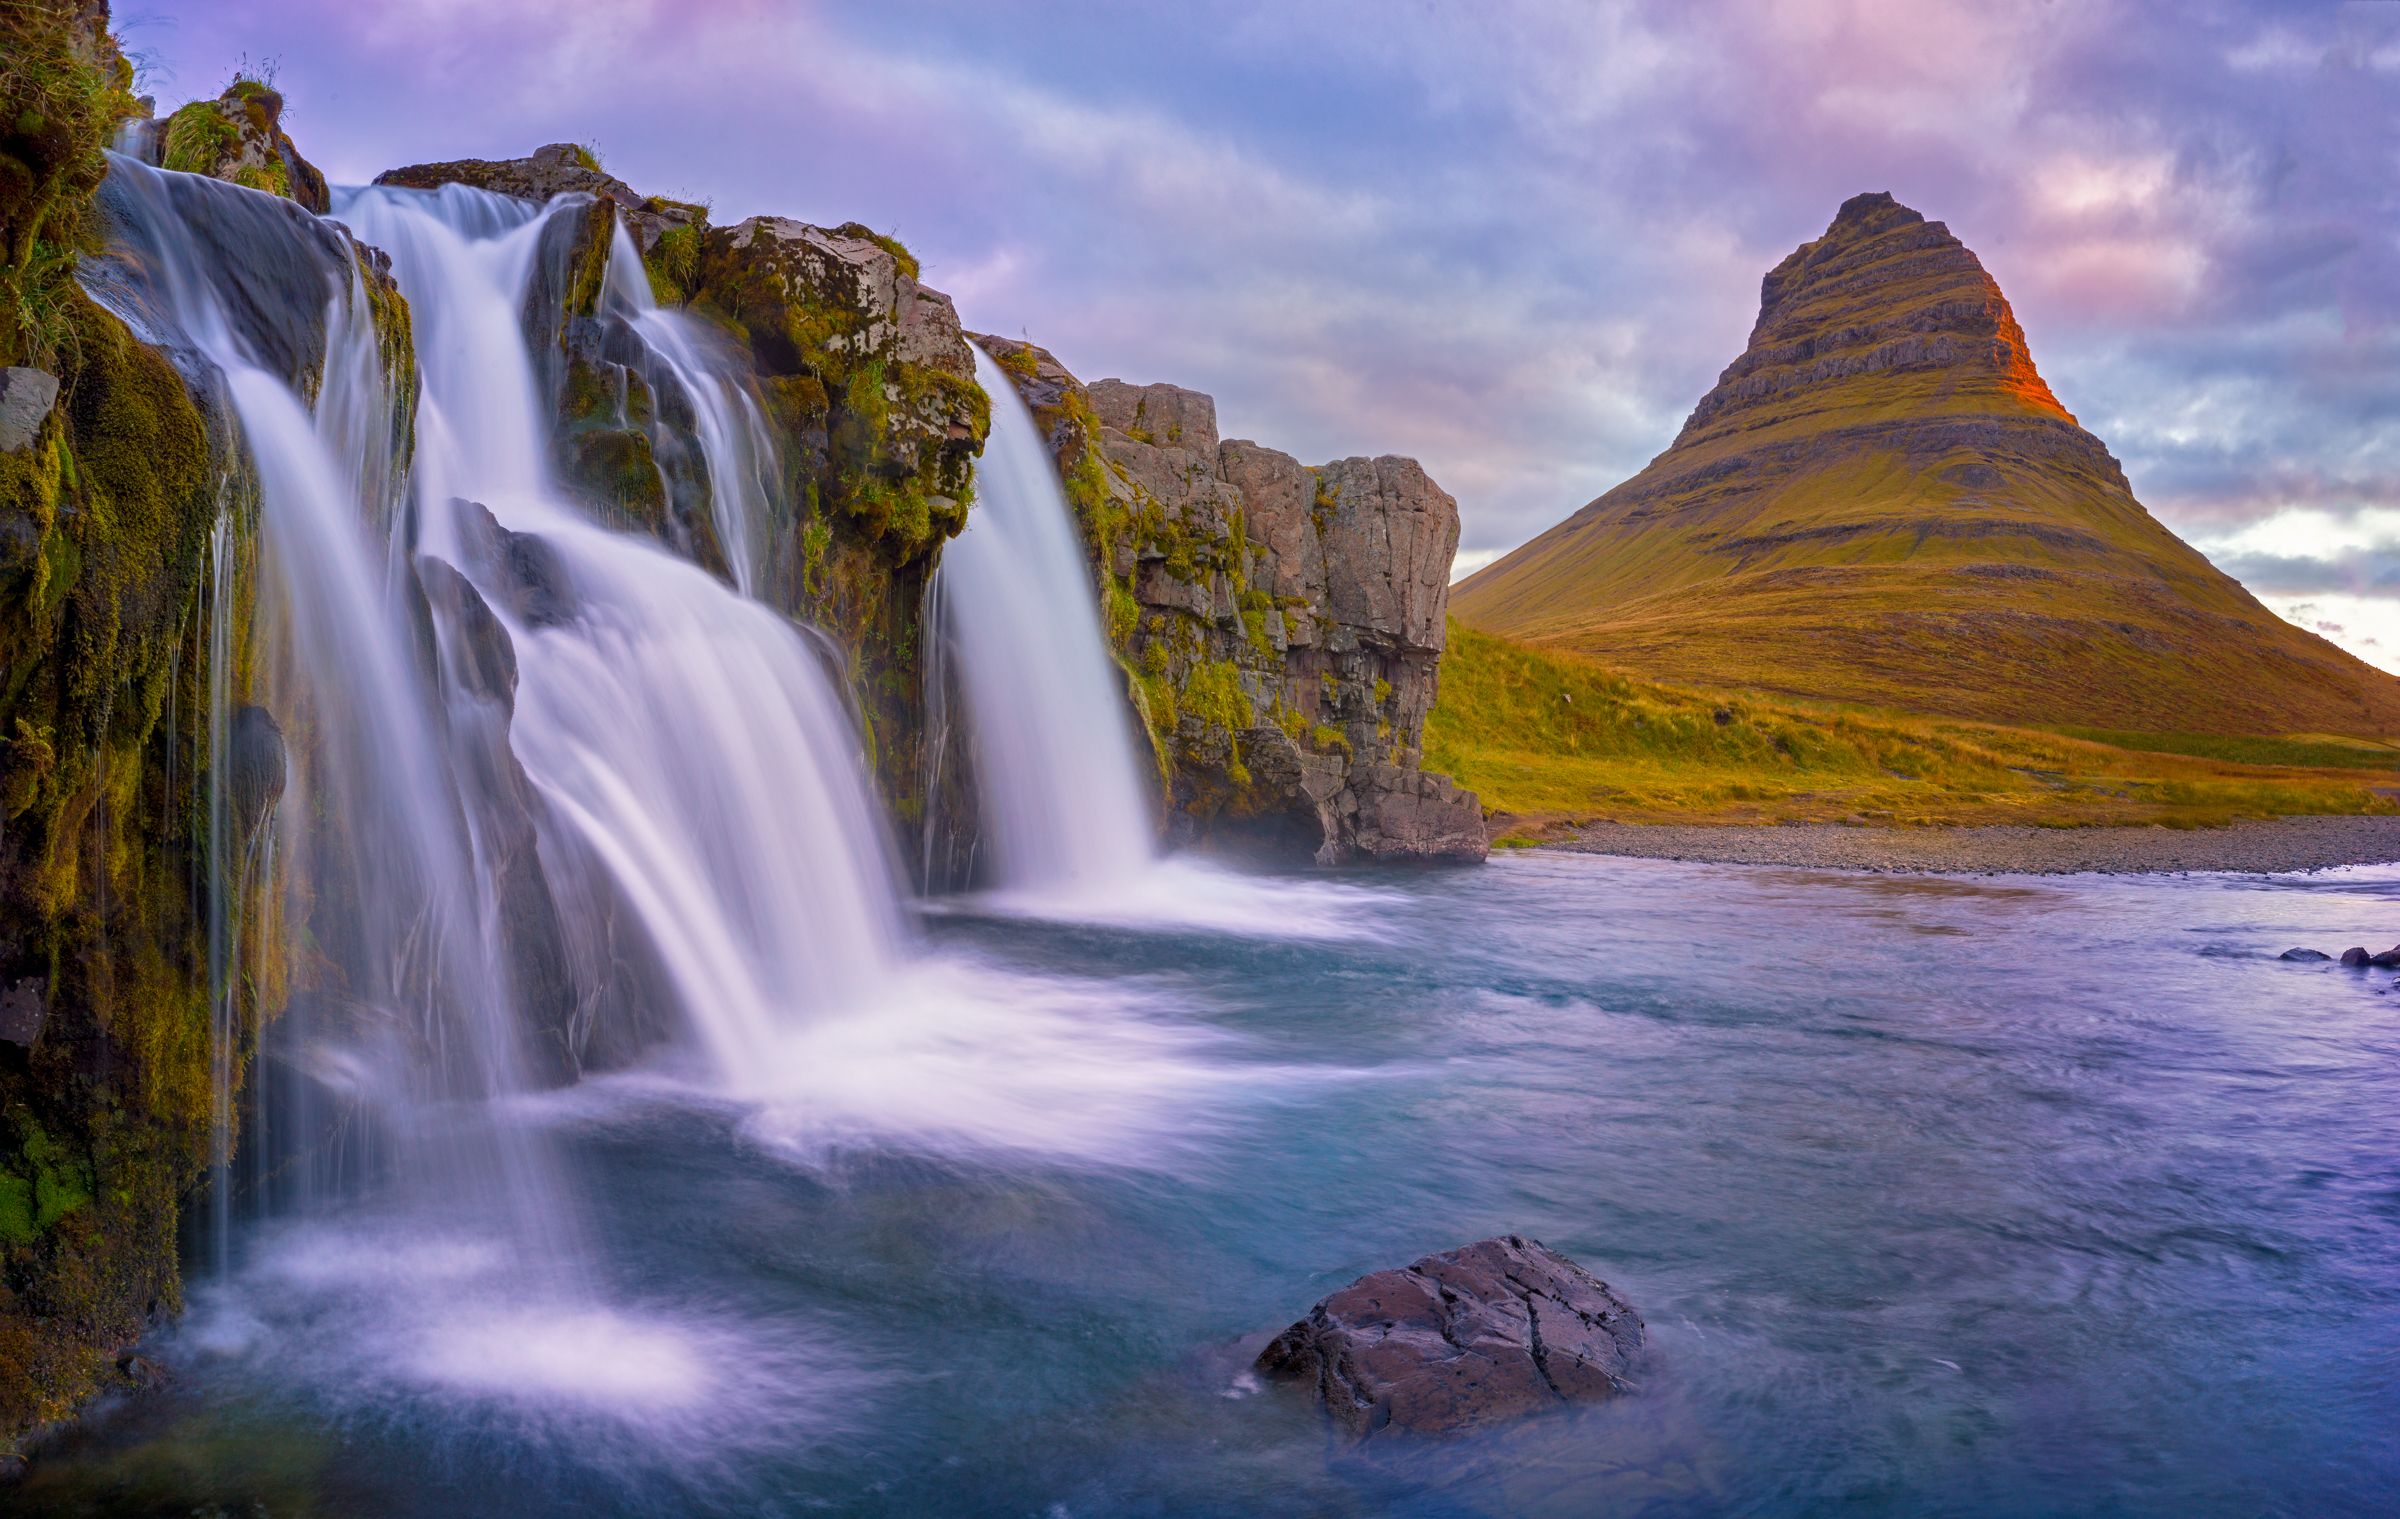
Long Exposures During the Day and Neutral Density Filters
Have you ever seen those iconic long exposure shots portraying soft-looking and moving water or blurred people crossing an intersection, that were taken during the day? These images are a really unique way to portray movement and the passage of time with a single photograph. So, how were they achieved? The answer is likely that the photographer used a neutral density filter.
Neutral Density filters are filters that usually combine two pieces of glass that can alter the darkness of the filter and therefore the amount of light entering the lens. They are the primary method to achieve longer exposure during the daytime or in any situation where there is more than enough environmental light available. By reducing the amount of light entering your camera, you can achieve longer shutter speeds.
Of course, you’ll need a way to keep your camera perfectly still, like a tripod, and I would recommend using a remote or delayed shutter to prevent any unwanted camera movement from ruining your images. But if you can keep your camera still and add an ND filter to your lens you’ll be able to take some breathtaking images. I would recommend that every photographer experiment with this style of photography.

Capturing the Night Sky with Astrophotography
My final recommendation for more advanced and experienced landscape photographers is to experiment with really long exposures and to get out there and take photos in the dead of night when there is hardly any natural light at all. Astro photography can be very challenging and will take lots of practice and ideally some research to master, but once you have the general idea you can take some incredible photos that will allow you to witness the night sky in a way your eyes never could.
To capture high-quality images of the night sky you’ll need to set yourself up for success. You definitely don’t want other light sources drowning out the light of the stars. Stay far away from any cities or towns that will create light pollution and try to avoid the light from the moon as much as possible. A full moon will overpower the light from a large majority of stars in the sky. In addition, you’ll want to make sure you’re working with a crystal clear atmosphere. If there are clouds in the sky, or you’re in a polluted or humid location it’ll be difficult to see what’s up there. I always check the forecast before a night of shooting and search out particularly dark and clear nights.
Now that you’ve set yourself up, you’ll need to make sure your camera settings are dialed in. I would recommend a wide-angle lens with a very low f-stop. The more zoomed in your lens the more likely you are to capture the motion of the stars or encounter shake and blur. Having the ability to shoot at wider apertures is also key because you’ll need to let in as much light as possible. Next, you’ll need to set a long shutter speed to increase the amount of light hitting your sensor even more. Then you’ll just have to mess around with your settings including your ISO until you capture an image you like. Another very important tip is to lower the brightness of the LCD screen on the back of your camera. Since you are in a very dark environment, a bright screen will make you think you’ve captured a decent exposure only to find out that in daylight you can barely see the image at all.
One of my favorite forms of astrophotography that requires a ton of patience is the art of capturing star trails. It’s a nervous and exciting feeling to focus my lens in the direction of the north star and wait, often multiple hours, for my camera to capture hundreds of images. Once this is complete, and I’ve been able to enjoy the beauty of the night sky for quite a while, I’ll combine all of these images together to create a truly unique portrayal of the night sky. It's a magical and powerful thing to show the rotation of the earth amongst the stars in a single photograph. And this is something you can achieve with your own camera!
Conclusion
To wrap things up I would like to reiterate how important it is to experiment with new styles and techniques in your photography. I think it’s vital that we try new things and go out of our comfort zones if we want to improve our photography skills and broaden our horizons. One of the best ways to get out there and try new things is with the help of a professional guide. At Backcountry Journeys we have some of the best photography trip leaders in the entire industry and they would love to help you improve your landscapes photography. Check out some of our landscape photography tours to learn more!
I sincerely hope that this article was informative and that some of this information will help you in your own landscape photography journeys. Thanks for reading and happy shooting. Until next time!

We offer world-class travel photography
experiences around the world.
Each tour is bundled with lodging, meals, and transportation between workshops included, allowing you to focus on photography instead of the stress of traveling.
experiences around the world.
Each tour is bundled with lodging, meals, and transportation between workshops included, allowing you to focus on photography instead of the stress of traveling.
Get Our Trip Catalog
Receive a trip catalog that highlights all of our upcoming photo tours and workshops.Schedule a Trip Consultation
Meet with a photo experience coordinator, and experience a personal touch to your booking experience.Landscape Guide
Receive a FREE Landscape Cheat Sheet Written By a Pro Photographer.Webinars
Our regularly hosted webinars provide photography instruction from our own guides on a wide range of topics.Education Portal
Explore our library of articles that cover everything from common questions, to in-depth guides on how to achieve that perfect shot.
Backcountry Journeys
Connecting Passionate People To
Exceptional Experiences.
Exceptional Experiences.
Business Hours:
Mon-Fri, 8AM-4PM MT
928-478-1521
adventure@backcountryjourneys.com
Mon-Fri, 8AM-4PM MT
928-478-1521
adventure@backcountryjourneys.com
arrow_drop_down_circle
Divider Text
All Images & Content Are Property Of Backcountry Journeys Photography Tours, Workshops & Safaris LLC - Copyright 2026
About Us
Receive a Digital Trip Catalog
Find an upcoming photography tour with our interactive catalog.