Mon - Fri: 8 am - 4 pm MT

About Backcountry Journeys
Why Choose Backcountry Journeys
If you're considering a photography trip, hear why Backcountry Journeys delivers the best experience in the industry.Frequently Asked Questions
If you're new to photography trips, or new to BCJ, you can find our common travel questions here.Fitness Levels
Our trips vary on physical intensity, and by reviewing our fitness levels, you can find out which trips may be more challenging, or aligned more closely with your comfort level.Meet The Crew
We've built an amazing team of experienced guides, and dedicated office staff that elevate your travel experience. Get to know their backgrounds, and hear their stories.Loyalty Program
We reward our frequent photo adventurers with exclusive discounts on amazing photography trips.Contact Us
If you need to get in touch with our office staff, or have additional business inquiries, you can find our information here.Refer a Friend
Know someone perfect for one of our tours? Recommend them through this quick form.Stay Up To Date On All Things
Backcountry Journeys
Backcountry Journeys
Our Photography Community
Our Webinars
Our regularly hosted webinars provide photography instruction from our own guides on a wide range of topics.Our Education Portal
Explore our library of articles that cover everything from common questions, to in-depth guides on how to achieve that perfect shot.Community Testimonials
We're proud to foster an amazing group of photo travelers, and here you can find their stories from their past adventures.Resources For Photographers
About Our Company
Resources For Photographers
About Our Company
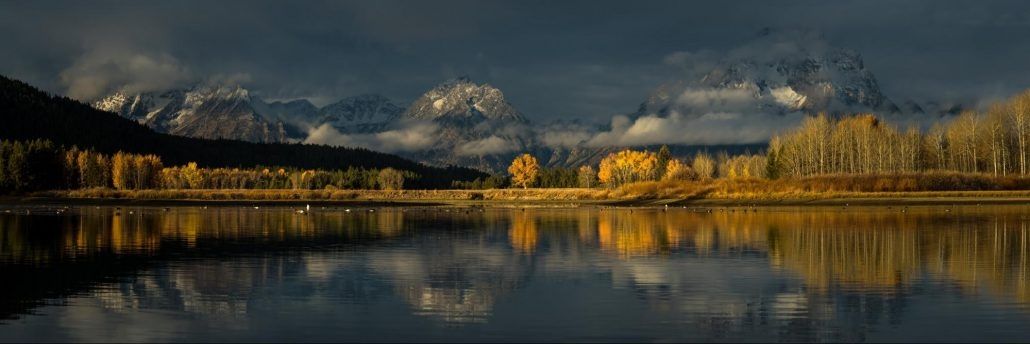
Panoramic Photography

Published November 1, 2020
Have you ever found yourself standing at a beautiful viewpoint wondering how best you might capture the scene? “How do those other guys manage to photograph these seemingly huge sweeping scenes so well? Might there be another way rather than simply shooting it with my widest-angle lens?”
Panoramic photography might just be the answer!
Panoramic photography might just be the answer!
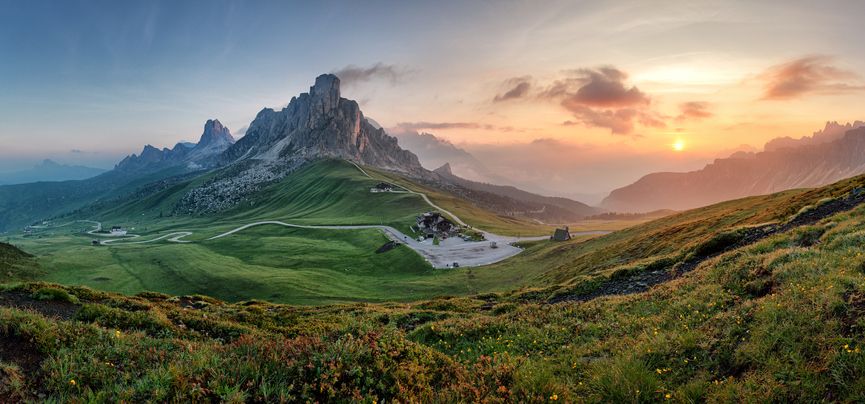
Shooting a “pano” is a special technique that in the end stitches multiple images from the same camera together to form a single, wide photograph that can be far more impressive than a single photo taken with a wide-angle lens. You’ll get less lens distortion, and the resulting photo size means you can get much larger prints, too.
While panoramic photography takes some preparation, it is relatively basic, and the results are certainly worth the extra effort!
While panoramic photography takes some preparation, it is relatively basic, and the results are certainly worth the extra effort!
The following tutorial will discuss what you’ll need to do in the field, as well as the simple post-processing techniques necessary to stitch your images into a single landscape panorama. To make a panorama, you take several shots that capture overlapping sections of the scene; then you use imaging software to seamlessly stitch (that is, join) the sections together. Let’s take a look at how this is done.
In The Field
Use a Tripod
Just do it. Invest in a good tripod, and use it. If you’ve traveled with Backcountry Journeys on any one of our landscape-based photo tours, you’ve likely heard your guide discuss the importance of a tripod. The support and stability provided by a tripod are even more essential with this technique because we’re going to be stitching several photographs together. This makes it imperative that you are working with the best images possible.
Level your tripod/camera
The essential first step: level the tripod. Then attach and level your camera.
Vertical or Horizontal?
Vertical is our preferred orientation for panoramas. This will allow for very large images, at the same time leaving you plenty of room to crop the top and bottom of your stitched image in post. Shooting horizontally works, too, but the result is typically a narrow image. Why not attempt both orientations and decide which works best for you?
Shoot in Manual
Since the most important part of a panorama is having a consistent exposure, it is pretty important that you aren’t stitching together images with varying exposures.
Manual Focus
Switch your lens from autofocus to manual focus, then achieve a sharp focus. Using manual focus so that it remains consistent with each image.
ISO
As in most instances when shooting landscapes on your tripod, set your ISO to the base ISO. This will likely be either 100, or maybe even 64. You do not want to allow the camera to potentially alter your ISO, which is possible in AUTO ISO mode.
Aperture and Shutter Speed
As with the majority of landscape images, you’ll want to have everything in focus, so choose an aperture that allows for this. You get a greater depth of field with a larger “f” number, so, apertures in the f/11-f/16 range should work in most instances. This should put most everything in your scene in focus from foreground to background. Obtain proper exposure as you would normally by adjusting your shutter speed in relation to your aperture.
Lens Focal Length
Unlike many landscape situations, when shooting and stitching panoramics, wider angle lenses won’t work well due to distortion and vignetting problems. Use a lens somewhere in the 28mm to 50mm on full-frame bodies, and 18mm to 35mm on crop sensors.
Shoot in RAW
We typically recommend always shooting in RAW. This will allow you advantages in post-processing. You’ll be able to easily adjust both white balance and exposure, as well as have better detail and overall quality.
White Balance
Speaking of White Balance, set yours to AUTO. As mentioned above, if you shoot in RAW you’ll be able to adjust White Balance in post.
Overlap
Be sure to take each photograph with considerable overlap. By doing this you’ll allow your computer to be able to see where it needs to stitch the photos. A good rule of thumb is to overlap each image by about 30%.
When you look to size up your image, you’ll want to decide just what all you want inside the frame, just like normal. However, you’ll need to be looking from left to right across a much longer distance. Make sure that you can freely pan the camera from one side to another without letting it change any angles. While doing this you can establish if your camera and tripod are in fact level, and, exactly how much of the scene you want in your frame. You can note both the starting and ending points using the numbers on your tripod.
Point your camera at your starting point on the left and take the first picture. Now, move the camera a bit, making sure you have overlap. Something like 15 degrees tends to work well. Take a picture and repeat this process until you get to the end. One easy thing you might consider doing is to snap a quick photo of your own hand before and after you take this collection of images. In doing so you’re essentially creating a visual “bookend,” of sorts so that you’ll know later just how many images you’ll be stitching together, and which images belong to which. Maybe consider even holding up the number of fingers to correspond with how many images on your final “bookend.” So, in the field take a photo of your hand prior to shooting your panoramic. Then, after you shoot your images, shoot your hand in the image once again holding up the number of fingers to correspond with the number of shots you just took. Not counting the first hand “bookend.”
At Home on the Computer
Now that you’ve got your images and your field “work” complete, you’ll now need to merge your photos using post-processing software. This is doable using different software, but we’ll discuss how to do this using Adobe Lightroom Classic CC.
Before we begin, know that it is important that you do not edit your photos at all prior to merging. So, we’ll import your images, merge them, and save the editing and potential crops for after your images are stitched into one.
Step 1: Import
Open Lightroom Classic CC and click the “Import” button. Select the images you wish to use. then click each of the images you want to use.
Step 2: Merge
Once the photos have imported, you’ll see them all displayed on the screen again. Select them all, and then via the main menu, go to Photo > Photo Merge > Panorama.
Step 3: Output Settings
Next, you’ll see a preview of your merged photos. There are three possible projection modes, the software will pick the best one based upon the images you’re merged. By default, the resulting panoramic image is auto-cropped.
Step 4: We’re there!
Finally, click the Merge button. Allow for some time, as this process isn’t exactly fast. It’ll depend, too, on how many photos that you’re merging. The more images that you’re merging, the slower this will be.
Step 5: Edit as you please
Now that your images have been merged into one single image, proceed with your editing workflow as normal.
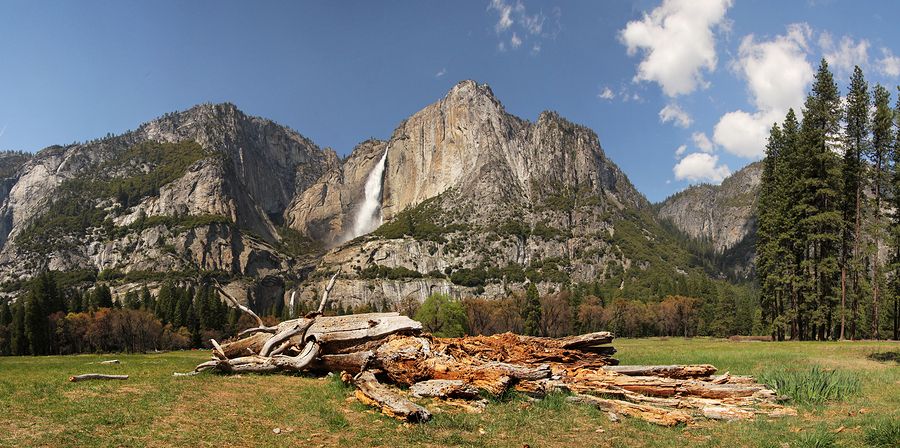
Mastering this technique will allow you to capture landscapes in fantastic detail, and with the necessary resolution to allow you to print your work in sizes that can be displayed proudly upon your walls at home, or in the office!

We offer world-class travel photography
experiences around the world.
Each tour is bundled with lodging, meals, and transportation between workshops included, allowing you to focus on photography instead of the stress of traveling.
experiences around the world.
Each tour is bundled with lodging, meals, and transportation between workshops included, allowing you to focus on photography instead of the stress of traveling.
Get Our Trip Catalog
Receive a trip catalog that highlights all of our upcoming photo tours and workshops.Schedule a Trip Consultation
Meet with a photo experience coordinator, and experience a personal touch to your booking experience.Landscape Guide
Receive a FREE Landscape Cheat Sheet Written By a Pro Photographer.Webinars
Our regularly hosted webinars provide photography instruction from our own guides on a wide range of topics.Education Portal
Explore our library of articles that cover everything from common questions, to in-depth guides on how to achieve that perfect shot.
Backcountry Journeys
Connecting Passionate People To
Exceptional Experiences.
Exceptional Experiences.
Business Hours:
Mon-Fri, 8AM-4PM MT
928-478-1521
adventure@backcountryjourneys.com
Mon-Fri, 8AM-4PM MT
928-478-1521
adventure@backcountryjourneys.com
arrow_drop_down_circle
Divider Text
All Images & Content Are Property Of Backcountry Journeys Photography Tours, Workshops & Safaris LLC - Copyright 2026
About Us
Receive a Digital Trip Catalog
Find an upcoming photography tour with our interactive catalog.