Mon - Fri: 8 am - 4 pm MT

About Backcountry Journeys
Why Choose Backcountry Journeys
If you're considering a photography trip, hear why Backcountry Journeys delivers the best experience in the industry.Frequently Asked Questions
If you're new to photography trips, or new to BCJ, you can find our common travel questions here.Fitness Levels
Our trips vary on physical intensity, and by reviewing our fitness levels, you can find out which trips may be more challenging, or aligned more closely with your comfort level.Meet The Crew
We've built an amazing team of experienced guides, and dedicated office staff that elevate your travel experience. Get to know their backgrounds, and hear their stories.Loyalty Program
We reward our frequent photo adventurers with exclusive discounts on amazing photography trips.Contact Us
If you need to get in touch with our office staff, or have additional business inquiries, you can find our information here.Refer a Friend
Know someone perfect for one of our tours? Recommend them through this quick form.Stay Up To Date On All Things
Backcountry Journeys
Backcountry Journeys
Our Photography Community
Our Webinars
Our regularly hosted webinars provide photography instruction from our own guides on a wide range of topics.Our Education Portal
Explore our library of articles that cover everything from common questions, to in-depth guides on how to achieve that perfect shot.Community Testimonials
We're proud to foster an amazing group of photo travelers, and here you can find their stories from their past adventures.Resources For Photographers
About Our Company
Resources For Photographers
About Our Company
The Orton Effect

Published April 24, 2020
It is quite likely that you have seen the Orton Effect applied in nature photographs, whether you are aware of it or not. The addition of a glow, dream-like effect, which is added in post-processing, has taken the landscape and nature photography world by storm.
In this article, we’ll take a look at the history of the Orton Effect, how this style has become prevalent in the world of nature photography today, and discuss the situations you might apply the technique – if you like the look – that is.
In today’s digital world, the Orton Effect, or a version of it, can be applied using software such as Adobe Photoshop. This article will not address the ‘how-to’ steps involved, so apologies upfront for anyone looking for a step-by-step. For those interested, the technique is introduced within the curriculum of Backcountry Journey’s Adobe Photoshop: Beginner to Intermediate classroom workshop.
History
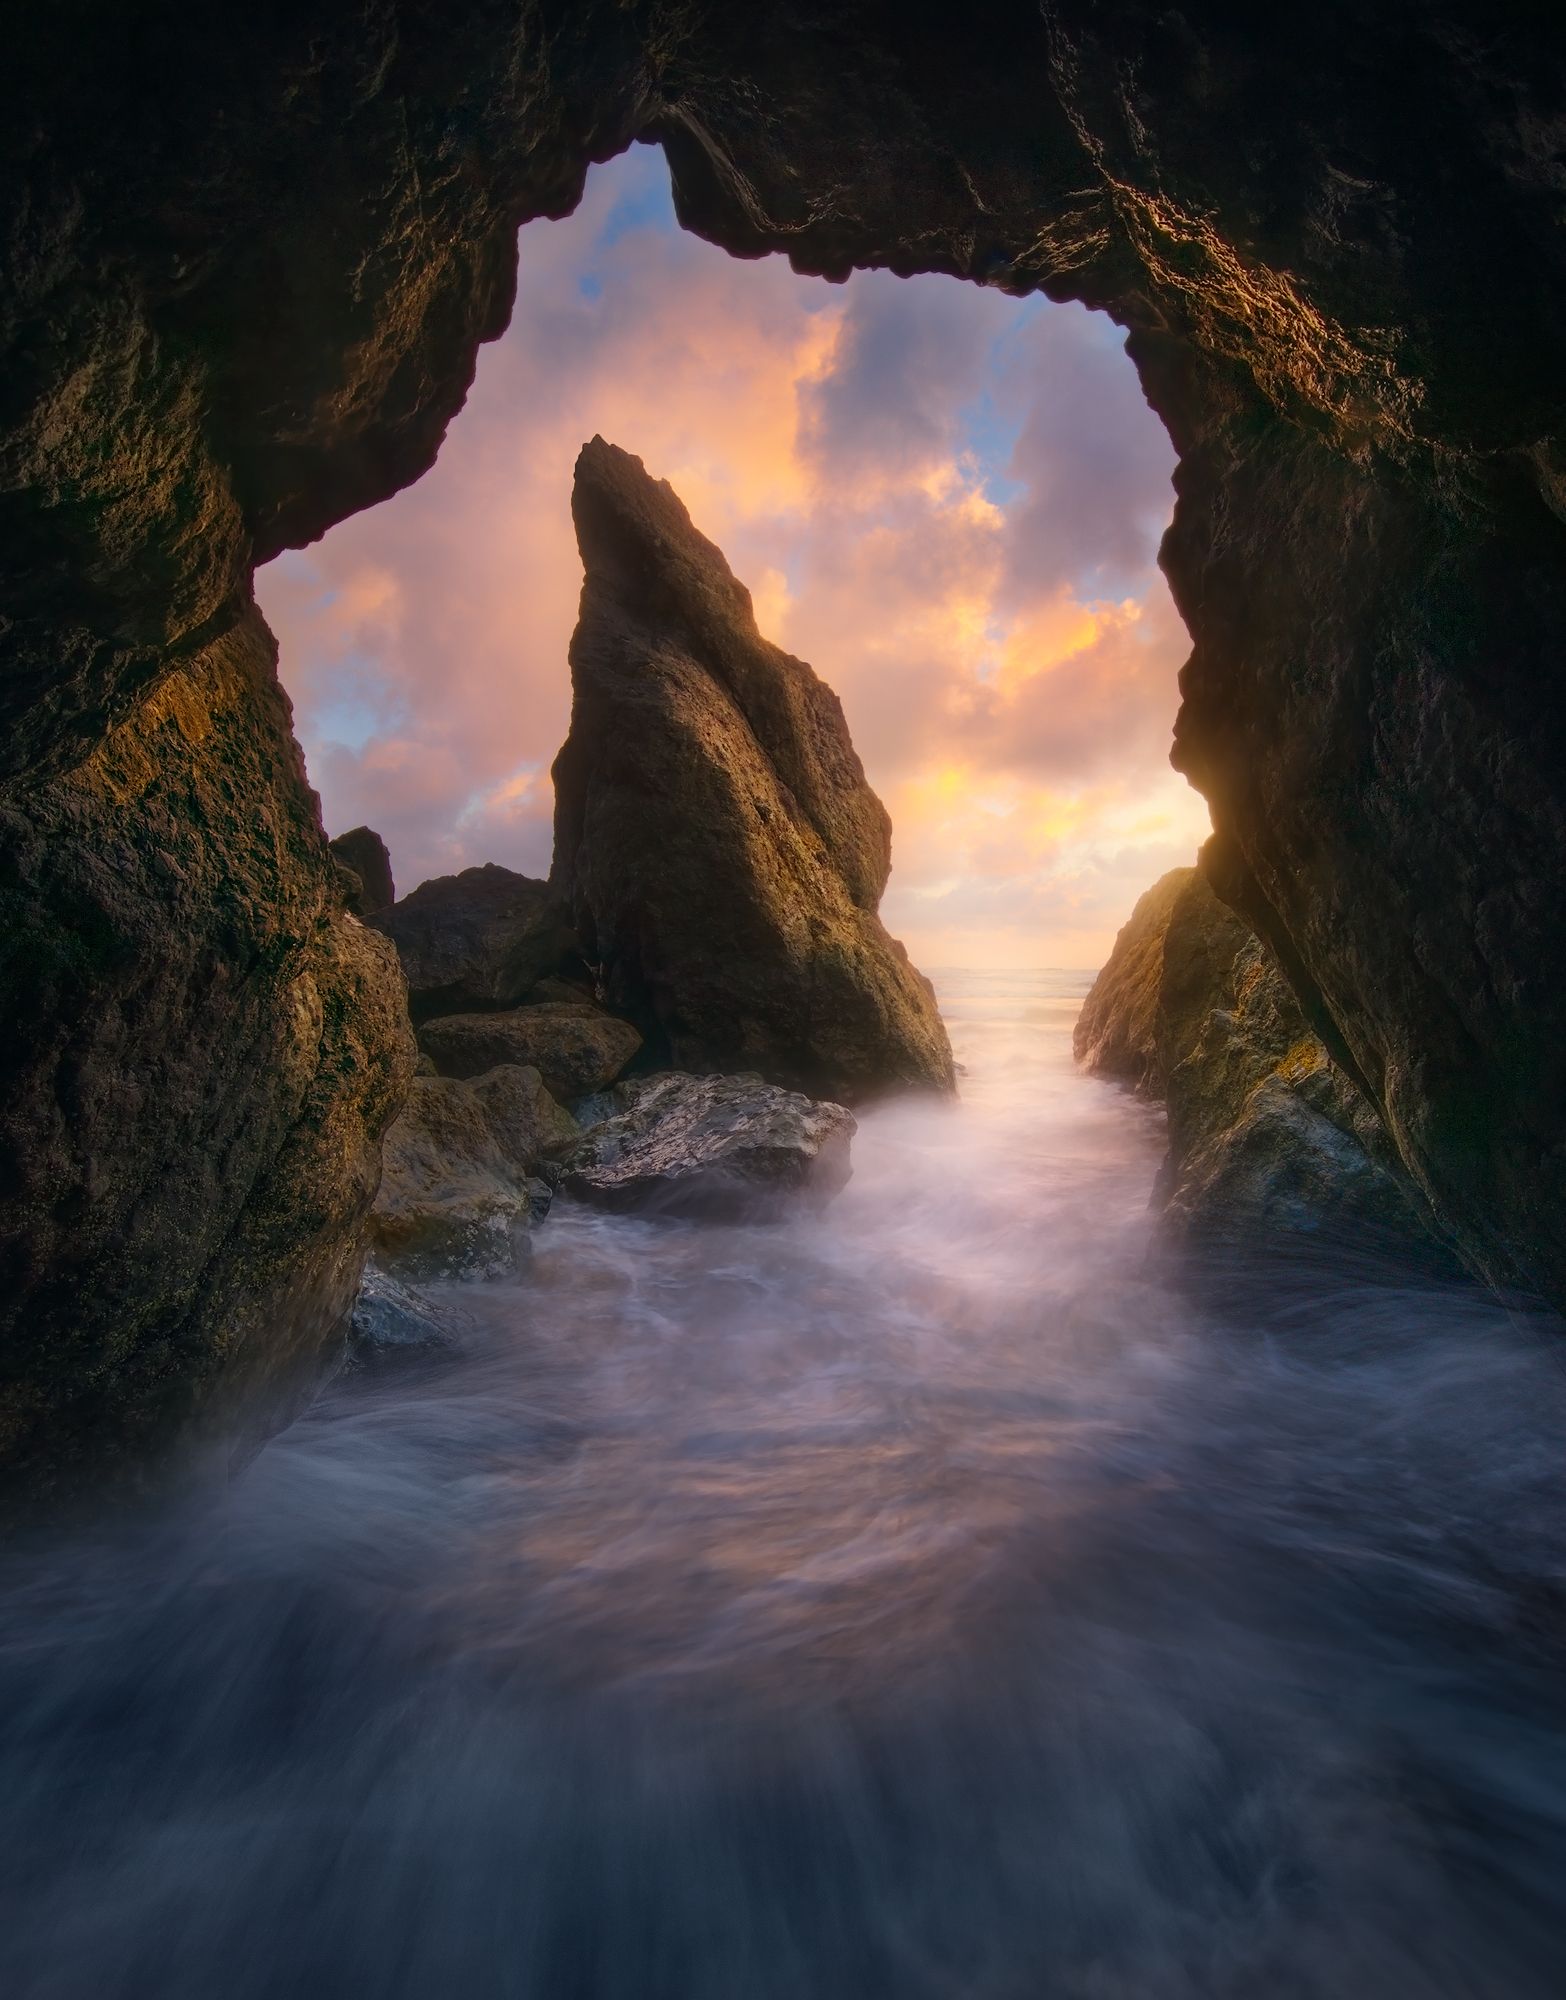
The Orton Effect was created in the 1980s by photographer Michael Orton. A film photographer, Orton would take two (or three) images and layer them on top of each other – one that was in focus, and one that was overexposed and out of focus. Orton originally created the effect to imitate watercolor paintings, adding a soft glowing, dreamy effect. Take a look at the image below. Look for its fantasy-like look. Believe it or not, that is not exactly what the scene looked like on the day this photographer snapped this image (Whether that matters or not is for another article).
The Orton Effect was created in the 1980s by photographer Michael Orton. A film photographer, Orton would take two (or three) images and layer them on top of each other – one that was in focus, and one that was overexposed and out of focus. Orton originally created the effect to imitate watercolor paintings, adding a soft glowing, dreamy effect. Take a look at the image below. Look for its fantasy-like look. Believe it or not, that is not exactly what the scene looked like on the day this photographer snapped this image (Whether that matters or not is for another article).

Prevalence
Take another look at the above image. Then, carefully inspect other nature images across the web. Take a look at your favorite photographers’ Instagram pages, as well as anywhere else you view images. See it now? All over the place? While there are varying degrees in which photographers are utilizing the Orton Effect, it is prevalent in many many nature images. The Effect will be very easy to spot in some photographs, and a bit less obvious in others.
It’s prevalent for good reason – the dreamy glow really makes images stand out above others! And in a world saturated with photos, and the use of filters and presets (think Instagram), making yours stand above others is important, even if (nearly) everyone is doing it. So, should I just apply it to all of my nature images? It looks super cool, and would instantly create a definitive style.
Not so fast, my friend!! As with just about everything, there are some things to consider before you simply apply the effect to every photograph in your portfolio. While the effect can enhance your photos, it has the potential to do the opposite if applied to all images as it is not right in every instance. For example, if you have a scene with flat front light, you’d create a continuity problem by adding dreamy light. Where did it come from?

When to Apply?
Deciding if this look is right for your image is obviously up to you. Are you a photographer who wants to create this sort of feeling in your images? Or, are you more interested in showing a scene as close to exactly what you saw when you took the image? Only you can decide what is correct for you. However, the Orton Effect typically will work well on images with the following qualities:
While this is by no means a complete list, it should get you thinking if you are interested in trying out this method. This technique, when applied correctly, can be an effective way of transporting your viewer into a different world, but if applied in the wrong situations, or too much too often, it can backfire as well.
Deciding if this look is right for your image is obviously up to you. Are you a photographer who wants to create this sort of feeling in your images? Or, are you more interested in showing a scene as close to exactly what you saw when you took the image? Only you can decide what is correct for you. However, the Orton Effect typically will work well on images with the following qualities:
- Soft light
- Clean gradients between lights and no harsh shadows
- Fog or smoke
- Mist around water
- Water
- Landscapes that include forestry or mountains
While this is by no means a complete list, it should get you thinking if you are interested in trying out this method. This technique, when applied correctly, can be an effective way of transporting your viewer into a different world, but if applied in the wrong situations, or too much too often, it can backfire as well.

The Orton Effect is here to stay. Landscapers love it because it really does add something nice to images, making them pop and really stand out! It is loved by many and, as with most things, also hated by some, but only you can decide if its right for your photography.

We offer world-class travel photography
experiences around the world.
Each tour is bundled with lodging, meals, and transportation between workshops included, allowing you to focus on photography instead of the stress of traveling.
experiences around the world.
Each tour is bundled with lodging, meals, and transportation between workshops included, allowing you to focus on photography instead of the stress of traveling.
Get Our Trip Catalog
Receive a trip catalog that highlights all of our upcoming photo tours and workshops.Schedule a Trip Consultation
Meet with a photo experience coordinator, and experience a personal touch to your booking experience.Landscape Guide
Receive a FREE Landscape Cheat Sheet Written By a Pro Photographer.Webinars
Our regularly hosted webinars provide photography instruction from our own guides on a wide range of topics.Education Portal
Explore our library of articles that cover everything from common questions, to in-depth guides on how to achieve that perfect shot.
Backcountry Journeys
Connecting Passionate People To
Exceptional Experiences.
Exceptional Experiences.
Business Hours:
Mon-Fri, 8AM-4PM MT
928-478-1521
adventure@backcountryjourneys.com
Mon-Fri, 8AM-4PM MT
928-478-1521
adventure@backcountryjourneys.com
arrow_drop_down_circle
Divider Text
All Images & Content Are Property Of Backcountry Journeys Photography Tours, Workshops & Safaris LLC - Copyright 2026
About Us
Receive a Digital Trip Catalog
Find an upcoming photography tour with our interactive catalog.