Mon - Fri: 8 am - 4 pm MT

About Backcountry Journeys
Why Choose Backcountry Journeys
If you're considering a photography trip, hear why Backcountry Journeys delivers the best experience in the industry.Frequently Asked Questions
If you're new to photography trips, or new to BCJ, you can find our common travel questions here.Fitness Levels
Our trips vary on physical intensity, and by reviewing our fitness levels, you can find out which trips may be more challenging, or aligned more closely with your comfort level.Meet The Crew
We've built an amazing team of experienced guides, and dedicated office staff that elevate your travel experience. Get to know their backgrounds, and hear their stories.Loyalty Program
We reward our frequent photo adventurers with exclusive discounts on amazing photography trips.Contact Us
If you need to get in touch with our office staff, or have additional business inquiries, you can find our information here.Refer a Friend
Know someone perfect for one of our tours? Recommend them through this quick form.Stay Up To Date On All Things
Backcountry Journeys
Backcountry Journeys
Our Photography Community
Our Webinars
Our regularly hosted webinars provide photography instruction from our own guides on a wide range of topics.Our Education Portal
Explore our library of articles that cover everything from common questions, to in-depth guides on how to achieve that perfect shot.Community Testimonials
We're proud to foster an amazing group of photo travelers, and here you can find their stories from their past adventures.Resources For Photographers
About Our Company
Resources For Photographers
About Our Company
Tips for Shooting Handheld
Published August 26, 2021
‘Do I need a tripod?’ It’s a question we get asked at least once during every workshop. It’s not a bad question, but I also think it’s more subjective than it seems. Tripods are frustrating, I’ll admit it. They’re just another piece of gear that you have to carry and take time to setup – time you could be using to photograph.
Tripods are a necessary evil. They have their place and they do yield the best possible image quality.
Tripods are a necessary evil. They have their place and they do yield the best possible image quality.

But this isn’t an article about using tripods, this is an article about shooting handheld. Is it possible to shoot handheld and produce images of excellent quality? Absolutely. There are many scenarios where I actually prefer shooting handheld because the difference in image quality between handheld and tripod is negligible.
There are also scenarios, less than ideal scenarios, where shooting handheld is possible. The results might not be as good as shooting on a tripod, but sometimes you don’t have the option or you simply don’t want to use a tripod.
Let’s cover shooting handheld. I’ll discuss some ideal (and less than idea) scenarios for shooting handheld, and I’ll also share some tips on how I would go about shooting handheld in the less-than-ideal situations.

Basic Things to Know
Shutter Speed
So, why don’t we just shoot handheld all the time?
Well, it really comes down to shutter speed. There are certain situations, especially during Golden Hour light, where a longer shutter speed is a necessity for a proper exposure – like 1/5th of a second to 1 second.
Once you get down to around 1/10th of a second and slower, it becomes very difficult to render sharp images while shooting handheld.
A good rule of thumb for shooting handheld is you want your shutter speed to be equal to the focal length you are shooting at. For instance, if you are shooting at 50mm, you want your shutter speed to be at least 1/50th of a second. If you are shooting at 600mm, you want your shutter speed to be at least 1/600th of a second.
ISO
When shutter speeds get too slow for handholding, we are forced to increase our ISO value. The ISO value makes the camera’s sensor more sensitive to light (i.e., brighter exposure), but this comes at a cost of added noise. We use tripod so we can shoot at the lowest base ISO on our cameras, usually ISO 100 – this means slower shutter speeds, but the lowest possible noise.
If you are noticing motion blur in your images while shooting handheld. You can increase the ISO, which will brighten the exposure and allow you to compensate with a faster shutter speed. Just beware the noise.
Aperture
Opening up the aperture will also let more light onto the sensor and brighten an exposure, allowing for a faster shutter speed. That’s why fast primes are so popular for wildlife photography. A 400mm f/2.8 is able to let a lot of light in at f/2.8, and that allows the photographer to shoot faster.
Now for landscapes, we often want a smaller aperture, like f/8-11, for greater depth of field (wide open apertures have a narrow depth of field. If you’re shooting handheld and you know most of your elements are far off, you can open up your aperture, focus to infinity, and speed up your shutter speed.
In-Body/Lens Stabilization
Mirrorless cameras have excellent in-body stabilization these days, it’s often paired with lens stabilization as well (where DSLRs rely solely on lens stabilization). The rule above kind of goes out the window with mirrorless bodies. I find I can shoot 4-5 stops slower with a mirrorless body than I can with a DSLR. I have shot Nikon and Sony mirrorless cameras as slow as 1/5th of a second with acceptable sharpness.
Playback
Using the playback feature of your camera is crucial even more so when shooting handheld. I don’t see enough photographers doing it during workshops. If you’re shooting handheld, you should be checking every few shots and zooming into 100% to check for sharpness. If you notice motion blur, you need to adjust a setting, like ISO or aperture, so you can change to a faster shutter speed.
Good Situations to Shoot Handheld
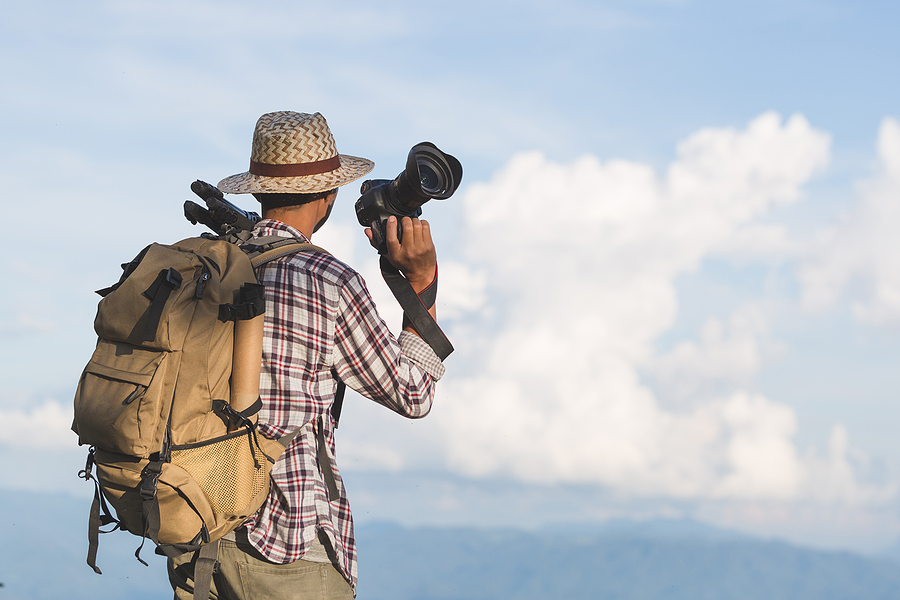
- Mid-day Light
- When the sun is out in full force, it’s a good time to shoot handheld, and one where I often leave the tripod in the car. Because it is so bright, you’ll be able to achieve fast shutter speeds that will negate any handheld movement.
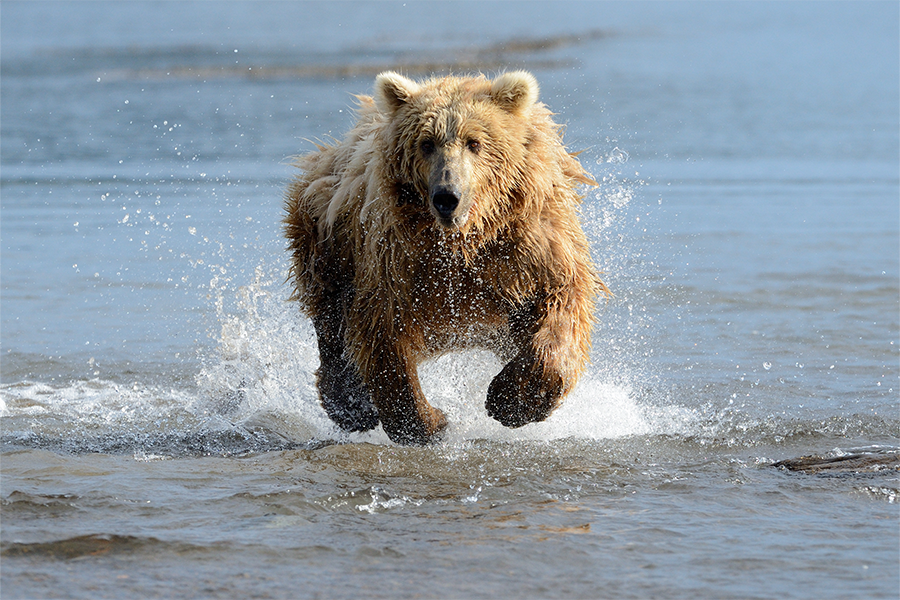
- Wildlife
- Wildlife shooting is a great option for handheld shooting, especially if you have a fast lens. Wildlife can move erratically and be especially hard to track on a tripod, often handheld is best. If needed, open up the aperture to achieve a faster shutter speed. Many situations will require you to increase your ISO, which is why we recommend using a camera with excellent noise performance, like the Sony A9 II or Canon R5. I also often underexposure wildlife images when a faster shutter speed is needed because I know with the great dynamic range these days, the darks/shadow detail can be brought back during post-processing.
- Unique Compositions
- Sometimes a camera on a tripod can’t be physically setup or positioned in the same manner as you handholding. And sometimes, you handholding can open up compositions that are not possible with a tripod. For instance, a few winters ago I put my camera in a 12” ice cave to frame a mountain the background, the shot would have been impossible with a tripod (note, I did set my camera down so it wasn’t technically handheld). I have shot handheld to achieve unique angles many times. I just always watch my shutter speed and check my images in playback.

Bad Situations to Shoot Handheld
- Low Light
- Low light periods like sunrise and sunset can be difficult to shoot handheld. Difficult in the sense that handheld shots will not render the same quality as shooting on a tripod. The big reason is with low light, shutter speeds will be much slower, often requiring you to increase your ISO.
- Water Features
- Waterfalls, creeks, streams, and the ocean – things landscape photographers love to shoot with slow shutter speeds. Yes, a slow shutter speed around 1/5th of a second to 1 second can create an awesome blurred water effect but it also can be very hard to shoot handheld at those speeds and get sharp shots.
- Focus Stacking or Exposure Blending
- If you’re interested in stacking multiple exposures for focus or exposure, it can be difficult handheld. These techniques require 2-3+ exposures. On a tripod, we can ensure our tripod doesn’t move shot to shot, while there may be a lot of movement when handholding.
How to Make the ‘Best’ of a ‘Bad’ Situation
For exposure blending, I recommend the same as above. Use the auto bracketing feature on your camera and the fastest shooting rate. The faster your camera can shoot, the less movement there will be. I have successfully focus stacked and exposure blended images shot handheld – it is possible.
- Low Light
- Unfortunately, there’s not a great solution for low light scenarios. There’s a point where slow is just too slow. My recommendation is open up your aperture as much as possible, while still achieving focus throughout the scene and bump your ISO up a bit. If you get above ISO 400 or so, you really want to be using a tripod at that point. Not because ISO 400-1600 shots aren’t usable, but because the quality of shooting at a low ISO on a tripod will far exceed those high ISO stills.
- Water Features
- 1/5th of a second is where I usually start when shooting water – waterfalls, creeks, streams etc. It’s probably my favorite shutter speed for water. It can be really difficult to show that slow on a DSLR with only lens stabilization (or no stabilization). The in-body stabilization potential of mirrorless is actually a reason I chose to switch a few years back. I have handheld my Nikon Z7 as slow as 1/5th of a second and have yielded shots of acceptable sharpness. Another trick for more advanced users is to use auto-bracketing on your camera. Set your camera at the shutter speed you know you can handhold with sharp shots, say 1/20th. Auto bracketing will take a brighter and darker exposure, the bright exposure will be at a slower shutter speed that 1/20th of a second, and should be slow enough to get you some water blur. While post-processing, open both those images as layers in Photoshop and simply blend the water exposure in (you might have to slightly darken it as well). Auto bracketing will also fire off the shots continuously, ensuring the least amount of movement frame to frame.
- Focus Stacking and Exposure Blending
- Similar to above, bracketing shooting features can make these situations much easier to deal with. Canon and Nikon have focus stacking modes, where the camera will take a succession of images at the same settings, but with the focal plane changing each frame. It allows you to fire off 3+ shots extremely quickly, without even having to touch the focus dial.
For exposure blending, I recommend the same as above. Use the auto bracketing feature on your camera and the fastest shooting rate. The faster your camera can shoot, the less movement there will be. I have successfully focus stacked and exposure blended images shot handheld – it is possible.

We offer world-class travel photography
experiences around the world.
Each tour is bundled with lodging, meals, and transportation between workshops included, allowing you to focus on photography instead of the stress of traveling.
experiences around the world.
Each tour is bundled with lodging, meals, and transportation between workshops included, allowing you to focus on photography instead of the stress of traveling.
Get Our Trip Catalog
Receive a trip catalog that highlights all of our upcoming photo tours and workshops.Schedule a Trip Consultation
Meet with a photo experience coordinator, and experience a personal touch to your booking experience.Landscape Guide
Receive a FREE Landscape Cheat Sheet Written By a Pro Photographer.Webinars
Our regularly hosted webinars provide photography instruction from our own guides on a wide range of topics.Education Portal
Explore our library of articles that cover everything from common questions, to in-depth guides on how to achieve that perfect shot.
Backcountry Journeys
Connecting Passionate People To
Exceptional Experiences.
Exceptional Experiences.
Business Hours:
Mon-Fri, 8AM-4PM MT
928-478-1521
adventure@backcountryjourneys.com
Mon-Fri, 8AM-4PM MT
928-478-1521
adventure@backcountryjourneys.com
arrow_drop_down_circle
Divider Text
All Images & Content Are Property Of Backcountry Journeys Photography Tours, Workshops & Safaris LLC - Copyright 2026
About Us
Receive a Digital Trip Catalog
Find an upcoming photography tour with our interactive catalog.