2024 Travelers' Choice

About Backcountry Journeys
Why Choose Backcountry Journeys
If you're considering a photography tour, hear why Backcountry Journeys delivers the best experience in the industry.Frequently Asked Questions
If you're new to photography tours, or new to BCJ, you can find our common travel questions here.Fitness Levels
Our trips vary on physical intensity, and by reviewing our fitness levels, you can find out which trips may be more challenging, or aligned more closely with your comfort level.Meet The Crew
We've built an amazing team of experienced guides, and dedicated office staff that elevate your travel experience. Get to know their backgrounds, and hear their stories.Travel Desk
You can review our various payment, and travel policies here, along with resources regarding international travel.Gift Certificates
Give the gift of photo adventure! We offer gift certificates that can be applied to any of our upcoming tours.Loyalty Program
We reward our frequent photo adventurers with exclusive discounts on amazing photography tours.Contact Us
If you need to get in touch with our office staff, or have additional business inquiries, you can find our information here.Stay Up To Date On All Things
Backcountry Journeys
Backcountry Journeys
Our Photography Community
Our Webinars
Our regularly hosted webinars provide photography instruction from our own guides on a wide range of topics.Our Education Portal
Explore our library of articles that cover everything from common questions, to in-depth guides on how to achieve that perfect shot.Community Testimonials
We're proud to foster an amazing group of photo travelers, and here you can find their stories from their past adventures.Resources For Photographers
About Our Company
Resources For Photographers
About Our Company
Understanding Exposure: A Comprehensive Look into Shutter Speed
Published April 5, 2020
Three components come together to create an exposure – aperture, shutter speed, and ISO.
That’s right, just three basic components. When you break down photography into its simplest form, those three settings are the basis for everything we do. It is amazing that those three ‘basic’ settings can also give us so much trouble and anxiety when we try to select the most optimal values for those settings when we are in the field.
All three settings are very important to understand, and your first step as a beginner should be understanding what each setting (aperture, shutter speed, and ISO) affects and how the three settings work together to form an exposure.
In my opinion, shutter speed is the most important to understand, mainly because it has great importance across all genres, especially wildlife and landscape photography. The specific shutter speed you choose can dramatically change how an image looks – i.e. take the same scene and shoot it at two different shutter speeds. I also think that shutter speed is the most basic setting to understand of the three. It simply means how long the shutter is open, right? The short answer is yes, but the effects and consequences of various shutter speeds can be difficult to comprehend, especially for beginners.
What is Shutter Speed Exactly?
The foundation of shutter speed is the camera shutter. The shutter acts as a curtain in front of the shutter. When you take a picture, the curtain reveals the sensor and your ‘shutter speed’ represents how long the sensor is revealed. The sensor collects light during that time period and then the shutter immediately closes, which stops the transmission of light to the sensor.
So, essentially, ‘shutter speed’ is how long the camera shutter is open and allowing light to hit the sensor. The longer the shutter is open, the more light that hits the sensor, and conversely, the shorter the shutter is open, the less light that hits the sensor.
Shutter speeds are usually expressed in seconds or fractions of a second. For instance, 1” means a shutter speed of 1 second, while 1/500 means a shutter speed of one five-hundredth of a second.
Almost all mirrorless cameras and DSLRs allow shutter speeds as fast as 1/4000th of a second, while allowing a shutter speed as slow as 30 seconds. Some pro-grade bodies allow faster shutter speeds, and you can implement longer shutter speeds than 30 seconds with the use of ‘Bulb’ mode and a camera remote.
The Effects of Shutter Speed
The two big effects related to shutter speed are motion blur and the brightness of your exposure. Blur relates to the sharpness of your photo, but also relates to creative choices in the field, specifically when dealing with water, which I will discuss below. The brightness of your exposure can be affected by shutter speed (but ISO and aperture can also change brightness). In this article, I want to mainly discuss the creative choices that come with shutter speed and some of the other technicalities but see the below on how shutter speed affects brightness.
Think of it this way – the longer the shutter speed, the more light that is able to hit the sensor, the more light that hits the sensor means a brighter exposure. So, with all settings being equal, when you select a slower and slower shutter speed, your final exposure will get brighter and brighter.
General Rule of Thumb
Shortly, I will discuss shutter speed as it relates to wildlife and landscape photography, but I wanted to share a quick rule of thumb that you can apply anytime you are in the field. Shutter speed is the reason we have to use tripods. Slow shutter speeds mean that the camera needs to be stabilized otherwise blur from shake and camera motion will ruin your image.
If you want or need, to shoot handheld here is a quick rule of thumb that can help lead you to a sharp final image.
Your shutter speed should at least be equivalent to 1/2X, where X is your focal length. For instance, if you are shooting handheld at 50mm, your shutter speed should be at least 1/100s. If you are shooting at 200mm, then your shutter speed should be at least 1/400s.
With systems that have a lens or in-body stabilization, you can get away with a shutter speed of 1/X.
Shutter Speed and Wildlife Photography
For wildlife photography, faster is generally better. Our main goal when photographing wildlife is to freeze the animal and freeze the action.
The difficult thing about shutter speed for wildlife and moving subjects is there is no ‘correct’ speed. At a minimum, I recommend a shutter speed of 1/500s. If the animal isn’t moving, you can get away with slower speeds, like 1/250s. Every situation is different, which is why picking a one size fits all shutter speed is difficult. Keep in mind the general rule above, if you are using a 600mm prime, then you should aim for a shutter speed of 1/600s or 1/1200s depending on your camera and if any stabilization is used, such as a gimbal head and tripod.
The key is to select a starting shutter speed, like 1/500s, and fire off some test shots. Jump into preview mode immediately and zoom in to see if the animal is sharp. Faster is always better though, and sometimes you only have one chance to capture a shot before the animal or moment has passed. If I am hand-holding at 400mm and a bear appears out of nowhere, I might bump up my shutter speed to 1/1000s to 1/1500s just to make sure I get a sharp shot. Those shutter speeds are most likely more than fast enough to capture a sharp shot, but better safe than sorry.
Birds in flight also garner some special consideration. Not only is the subject moving, but it is moving fast. One of the big objectives when it comes to photographing birds in flight is to freeze the wing motion. A good starting point for freezing wing motion is a starting speed of 1/1000s. I find myself shooting birds in flight at 1/1500s to 1/2000s. Again, faster is better.
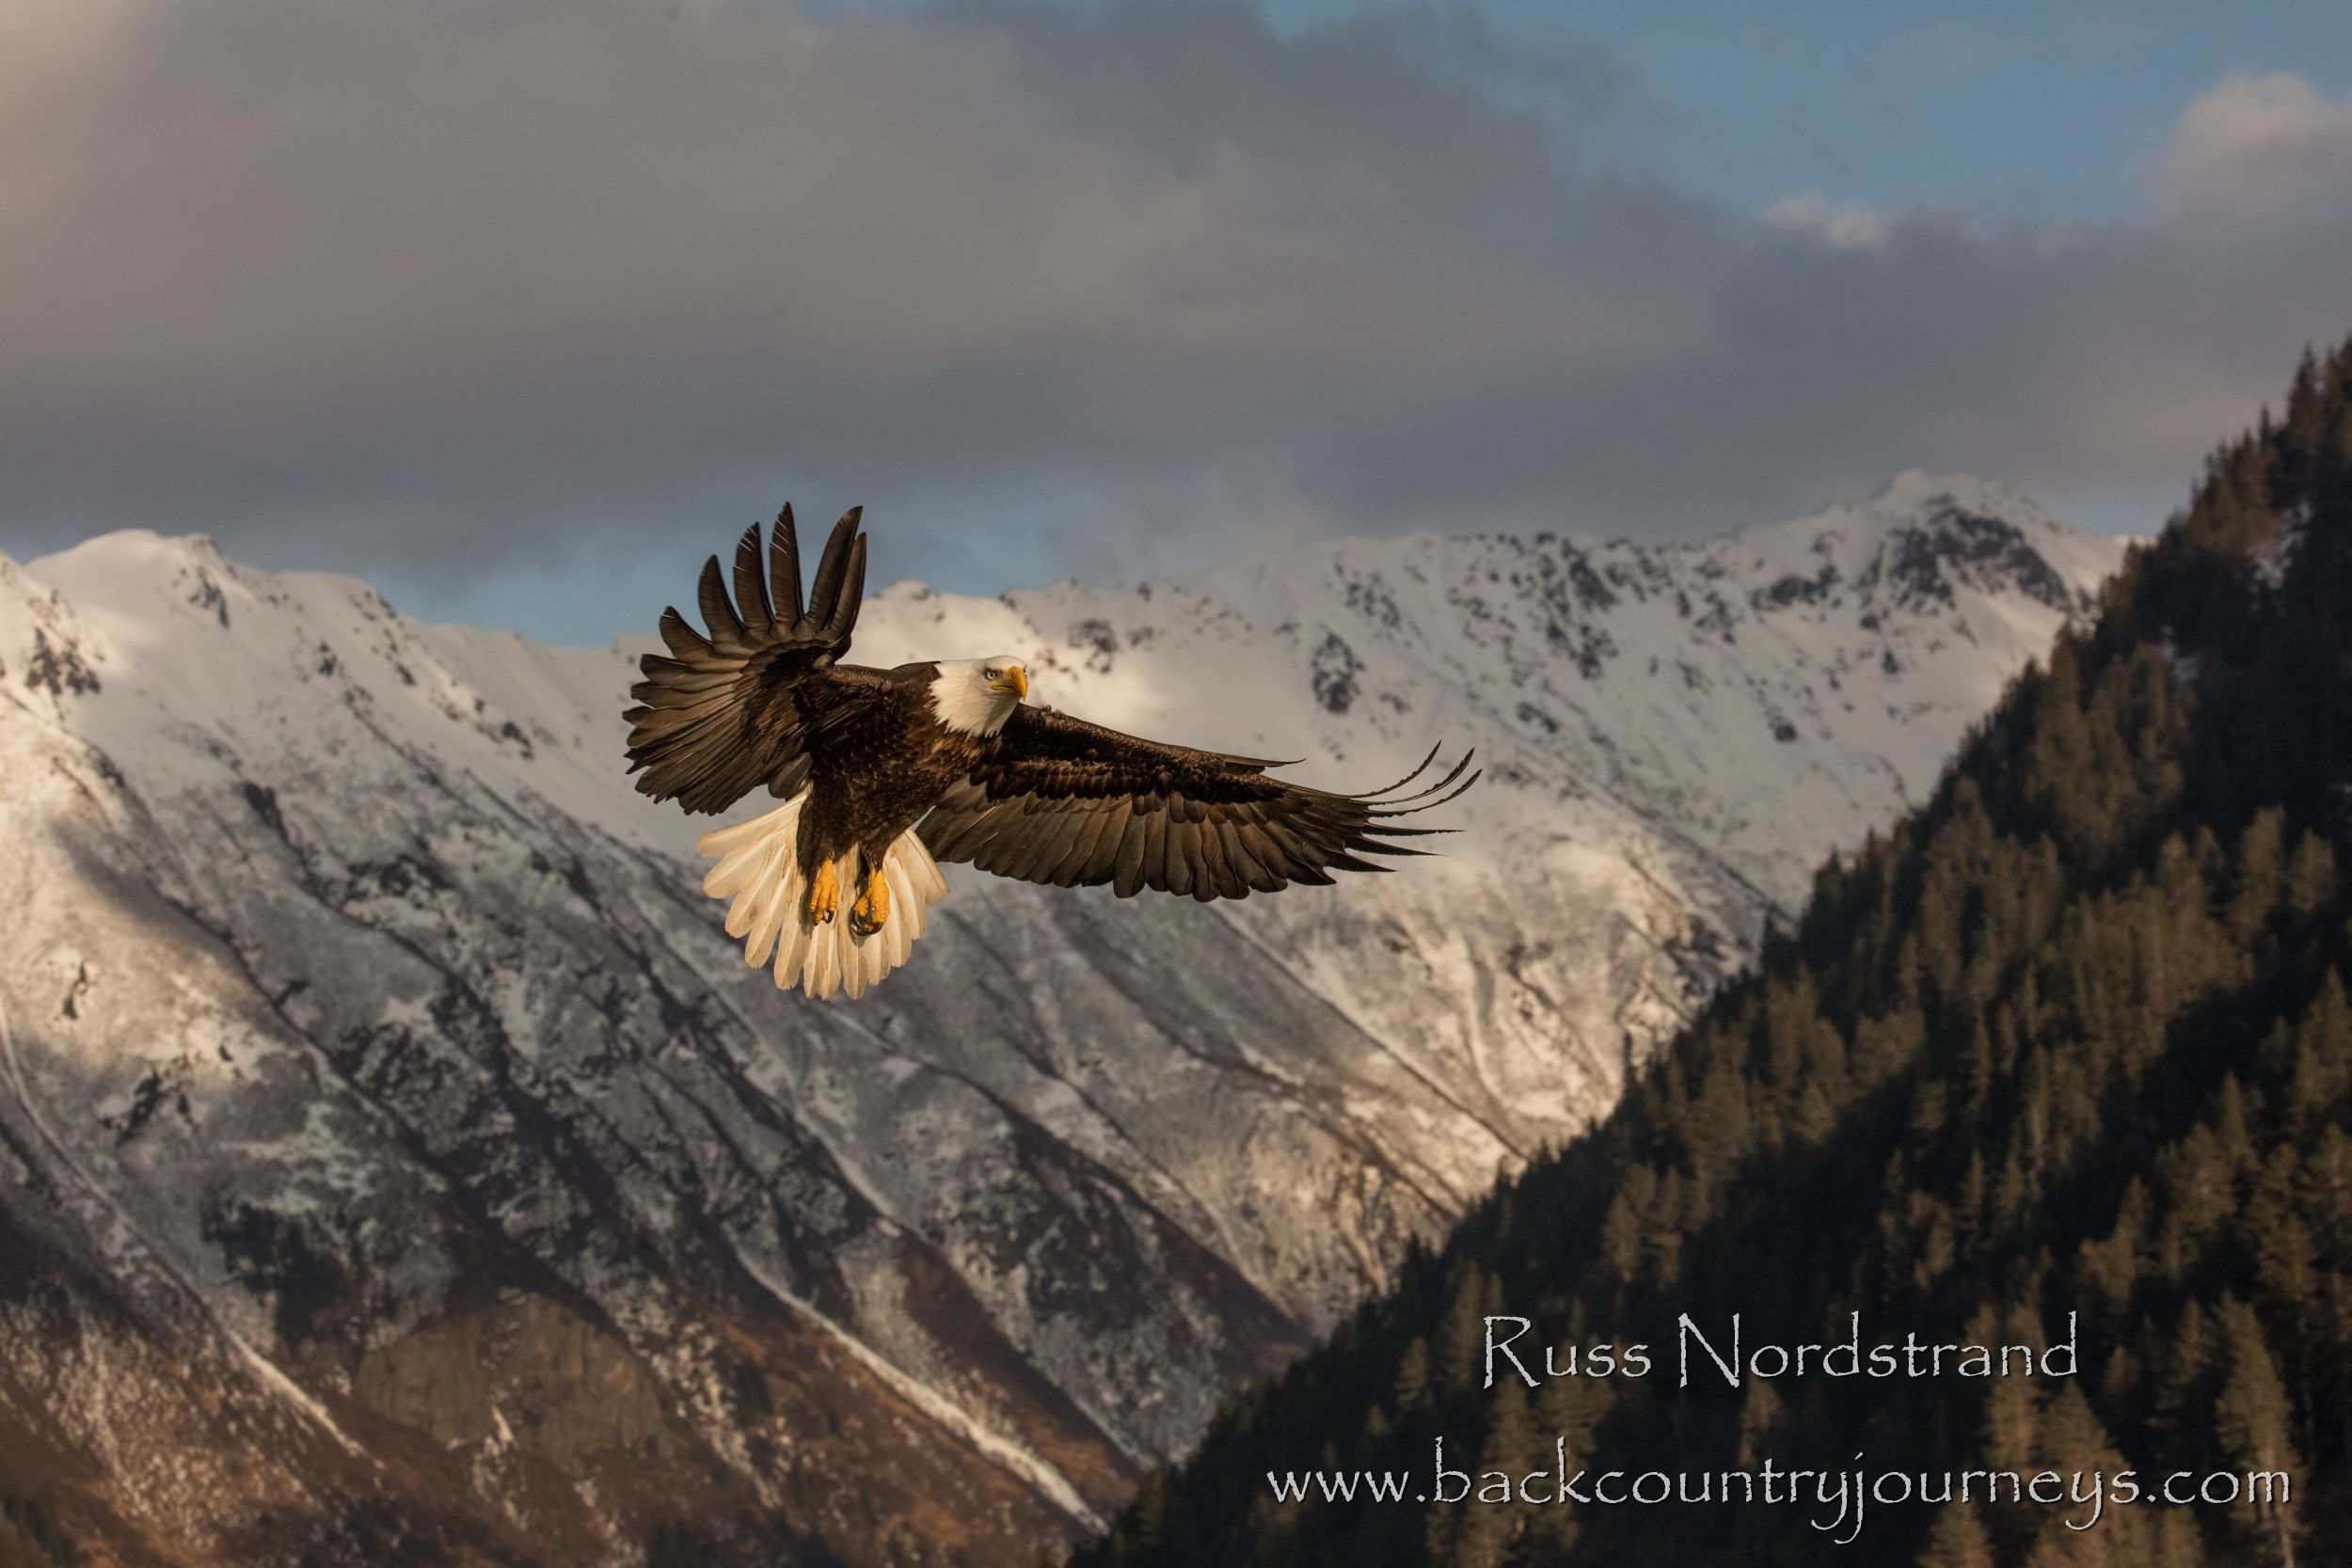
In this situation, a shutter speed of 1/1500s was used to ensure the flying eagle would be sharp. Photo by Russ Nordstrand
Creative techniques using shutter speed can also be used for wildlife photography. Slower shutter speed can blur wildlife movements, which can create unique effects. I have seen great shots using a slow shutter speed anywhere from 1/20s to 1 second on birds in flight and wildlife in motion. Ben Blankenship, one of our great BCJ guides, used a slow shutter speed while capturing some bison in Yellowstone National Park recently, and the end result was great.
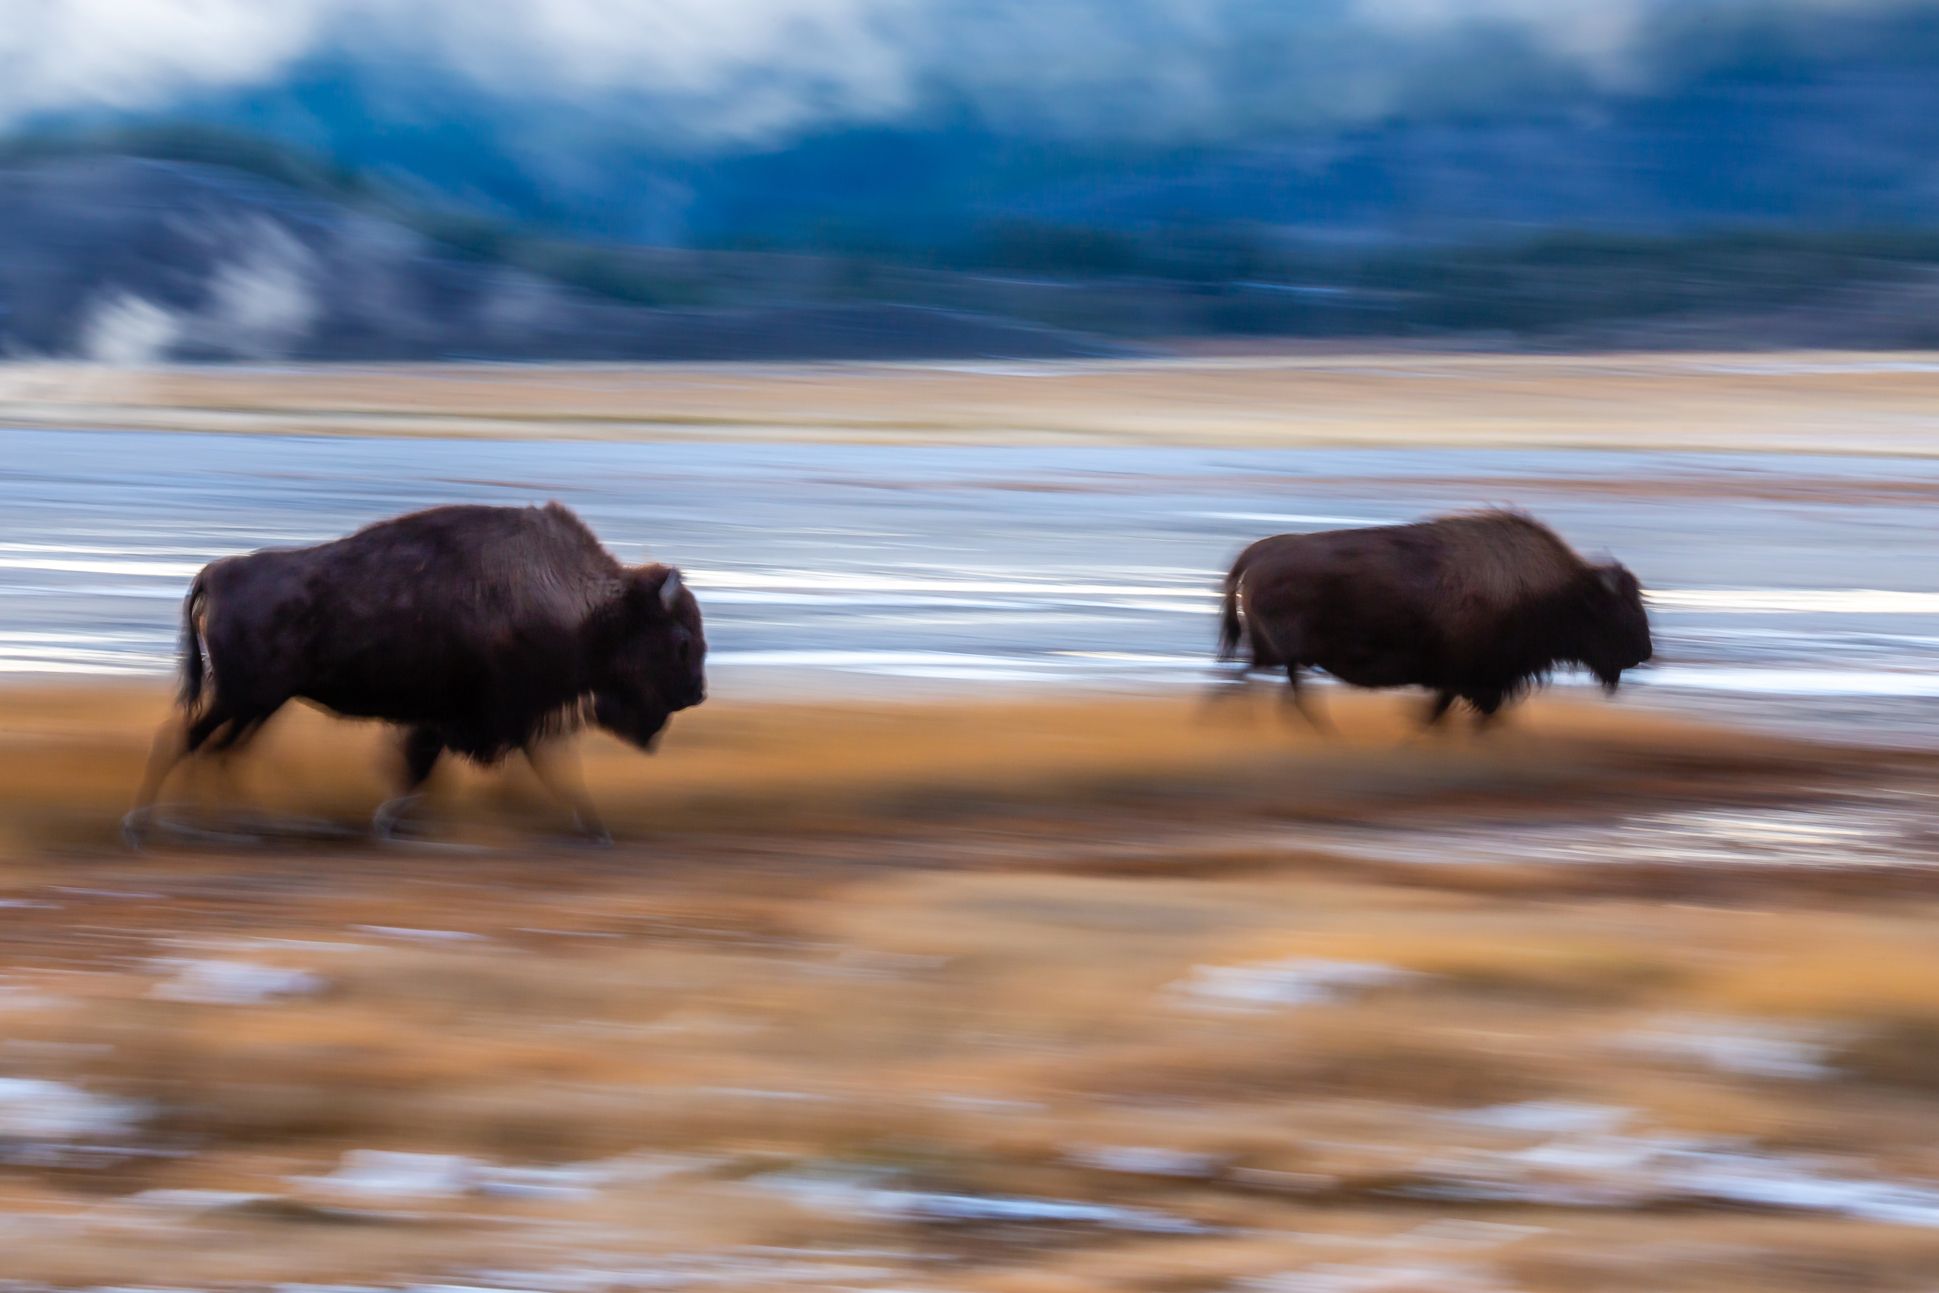
Ben used a slow shutter speed to blur the bison running, which resulted in a very creative photograph. Photo by Ben Blankenship
Shutter Speeds for Landscape Photography
For most situations, shutter speed does not matter for landscape photography. The reason? Because we are almost always shooting with the camera mounted on a tripod, which means a shutter speed of 15 seconds or 1/200s has no effect on the sharpness of our image since the camera is stabilized. I recommend always using the 2-second timer option on your camera or a separate camera remote to minimize camera movement.
If you must handhold, keep in mind the rule of thumb from earlier (1/2X or 1/X, where X is your focal length).
Now there are situations where our shutter speed REALLY matters for landscape photography. Two come to mind – shooting a non-static scene and shooting any scene involving water.
The first situation, shooting a non-static scene, means photographing a landscape where elements are moving. An easy example is windblown scenes. For instance, if you are shooting a nice landscape with fall foliage and the wind is blowing, moving all those autumn leaves in the tree around, you need to adjust your shutter speed to ensure it is fast enough to freeze the motion of the trees and leaves. I usually start at a shutter speed of 1/50s and then go into preview and zoom in to see if the elements are sharp. Rinse and repeat, adjusting my shutter speed as necessary.
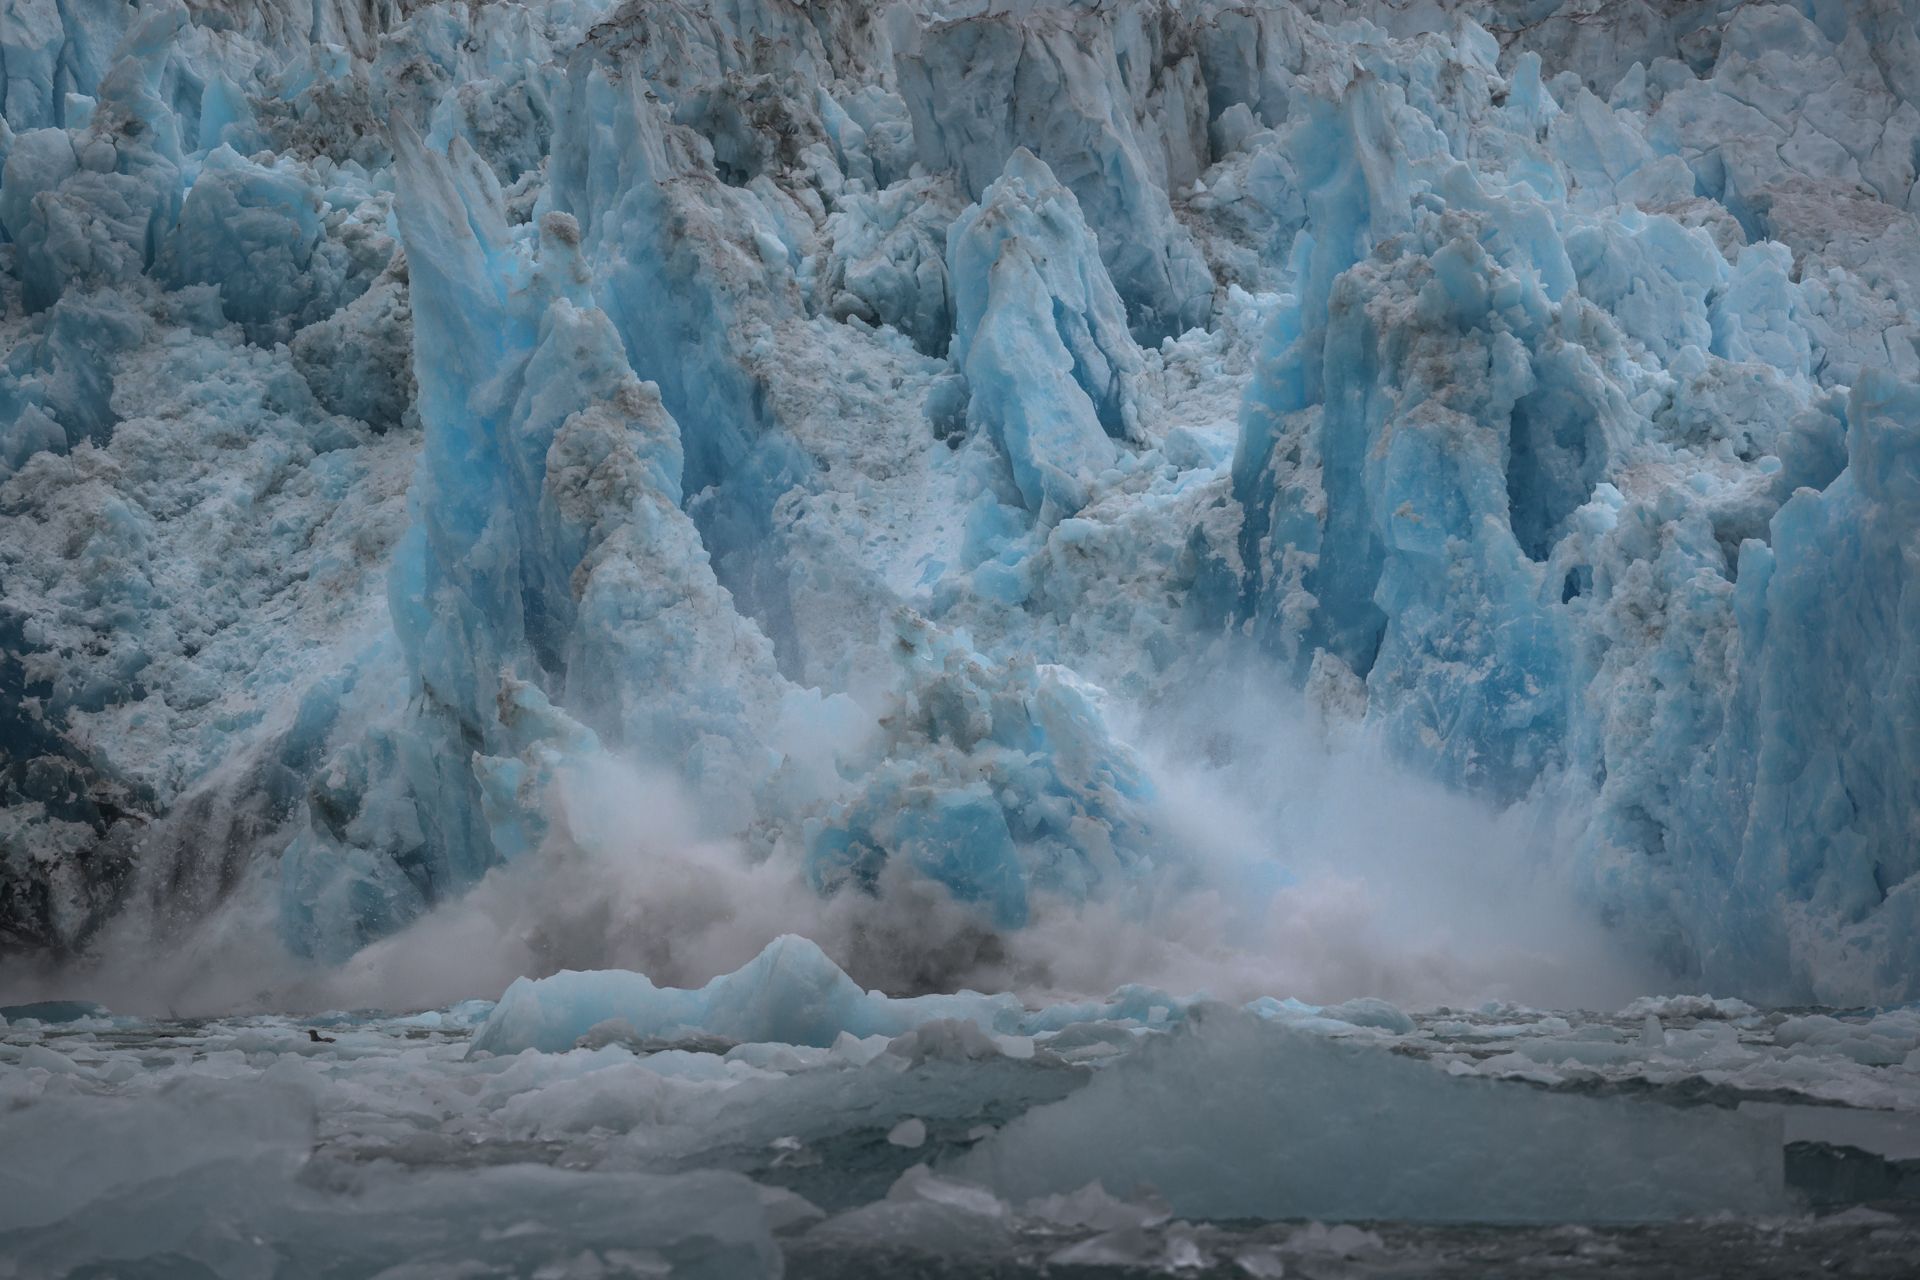
To capture this ice calving from Sawyer Glacier in Alaska, I chose a shutter speed of 1/500s to ensure I froze all the movement in the scene. Photo by Matt Meisenheimer
Things get interesting when we discuss water. Shutter speed has an incredible effect on water, whether you choose a fast or slow shutter speed. Slow shutters speeds will blur the motion of the water, creating a unique effect. Fast shutter speeds will freeze the motion of the water, ensuring ample detail in the water. The choice of shutter speed is not a given though, as many photographers prefer their water to look a certain way.
I myself prefer a shutter speed of 1/6s to 1 second for water. I prefer fast-moving water or crashing waves at 1/5s or 1/6s. I find those speeds blur the water just enough while maintaining detail in river rapids or splashing waves. I usually use a 1-second exposure for waterfalls. These are just basic starting points though, as I adjust my shutter speed based on the specific scene and what looks good to my eye.
Another good use for slow shutter speed is when you are shooting a lake or body of water that might have small waves or ripples. Slow shutter speed will completely smooth out the water and make the image much more visually appealing.
Water will look dramatically different at faster shutter speeds, like 1/100s to 1/500s. Below are some examples of what water looks like at varying shutter speeds.

This waterfall was captured using a shutter speed of 1/500s. You can see the impressive detail in the cascading water spray. Photo by Matt Meisenheimer
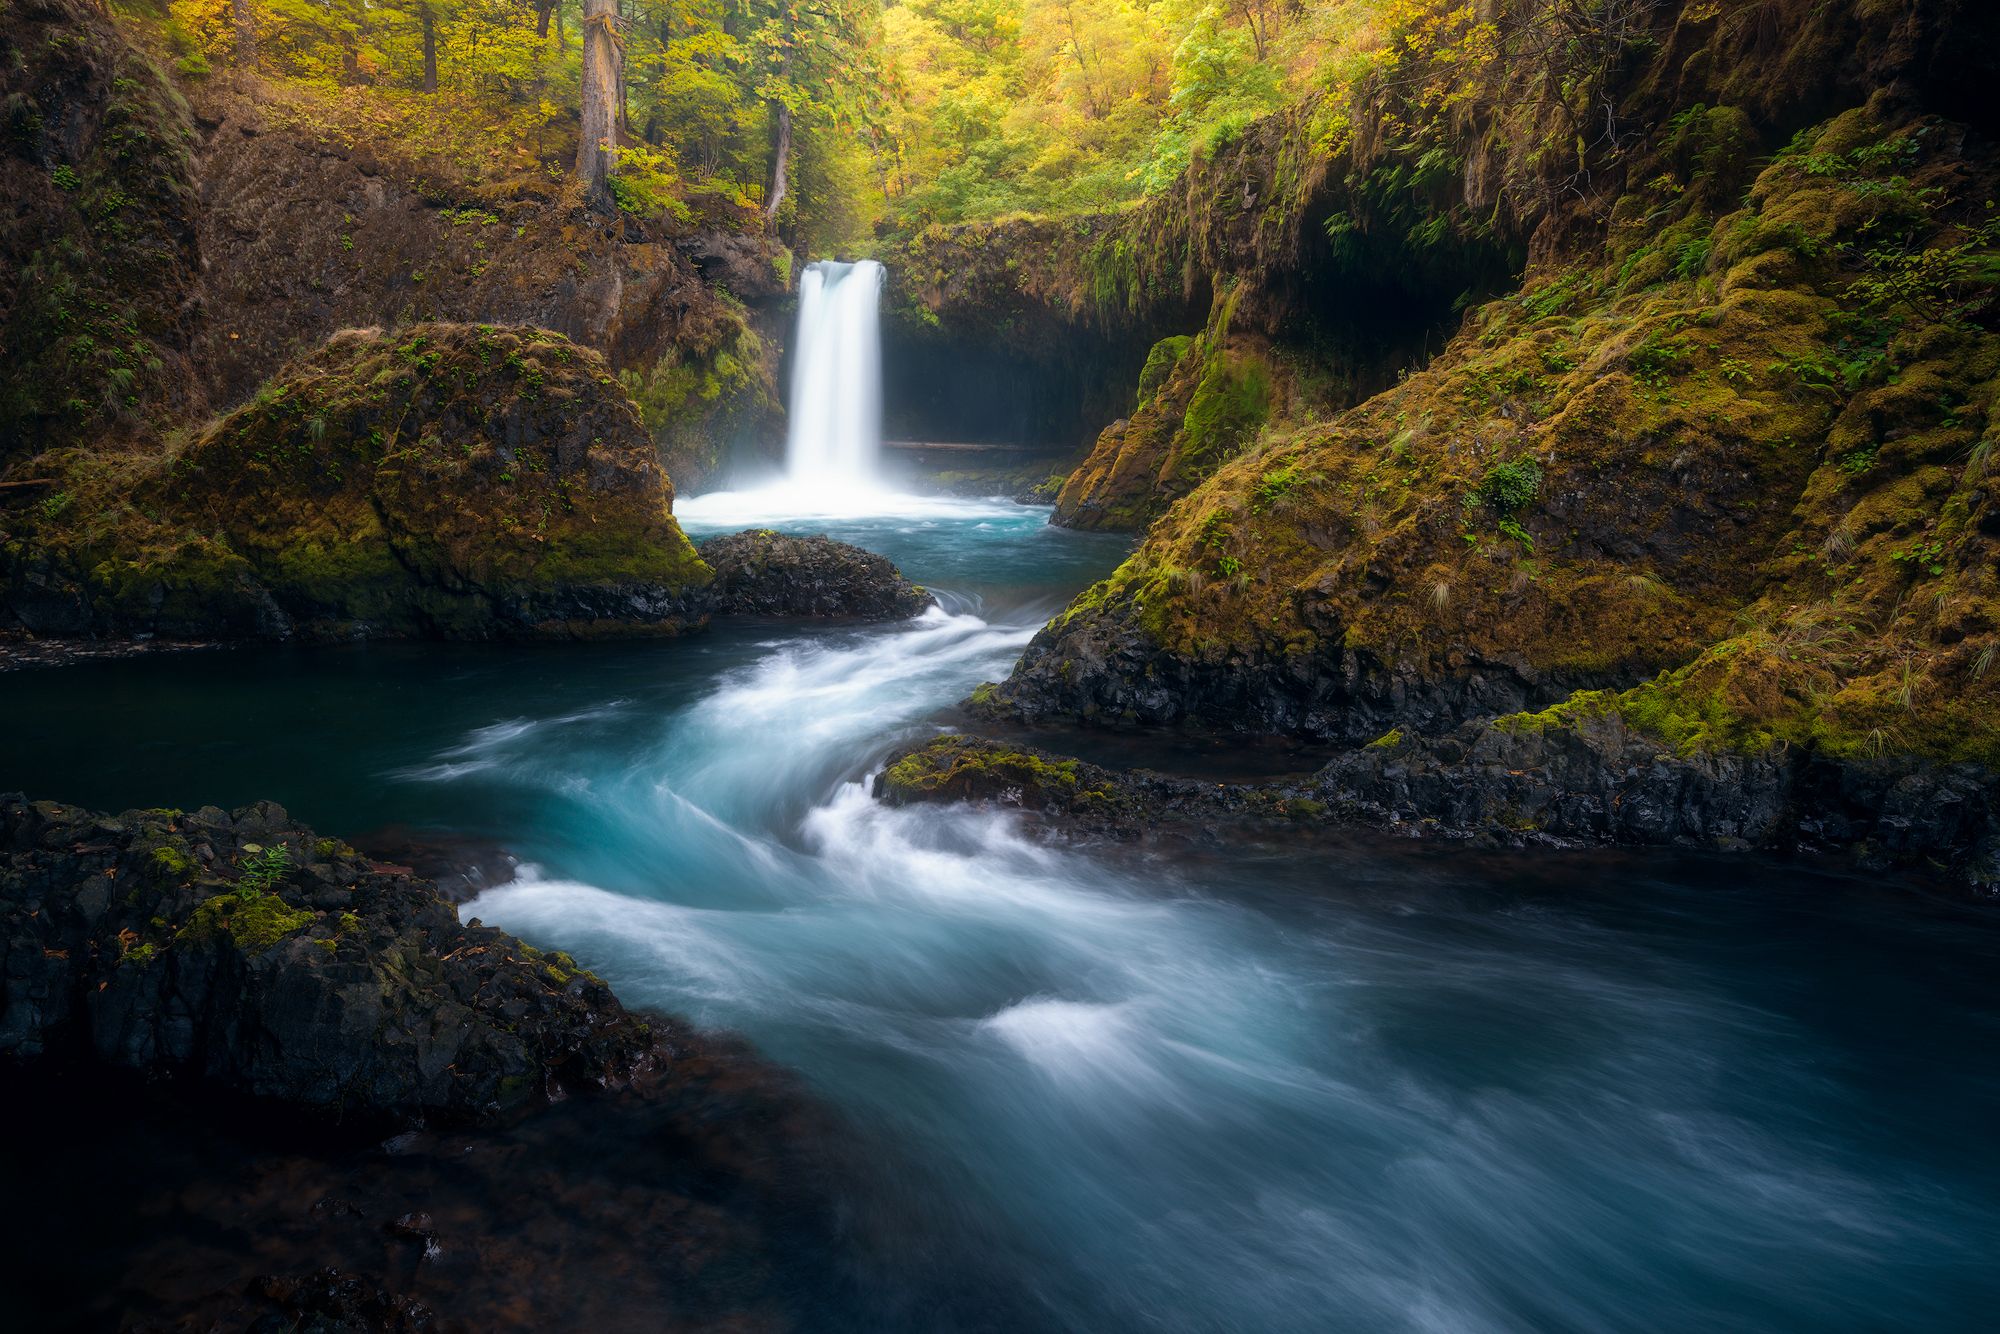
This is a beautiful waterfall tucked away in the Columbia River Gorge. I used a 1-second shutter speed, as I liked the amount of blur it introduced to the water. Photo by Matt Meisenheimer
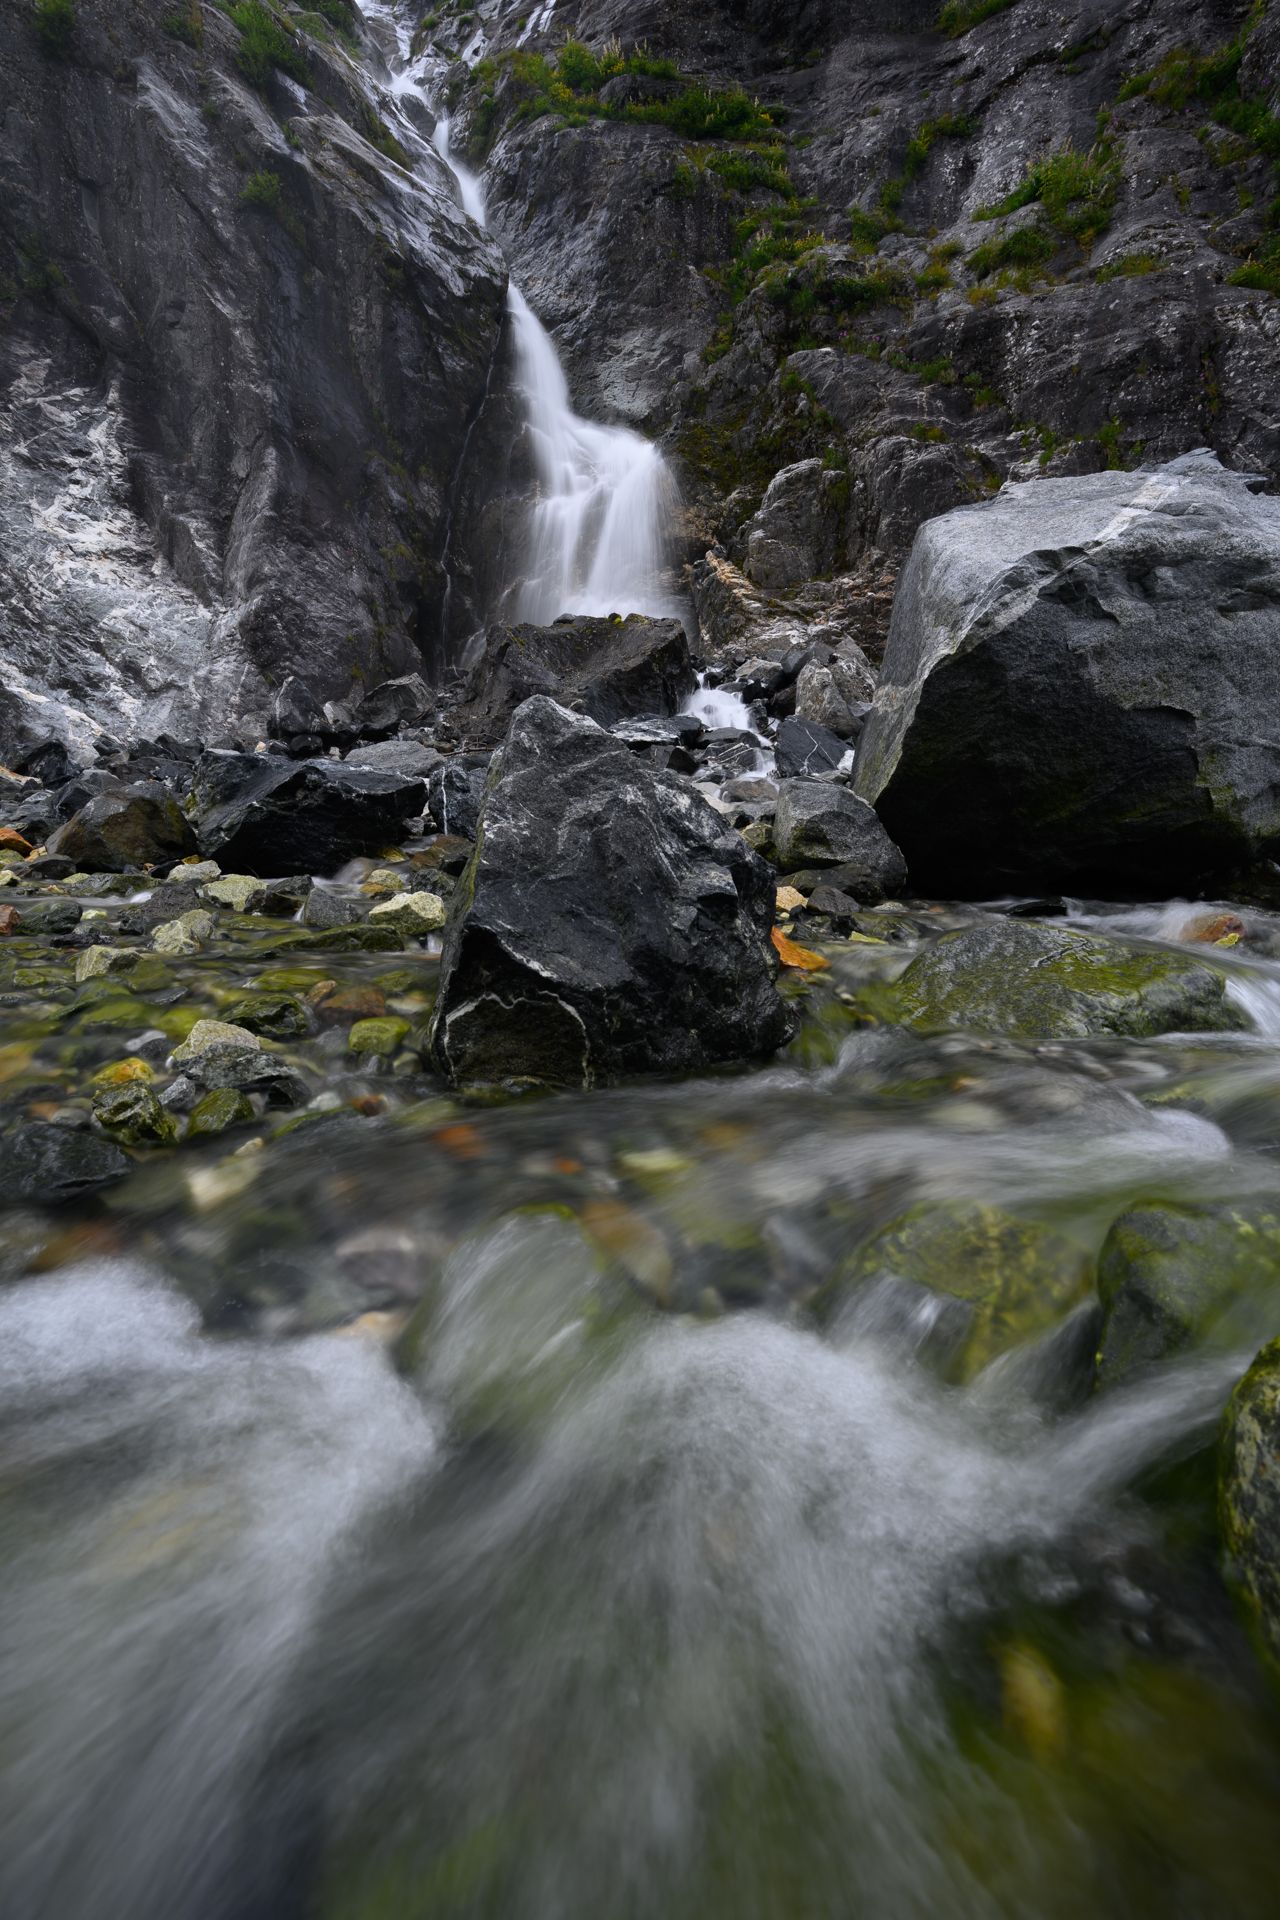
I captured this waterfall in Alaska using a shutter speed of 1/4s. I liked how 1/4s blurred the rapids in the foreground, as well as the waterfall. Photo by Matt Meisenheimer
Look at the examples, you can see the wide array of results from shooting water at differing shutter speed. No two shots of water are alike as well, that is another reason I like shooting water so much. Regardless of what effect you prefer, next time you are in the field, I recommend adjusting your shutter speed for water so you can first hand see the differences in your own photos.
Panning
You can also come up with some creative photos by trying out panning techniques. For instance, some interesting shots of trees (especially trees with fall color) can be created by setting a shutter speed of 1/10s to 1/30s and panning vertically immediately after pressing the shutter button. See below for an example.
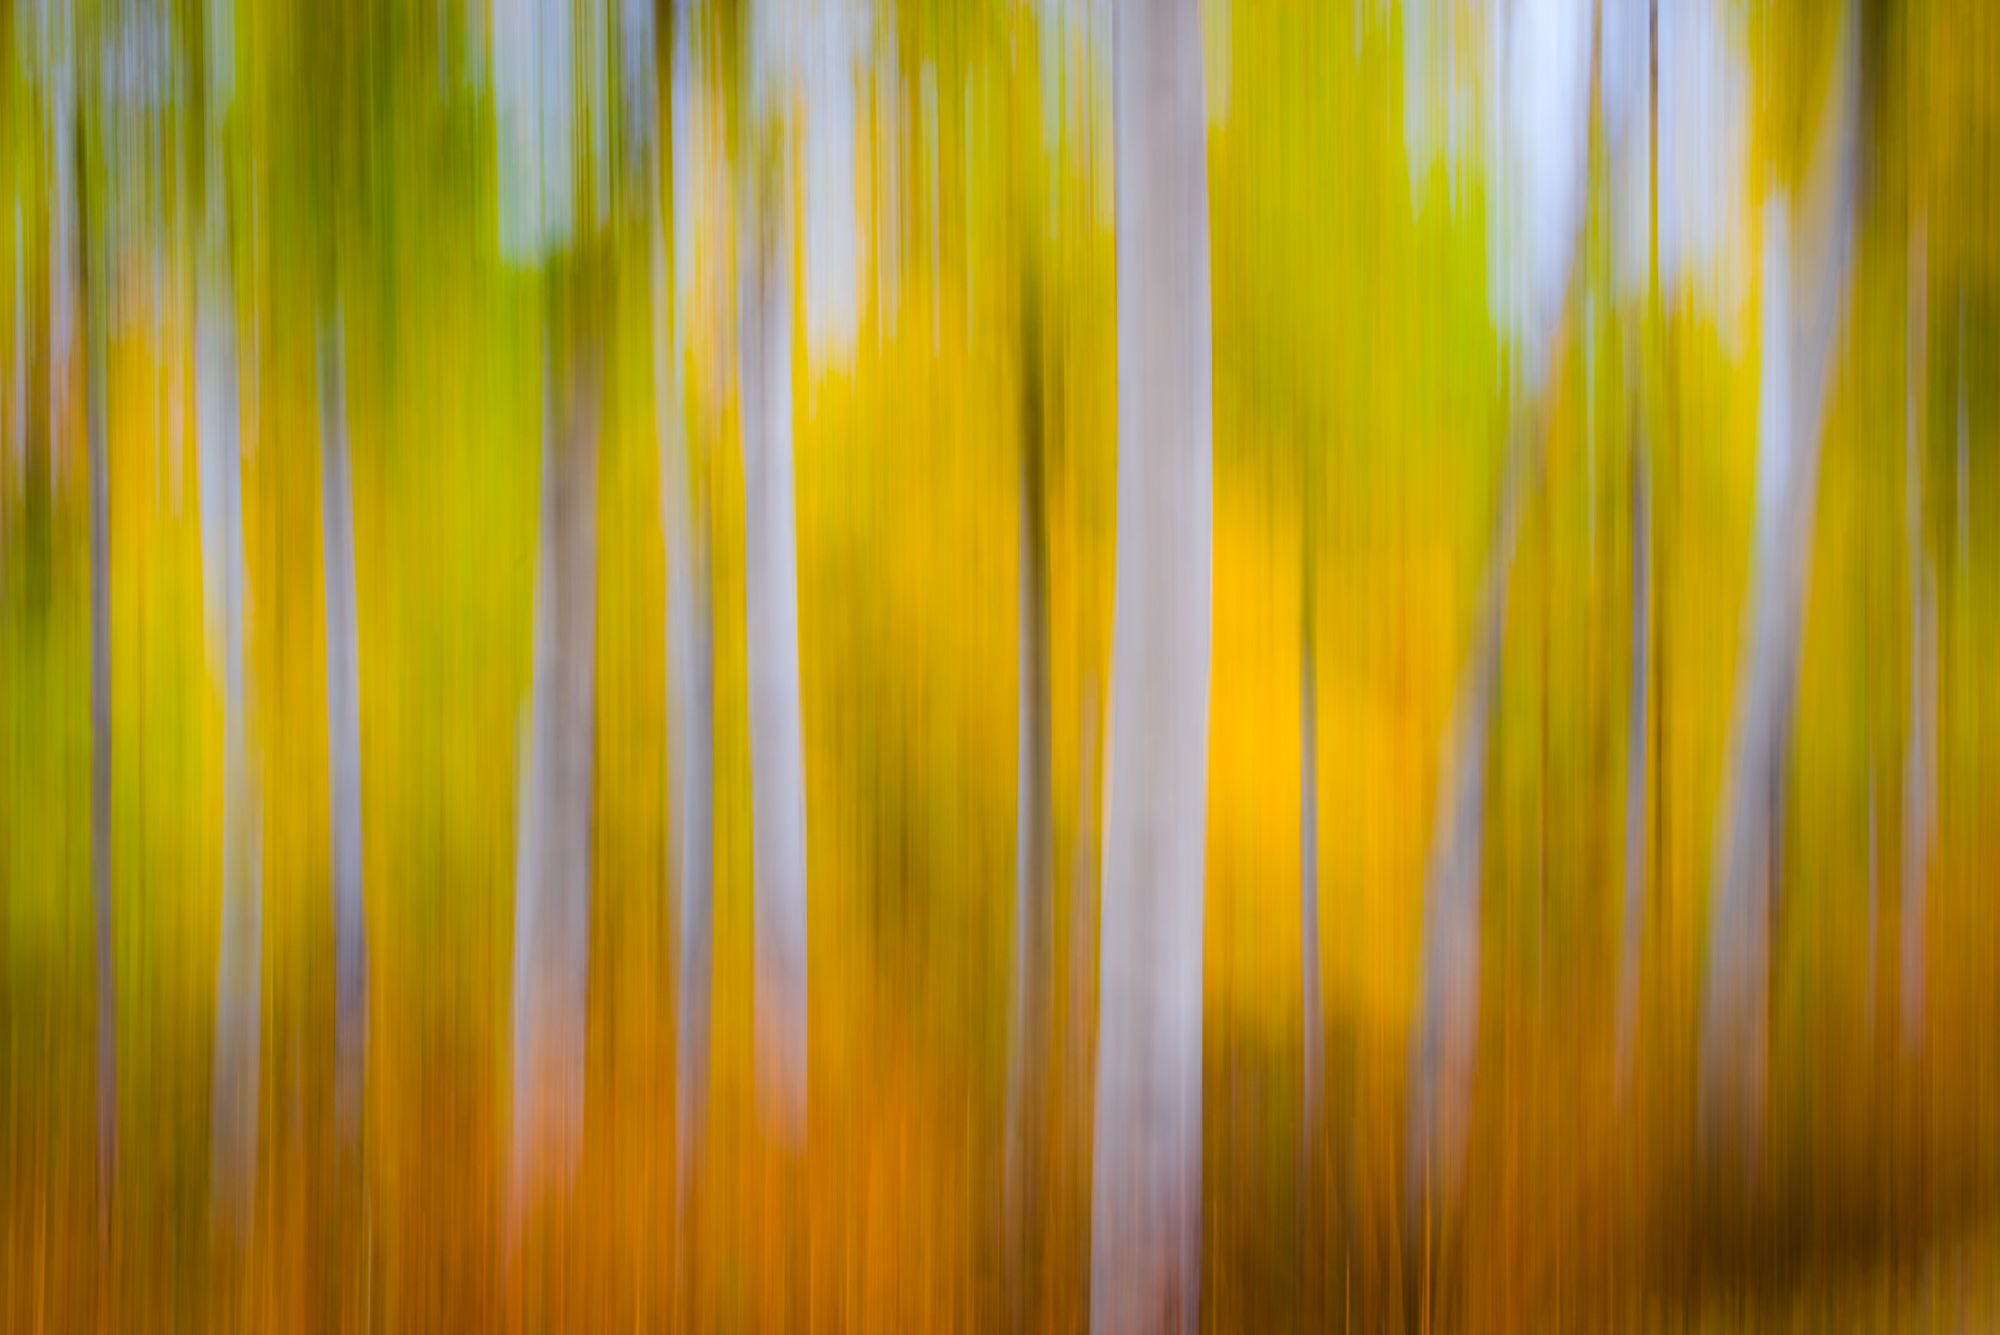
The image is of an aspen grove during fall. The creative blur was achieved using the panning technique described.
Night Photography
Shutter speed is extremely important for night photography. Slow shutter speeds are required for night photography. Night is hard on our camera; landscapes are completely dark and the camera sensor needs a lot of time to absorb as much light as possible. Shutter speeds for night photography can range from just a few seconds to 25-30 seconds. A few seconds can suffice at dusk or dawn, or during a really strong Northern Lights show. Longer shutter speeds, like 20 seconds, will be required for capturing the stars and Milky Way.
The Milky way is a lot of fun to shoot, so I will recommend some settings. A good starting point is a shutter speed of 20-25 seconds (f/2.8 to f/4, ISO 1600 to ISO 3200)…too much longer than that and the stars will start to blur due to the rotation of the Earth.

This image of the Milky Way was captured using a 20-second shutter speed – 14mm, f/2.8, 20s, ISO 6400). Photo by Matt Meisenheimer
Side Note: Neutral Density Filters
Neutral density (ND) filters can help you achieve slower shutter speeds. An ND filter is analogous to putting sunglasses on. When we put on sunglasses, light is blocked and things appear darker. It is the same for an ND filter, they reduce the amount of light available to your camera sensor. They come in different stops – 4 stop, 5 stop, 6 stop, 10 stop and more. The more stops of light, the darker the filter will be and the more light it will block.
I use ND filters for two scenarios – when I want a slower shutter speed of 1/5s to 1s, but there is too much light to achieve those shutter speeds at optimal aperture and ISO settings AND when I want a really long exposure.
First, I use a 4 stop or 5 stop filter when I am shooting most ocean scenes, especially in the US when I find myself on the west coast for most of my seascape photography. Because the sun is setting in the west and I am shooting directly into the sun, I cannot achieve slow shutter speeds when I am at optimal settings of f/11 and ISO 64, for instance. Putting an ND filter on my lens reduces the amount of light (like sunglasses) and allows me to get that slower shutter speed. I also use an ND filter when shooting waterfalls and streams in bright light.
Occasionally, I use a really dark ND filter, like a 10 stop to experiment with blurring. For instance, I might try a really slow shutter speed on water, like 20-30 seconds. That long of a shutter speed will result in wispy water, which can be a cool effect with the right composition. A super long shutter speed like that can also have an interesting effect when used in conjunction with fast-moving clouds. A 20 second exposure will blur the clouds and streak them. That can be a really nice complement to your scene
Closing Thoughts
I cannot stress enough the importance of having a deep understanding of the three big camera settings – shutter speed, aperture, and ISO – and understanding how they work together. Shutter speed is very important because it has direct implications on the sharpness of your image, but also has many creative uses. When you are in the field, think about the shutter speeds you are using and the final results you are getting. Why is the animal you are shooting sharp, what focal length were you at, why is the water blurred, why is my image blurred etc. Question your results so you can better understand the settings you use. When you become an expert in the technicalities, then you can just react in the field and let creativity take over.
Keep in mind the general rule of 1/2X or 1/X, and the general starting places to use for different types of photography. For wildlife photography, we commonly want shutter speeds as fast as possible. For landscape photography, usually shutter speed does not matter as much, but has big implications when it comes to movement and water. The best thing you can do is to get out there and shoot as much as possible, and try out some of these settings and techniques.

We offer world-class travel photography
experiences around the world.
Each tour is bundled with lodging, meals, and transportation between workshops included, allowing you to focus on photography instead of the stress of traveling.
experiences around the world.
Each tour is bundled with lodging, meals, and transportation between workshops included, allowing you to focus on photography instead of the stress of traveling.
Get Our Trip Catalog
Receive a trip catalog that highlights all of our upcoming photo tours and workshops.Schedule a Trip Consultation
Meet with a photo experience coordinator, and experience a personal touch to your booking experience.Trip Calendar
View our trip calendar and filter upcoming departures by interest or seasonality.Webinars
Our regularly hosted webinars provide photography instruction from our own guides on a wide range of topics.Education Portal
Explore our library of articles that cover everything from common questions, to in-depth guides on how to achieve that perfect shot.BACKCOUNTRY JOURNEYS
"Backcountry Journeys offers guests the unique opportunity to explore our natural world from behind their own lens. We run a selection of hand-crafted Photo Tours, Workshops & Safaris connecting passionate people to exceptional experiences. Locations worldwide.
- Russ Nordstrand, Backcountry Journeys Founder & Director
- Russ Nordstrand, Backcountry Journeys Founder & Director
TRIP CATALOG
Download our Trip Catalog for detailed information on our many destinations for photography tours, workshops, and safaris.
All Images & Content are property of Backcountry Photography Tours, Workshops & Safaris LLCs - Copyright 2025
BACKCOUNTRY JOURNEYS
"Backcountry Journeys offers guests the unique opportunity to explore our natural world from behind their own lens. We run a selection of hand-crafted Photo Tours, Workshops & Safaris connecting passionate people to exceptional experiences. Locations worldwide.
All Images & Content are property of Backcountry Journeys Photography Tours, Workshops & Safaris LLC - Copyright 2025
TRIP CATALOG
Download our Trip Catalog for detailed information on our many destinations for photography tours, workshops, and safaris.