Awarded 2025 Travelers' Choice

About Backcountry Journeys
Why Choose Backcountry Journeys
If you're considering a photography trip, hear why Backcountry Journeys delivers the best experience in the industry.Frequently Asked Questions
If you're new to photography trips, or new to BCJ, you can find our common travel questions here.Fitness Levels
Our trips vary on physical intensity, and by reviewing our fitness levels, you can find out which trips may be more challenging, or aligned more closely with your comfort level.Meet The Crew
We've built an amazing team of experienced guides, and dedicated office staff that elevate your travel experience. Get to know their backgrounds, and hear their stories.Loyalty Program
We reward our frequent photo adventurers with exclusive discounts on amazing photography trips.Contact Us
If you need to get in touch with our office staff, or have additional business inquiries, you can find our information here.Refer a Friend
Know someone perfect for one of our tours? Recommend them through this quick form.Stay Up To Date On All Things
Backcountry Journeys
Backcountry Journeys
Our Photography Community
Our Webinars
Our regularly hosted webinars provide photography instruction from our own guides on a wide range of topics.Our Education Portal
Explore our library of articles that cover everything from common questions, to in-depth guides on how to achieve that perfect shot.Community Testimonials
We're proud to foster an amazing group of photo travelers, and here you can find their stories from their past adventures.Resources For Photographers
About Our Company
Resources For Photographers
About Our Company
Understanding ISO

Published February 8, 2019
ISO is the measure of your digital camera’s sensor sensitivity, but where did that term come from? How does it affect an image? And how can you use it to your advantage to make the most of your images? I hope to answer all of these questions and more as we discuss another great tool for modifying your camera’s exposure and capturing quality images.
What is ISO?
ISO is the abbreviated name for the International Organization for Standardization, an international non-governmental organization that establishes international industrial and commercial standards for a wide variety of products including food, technology, mechanics and healthcare.
Prior to 1974, there was a wide variety of systems for determining the standard speed of film, some dating back to the 1930’s. These various systems were developed in many different countries and used differing variables and base values for calculating the exact speed of a roll of film, and as a result, buying or using film in different countries proved very difficult as there was no standard measure. The ISO stepped in and merged two different measurement styles in 1974 and the ISO standard was born.
This standard has since been adopted as the primary standard for measuring film speed, and in 1998 the ISO organization released a new standard for digital photography “film speed” and after being modified in 2006, we now have the current standard for digital sensor sensitivity, being written as simply ISO x with the x being a whole number, typically as low as 100, and in some modern high end cameras producing ISO values in the millions.
As it relates to photography, ISO was originally a measurement of film speed as it relates to film cameras and the overall sensitivity to light, and as a result, the speed at which an image was captured on that film. This was measured by the density and size of the photosensitive crystals embedded in a piece of film. Larger crystals meant faster film, but also would result in more of a grainy appearance due to the larger individual crystals being triggered by particles of light.
Slower film (distinguished by a lower ISO number) meant the film took a longer time to capture an image at the same brightness than film with a higher ISO number (faster film) because there were smaller individual crystals which had to be exposed to light longer in order for them to be triggered and reflect the image during processing. This allowed a photographer to manage shutter speeds in conjunction with the speed of their film to ensure a proper exposure and an ability to capture movement or freeze action. Higher film speeds would allow higher shutter speeds, and vice versa without the image being too bright or too dark.
How does ISO affect my image?
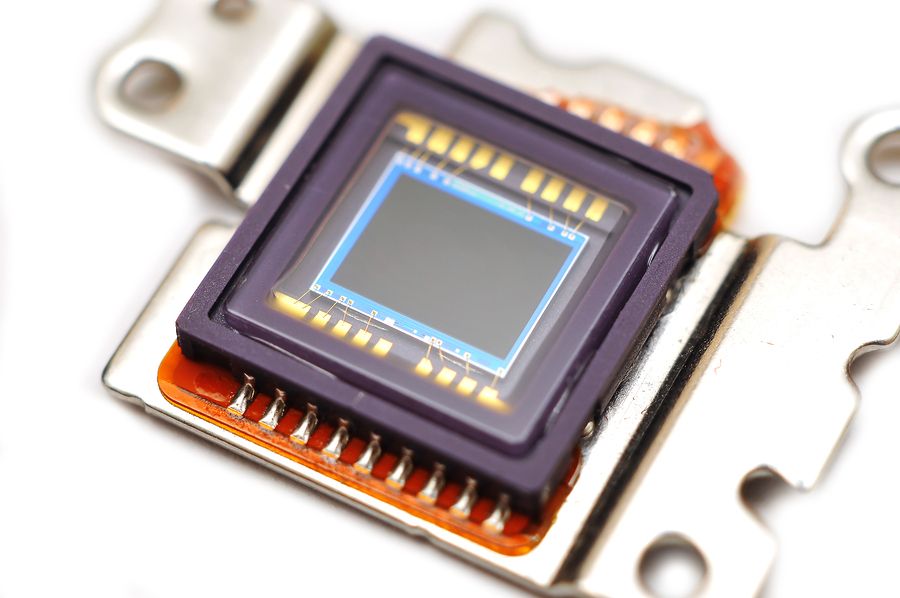
Each digital camera has a sensor behind a shutter and a lens. That sensor is what converts light particles into digital signals, and those signals tell your camera what color and brightness to display within each pixel. Your camera will then put all of those pixels together to recreate your image. Simple, right? Well, ISO is what will help your sensor to know how brightly to collectively display your pixels.
What is ISO?
ISO is the abbreviated name for the International Organization for Standardization, an international non-governmental organization that establishes international industrial and commercial standards for a wide variety of products including food, technology, mechanics and healthcare.
Prior to 1974, there was a wide variety of systems for determining the standard speed of film, some dating back to the 1930’s. These various systems were developed in many different countries and used differing variables and base values for calculating the exact speed of a roll of film, and as a result, buying or using film in different countries proved very difficult as there was no standard measure. The ISO stepped in and merged two different measurement styles in 1974 and the ISO standard was born.
This standard has since been adopted as the primary standard for measuring film speed, and in 1998 the ISO organization released a new standard for digital photography “film speed” and after being modified in 2006, we now have the current standard for digital sensor sensitivity, being written as simply ISO x with the x being a whole number, typically as low as 100, and in some modern high end cameras producing ISO values in the millions.
As it relates to photography, ISO was originally a measurement of film speed as it relates to film cameras and the overall sensitivity to light, and as a result, the speed at which an image was captured on that film. This was measured by the density and size of the photosensitive crystals embedded in a piece of film. Larger crystals meant faster film, but also would result in more of a grainy appearance due to the larger individual crystals being triggered by particles of light.
Slower film (distinguished by a lower ISO number) meant the film took a longer time to capture an image at the same brightness than film with a higher ISO number (faster film) because there were smaller individual crystals which had to be exposed to light longer in order for them to be triggered and reflect the image during processing. This allowed a photographer to manage shutter speeds in conjunction with the speed of their film to ensure a proper exposure and an ability to capture movement or freeze action. Higher film speeds would allow higher shutter speeds, and vice versa without the image being too bright or too dark.
How does ISO affect my image?
Each digital camera has a sensor behind a shutter and a lens. That sensor is what converts light particles into digital signals, and those signals tell your camera what color and brightness to display within each pixel. Your camera will then put all of those pixels together to recreate your image. Simple, right? Well, ISO is what will help your sensor to know how brightly to collectively display your pixels.
Think of it as a way to increase the base brightness of the total image. Only, instead of individual photosensitive crystals in your film, you now have a set number of pixels, regardless of ISO. As a result, it can be a little misleading to say that ISO directly relates to your sensor’s sensitivity, and instead more accurately ISO directly relates to the brightness of each individual pixel. When a pixel is blown out (becoming too bright), the result is the graininess that appears in high ISO photos. The more pixels that get blown out, the more “grain” appears and the worse your photo looks. So why wouldn’t you just always shoot at the lowest possible ISO? The answer, like with most things in photography, is “it depends.”
When should I change my ISO?
In my opinion, the beautiful thing about getting to guide photography tours, (and nature photography in general) is that no two scenes are ever the same. Sure, there may be similar light, similar subjects, or even similar clouds (or lack thereof), but at the heart, there’s never going to be the same scene shot twice from the same spot in the same conditions with the same results. As such, ISO can be a dynamic part of your use of the exposure triangle and a way to ensure great results each time, no matter what the light is doing. Let’s cover a few specific instances when ISO plays a big role.
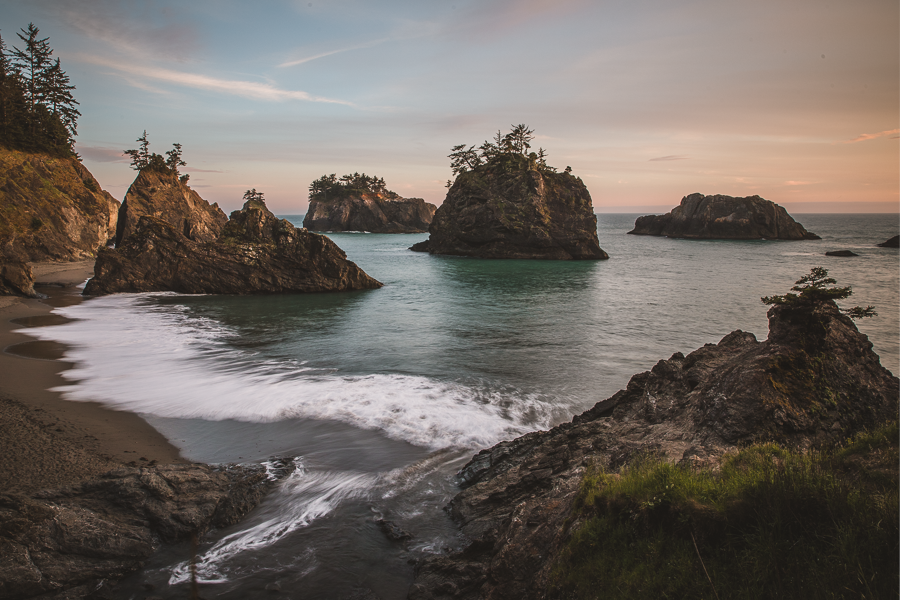
Landscape Photography on a Tripod
When shooting landscape scenes without a moving component (ie. no animals or people in the frame), know that your clearest result will come from an ISO of 100. If you’re shooting a mirrorless system, know that the Sony, Olympus and Panasonic mirrorless systems have all been designed to have their best ISO actually at 200, so shoot at 200 for best results. You Canon and Nikon folks? 100 is your sweet spot.
Why can you count on 100 (or 200) to be your hard line go to for landscapes on a tripod? Because you’re better off using shutter speed to increase total light in your scene than ISO. The use of a sturdy tripod will result in the ability to really slow your shutter way down and get the clearest results with minimal noise caused by high ISO.
When should I change my ISO?
In my opinion, the beautiful thing about getting to guide photography tours, (and nature photography in general) is that no two scenes are ever the same. Sure, there may be similar light, similar subjects, or even similar clouds (or lack thereof), but at the heart, there’s never going to be the same scene shot twice from the same spot in the same conditions with the same results. As such, ISO can be a dynamic part of your use of the exposure triangle and a way to ensure great results each time, no matter what the light is doing. Let’s cover a few specific instances when ISO plays a big role.
Landscape Photography on a Tripod
When shooting landscape scenes without a moving component (ie. no animals or people in the frame), know that your clearest result will come from an ISO of 100. If you’re shooting a mirrorless system, know that the Sony, Olympus and Panasonic mirrorless systems have all been designed to have their best ISO actually at 200, so shoot at 200 for best results. You Canon and Nikon folks? 100 is your sweet spot.
Why can you count on 100 (or 200) to be your hard line go to for landscapes on a tripod? Because you’re better off using shutter speed to increase total light in your scene than ISO. The use of a sturdy tripod will result in the ability to really slow your shutter way down and get the clearest results with minimal noise caused by high ISO.
Landscape Photography Without a Tripod
Knowing that your shutter speed should be no lower than your focal length will ensure minimal shake in the exposure and will allow you to keep your image sharp.
What this means in regards to ISO, however, is that you will need to monitor your ISO in order to allow yourself to shoot at higher frame rates. This can be done with auto ISO, but in low light you may risk the camera selecting a high ISO that causes noise.
To mitigate this, utilize the setting in your camera that allows you to establish an upper limit to your camera’s ISO when on Auto. As your ISO maxes out, you’ll need to adjust your shutter speed or aperture accordingly, but you won’t have to worry too much about the graininess of your photo. With Auto ISO, you’ll also have to establish your desired exposure compensation, to let the camera know how bright to make your image. I typically like to slightly underexpose my images when utilizing the exposure compensation, and will discuss this further in a post on metering in the coming weeks.
Wildlife Photography
The most important component to a well exposed wildlife photograph is going to be your shutter speed. It’s important to understand your subject and the pace at which it moves, and adjust your shutter speed accordingly to ensure a crisp image. If you have a mostly stationary subject, such as a polar bear lounging on shore, your need for a high shutter speed will be much lower than if you’re shooting a bird in flight.
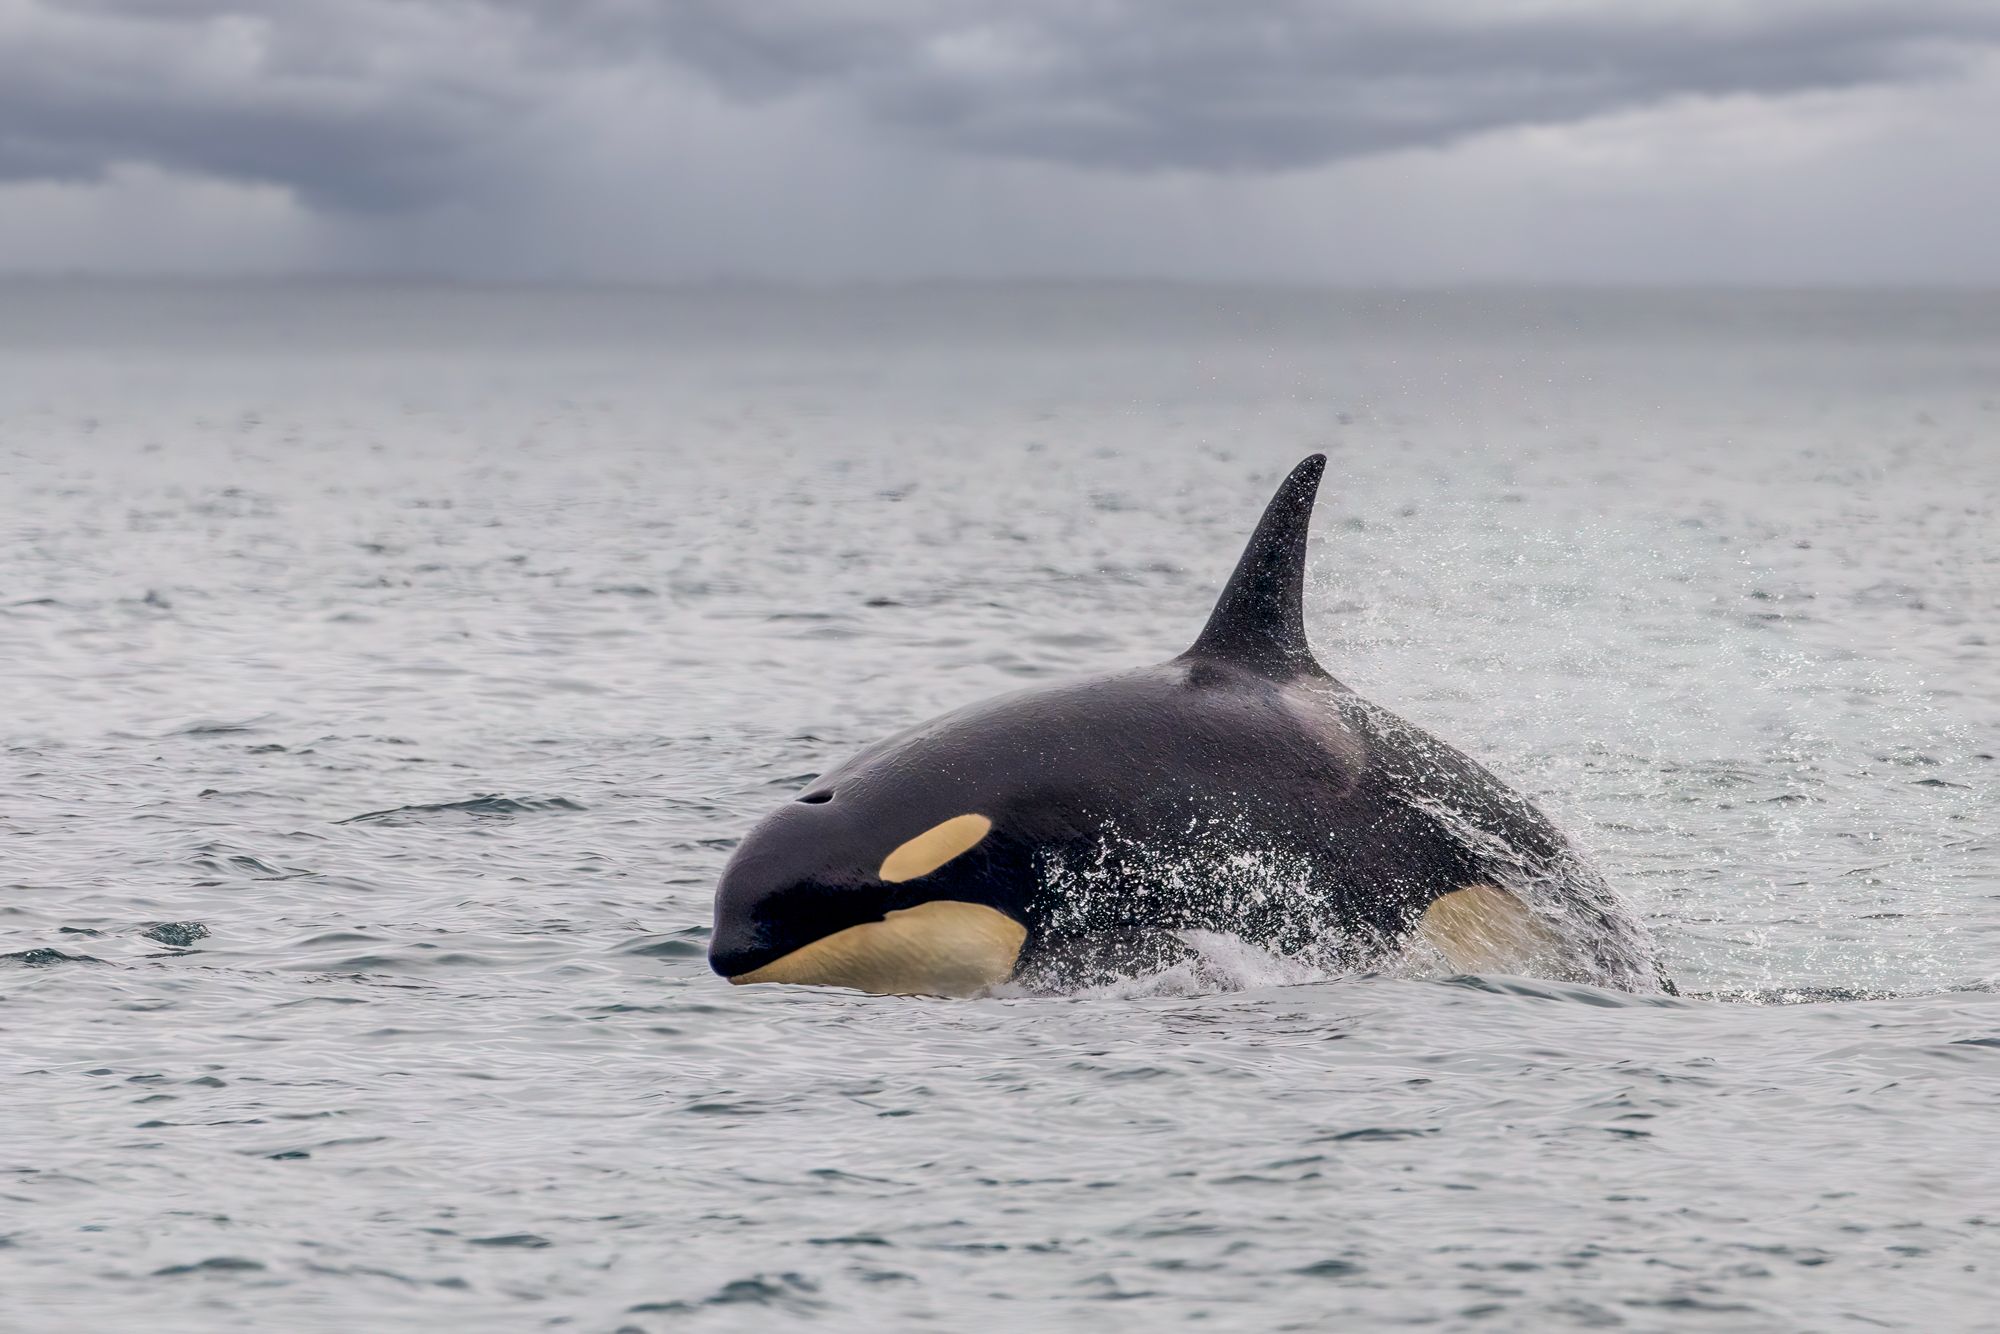
As such, your ISO will also need to change with your shutter speed to ensure a crisp and well exposed image. As a result, when shooting wildlife, I typically adjust my ISO last, after aperture and shutter speed. I like to select an appropriate aperture based on the distance and size of my subject to ensure the entire body is in focus, while still giving me enough depth of field to isolate my subject.
Once I’ve chosen an appropriate aperture, I’ll pick a shutter speed that matches the expected movement of the animal. Birds of prey are typically going to be in excess of 1/2500, while larger mammals will be closer to 1/400 or so depending on light and any anticipated movement.
At this point, I could opt for an auto ISO, but I want to ensure the image is shot at as low of an ISO as I can get, while still maintaining my shutter speed. If the necessary ISO is higher than I’d like to properly expose my image, I’ll open the aperture a bit or slow my shutter speed just a touch to help me out. It’s a delicate balancing act, but can be very rewarding knowing that you’ve nailed a shot without the assistance of the camera’s automated settings. Understanding the full stops of light and the matching intervals for ISO, shutter speed and aperture will help to make this process much easier.
Night Photography
ISO is perhaps most influential when shooting night photography due to the already incredibly dark scenes. Combine this with the vast amount of black in the image and primarily white sources of light and you can afford to introduce a little bit more noise in your image.
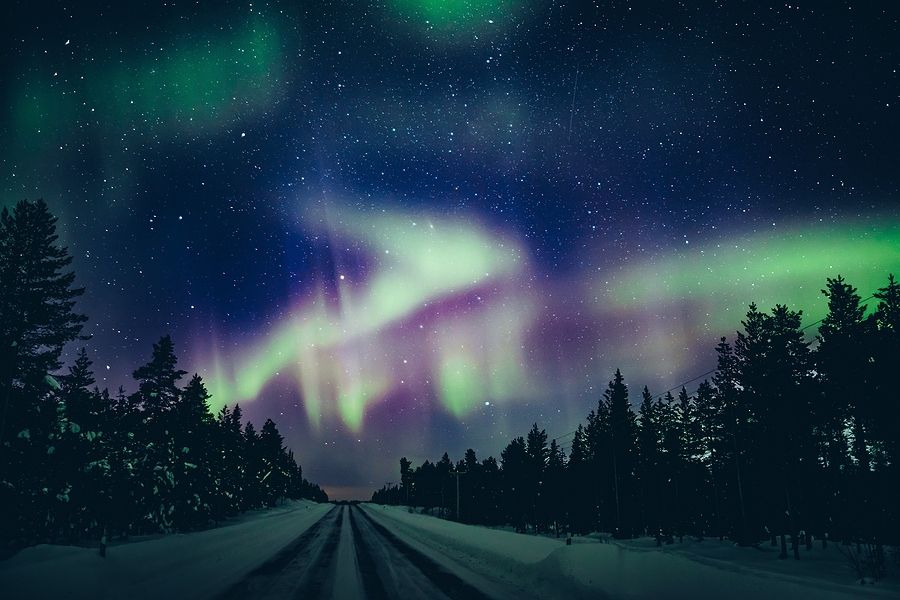
When shooting night photos, start by dropping your aperture way down and slowing your shutter speed to an acceptable speed to limit the amount of star blur while maximizing your exposure time. There are lots of great charts and apps that will help you calculate this.
Once you have your shutter speed and aperture set, start taking a series of images with increasingly higher ISO values and watch for the noise to show up. As your image gets brighter it’s up to you as the photographer to decide what is too grainy for your own liking. Once you reach that point, back it off a couple ticks and fire away. Typically for me this ends up being between ISO 1600 and 3200, but your camera may produce vastly different results based on sensor size and other settings. Be sure to zoom way in to your photo to survey the noise knowing that as your image is pulled up on a larger screen, the graininess will be more obvious.
An important thing to remember when shooting nights is the stars will also be brighter after a little post processing, so if your image isn’t that impactfully bright starry sky you’re looking for, just know that you’ll likely be surprised by how many stars were actually captured by your camera’s sensor.
All told, your ISO shouldn’t be an intimidating part of the exposure triangle. It is a simple and effective way to manage light and exposure so long as you’re conscious of noise introduction. If you keep an eye on your shutter speed and aperture, shooting in manual should be fairly easy with the use of ISO as a fine tune adjustment for ensuring well exposed photos. Stay tuned as we move forward in this series as I’ll be writing additional pieces on metering, exposure compensation and white balance to really help maximize your use of your camera’s manual setting. Until then, try shooting a variety of scenes without the use of auto ISO and see what you can come up with. Happy shooting!

We offer world-class travel photography
experiences around the world.
Each tour is bundled with lodging, meals, and transportation between workshops included, allowing you to focus on photography instead of the stress of traveling.
experiences around the world.
Each tour is bundled with lodging, meals, and transportation between workshops included, allowing you to focus on photography instead of the stress of traveling.
Get Our Trip Catalog
Receive a trip catalog that highlights all of our upcoming photo tours and workshops.Schedule a Trip Consultation
Meet with a photo experience coordinator, and experience a personal touch to your booking experience.Landscape Guide
Receive a FREE Landscape Cheat Sheet Written By a Pro Photographer.Webinars
Our regularly hosted webinars provide photography instruction from our own guides on a wide range of topics.Education Portal
Explore our library of articles that cover everything from common questions, to in-depth guides on how to achieve that perfect shot.
Backcountry Journeys
Connecting Passionate People To
Exceptional Experiences.
Exceptional Experiences.
Business Hours:
Mon-Fri, 8AM-4PM MT
928-478-1521
adventure@backcountryjourneys.com
Mon-Fri, 8AM-4PM MT
928-478-1521
adventure@backcountryjourneys.com
arrow_drop_down_circle
Divider Text
All Images & Content Are Property Of Backcountry Journeys Photography Tours, Workshops & Safaris LLC - Copyright 2026
About Us
Receive a Digital Trip Catalog
Find an upcoming photography tour with our interactive catalog.