Mon - Fri: 8 am - 4 pm MT

About Backcountry Journeys
Why Choose Backcountry Journeys
If you're considering a photography trip, hear why Backcountry Journeys delivers the best experience in the industry.Frequently Asked Questions
If you're new to photography trips, or new to BCJ, you can find our common travel questions here.Fitness Levels
Our trips vary on physical intensity, and by reviewing our fitness levels, you can find out which trips may be more challenging, or aligned more closely with your comfort level.Meet The Crew
We've built an amazing team of experienced guides, and dedicated office staff that elevate your travel experience. Get to know their backgrounds, and hear their stories.Loyalty Program
We reward our frequent photo adventurers with exclusive discounts on amazing photography trips.Contact Us
If you need to get in touch with our office staff, or have additional business inquiries, you can find our information here.Refer a Friend
Know someone perfect for one of our tours? Recommend them through this quick form.Stay Up To Date On All Things
Backcountry Journeys
Backcountry Journeys
Our Photography Community
Our Webinars
Our regularly hosted webinars provide photography instruction from our own guides on a wide range of topics.Our Education Portal
Explore our library of articles that cover everything from common questions, to in-depth guides on how to achieve that perfect shot.Community Testimonials
We're proud to foster an amazing group of photo travelers, and here you can find their stories from their past adventures.Resources For Photographers
About Our Company
Resources For Photographers
About Our Company
From Amateur to Pro: 5 Steps to Elevate Your Photography Skills
Published October 2, 2023
Have you ever viewed an absolutely incredible photograph and not only admired it but also thought to yourself “I’ll never be able to capture an image like that”? I know I’m not alone when saying that I’ve experienced this many times over. Of course, masterful images can inspire us to get out, learn more, and improve our craft but they can also inadvertently have the opposite effect. An image can be so good that it may feel like the gap between where you are right now and the level of the photographer that captured that image is simply too big.
Whenever I feel this way, I first remind myself that the person who captured said image has likely dedicated a very large portion of their life to photography, they likely specialize in a specific style, they may have been pursuing this image for months if not years, and as with everything there was likely quite a bit of luck involved. I also remind myself above all else, that if I ever want to capture an image like that, simply wishing I could be at that level won’t get me any closer. Instead, I try to inspire myself to take action, learn more about the craft, and get out there and practice as much as possible.
Photography is a captivating art form that enables us to capture moments in time and convey stories, emotions, and beauty through images. Whether you're an amateur looking to hone your skills or an aspiring professional aiming to elevate your craft, there are fundamental steps you can take that can significantly enhance your photography skills and abilities.
In today’s article, we’ll explore five key tips and tricks that every photographer should know, explaining their importance and how they can transform your photography. These 5 key pieces of advice are fundamental to improving your craft and capturing high-quality images. If you’re trying to push your photography to the next level then this is a great place to start.
Let’s get into it!
Mastering your Camera Settings
One of the absolute best things you can do to ensure your success and growth as a photographer is to thoroughly understand your camera, how it works, and all of the fundamental manual settings that can alter the look and feel of an image. No matter how lucky you get, you’ll never get the perfect image if your camera settings are off.
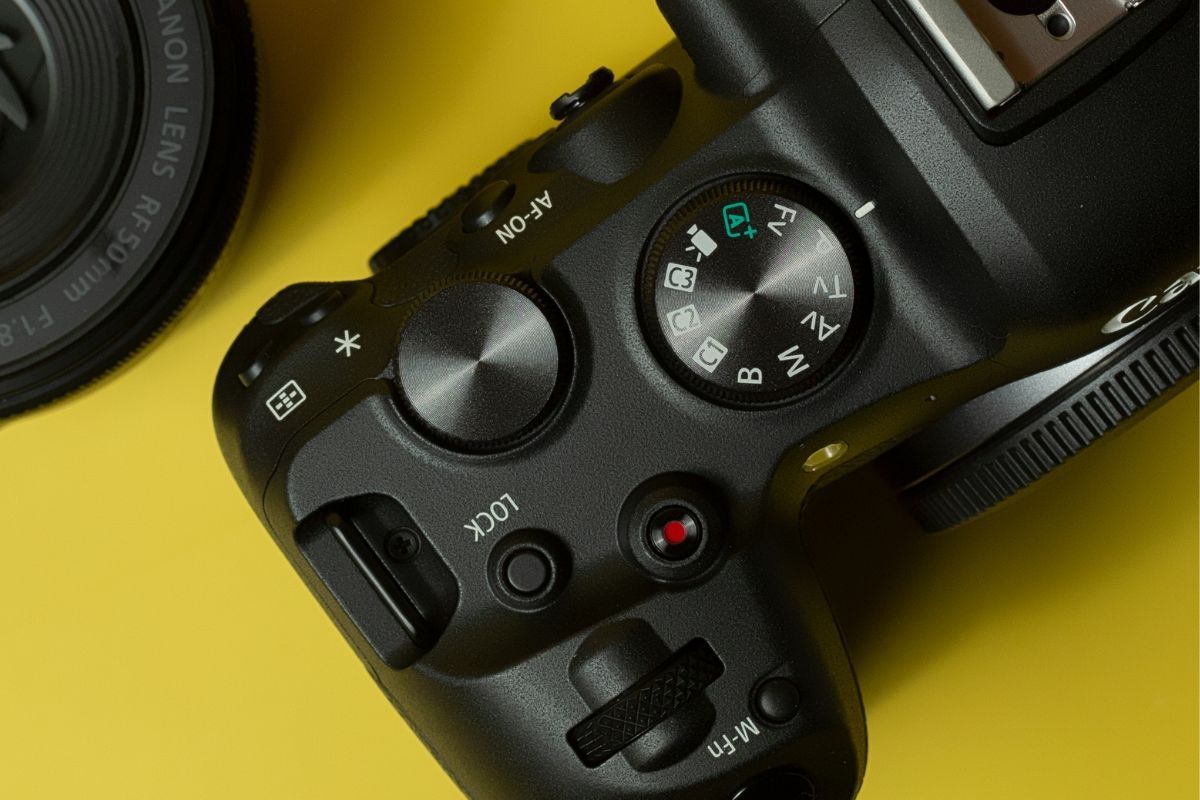
In this article, we’ll briefly cover the basics and touch on the essential camera settings that every photographer should thoroughly understand. We’ll start with what I believe is the most important: the exposure triangle. The exposure triangle consists of three settings you can manually change that all work with one another to affect the way your camera interprets light. These settings are of course shutter speed, aperture, and ISO. I won’t go into too much detail on each in this article but click the links below to read more about each of them. Shutter speed affects how long your camera’s shutter is open or the amount of time that light is being allowed to enter your camera and create an image. Aperture controls the diameter of your camera’s aperture ring which also controls how much light is being let in but also very importantly controls the depth of field in your image. And finally, ISO is a way to digitally control the sensitivity of your camera’s sensor to light. All three of these settings will fundamentally change the way your images look and feel and it’s absolutely essential to understand them in order to improve your craft.
Another incredibly useful tip when it comes to capturing images and changing your camera settings is to use the histogram. I didn’t even know what this feature was when I was first getting started on my photography journey but once I realized just how useful it is I started using it religiously. The histogram is a visual portrayal of the distribution of pixels in an image ranging from the darkest shadows to the brightest highlights. It’s a great way to make sure you aren’t losing any information in an image. Sometimes I’ll take an image with a very high dynamic range (very bright highlights and very dark shadows) and it won’t look great on my camera’s LCD screen but by checking the histogram I can see that all the information I need is indeed included and I’ll be able to create a nice image when post-processing.
It can't be understated just how important it is to truly understand the way your camera works and what each of the main settings controls.
One of the absolute best things you can do to ensure your success and growth as a photographer is to thoroughly understand your camera, how it works, and all of the fundamental manual settings that can alter the look and feel of an image. No matter how lucky you get, you’ll never get the perfect image if your camera settings are off.
In this article, we’ll briefly cover the basics and touch on the essential camera settings that every photographer should thoroughly understand. We’ll start with what I believe is the most important: the exposure triangle. The exposure triangle consists of three settings you can manually change that all work with one another to affect the way your camera interprets light. These settings are of course shutter speed, aperture, and ISO. I won’t go into too much detail on each in this article but click the links below to read more about each of them. Shutter speed affects how long your camera’s shutter is open or the amount of time that light is being allowed to enter your camera and create an image. Aperture controls the diameter of your camera’s aperture ring which also controls how much light is being let in but also very importantly controls the depth of field in your image. And finally, ISO is a way to digitally control the sensitivity of your camera’s sensor to light. All three of these settings will fundamentally change the way your images look and feel and it’s absolutely essential to understand them in order to improve your craft.
Another incredibly useful tip when it comes to capturing images and changing your camera settings is to use the histogram. I didn’t even know what this feature was when I was first getting started on my photography journey but once I realized just how useful it is I started using it religiously. The histogram is a visual portrayal of the distribution of pixels in an image ranging from the darkest shadows to the brightest highlights. It’s a great way to make sure you aren’t losing any information in an image. Sometimes I’ll take an image with a very high dynamic range (very bright highlights and very dark shadows) and it won’t look great on my camera’s LCD screen but by checking the histogram I can see that all the information I need is indeed included and I’ll be able to create a nice image when post-processing.
It can't be understated just how important it is to truly understand the way your camera works and what each of the main settings controls.

Understanding Compositions
Another incredibly useful tip to level up your photography is to develop a fundamental understanding of composition and how this can affect the way an image is interpreted. This is something that photographers of all skill levels should constantly be thinking about and understanding some of the basic rules can make a huge difference in your photography. There are of course basic rules that serve as a great starting point but I’m always thinking of ways I can improve compositions even after years and years of shooting. Let’s take a look at some key rules or guidelines that can get you started.
Of course, we’ve likely all heard of the iconic rule of thirds. This is often the go-to rule, especially for beginner photographers, when it comes to creating compositions. But what exactly is this rule and why is it so popular? Quite simply, if you divide your image into thirds (three equal sections) both horizontally and vertically you are left with a simple grid of two vertical and two horizontal lines. Where these lines fall and especially where they intersect with one another are places that the eye is naturally drawn to when viewing an image. If you place subjects or key areas of interest either on these lines or at their intersections the eye will naturally gravitate to this part of your composition often leading to an enhanced viewing experience. The rule of thirds is a great place to start and I still follow it frequently but I’m constantly deviating away from it on a case-by-case basis depending on what I’m shooting.
Another key element that can create compelling compositions is leading lines. Leading lines are a great way to guide a viewer’s gaze throughout your image and somewhat control how a scene is interpreted. Leading lines can take many forms and can range in subtlety. A very obvious example would be looking directly down a hallway. In this instance, all of the lines that are stretching out away from the camera are receding into the distance and pointing towards the center of the frame. If you were to place a subject right in the middle of your composition, all of these lines would direct the viewers’ attention directly toward said subject. In nature leading lines can take many forms but a line of trees, a ridgeline, or maybe the bank of a river or lake can all serve this purpose and help guide a viewer’s gaze throughout your composition.
Another thing I aim to do in many of my compositions is to create a sense of depth adding dimension to an image rather than just a flat portrayal of something. By including a clear foreground, midground, and background and clearly separating each you can really immerse the viewer and pull them into a photograph. Environmental and atmospheric elements such as clouds, mist, haze, plants, or really anything else can help you achieve this effect. You can also experiment with different apertures and depths of field to enhance a sense of depth.
And finally, another thing to think about when it comes to wildlife images or images with a clear subject is where you place that subject in the frame. For instance, if an animal is moving in a certain direction it’s never a bad idea to leave some room in front of them to portray the space they are moving into and provide some breathing room so to speak. And if an animal is looking directly at you, you could have the subject fill up more of the frame and place them right in the center in more of a portrait-style image.
These are just a few tips to get started but deeply thinking about composition and how each element of your frame is placed and interacts with one another will drastically improve your photography. I recommend taking some time to study your favorite photographers and observe the compositional choices they make in their work.
Understanding Environmental Light
Another way to greatly improve your photography skills is to develop a fundamental understanding of light. And not just the way light enters your camera but also the differences in light sources and environmental lighting. There’s a lot to unpack here and many people have written entire books on the subject but for today’s article, I’ll keep things relatively simple and cover the basics.
Let’s start with a conversation on natural and environmental light. Of course, we’re all familiar with the most powerful and consistent light source available: the sun. Although the light from the sun is constant (at least during the day) there are many environmental factors that can alter or change the way this light illuminates our scenes.
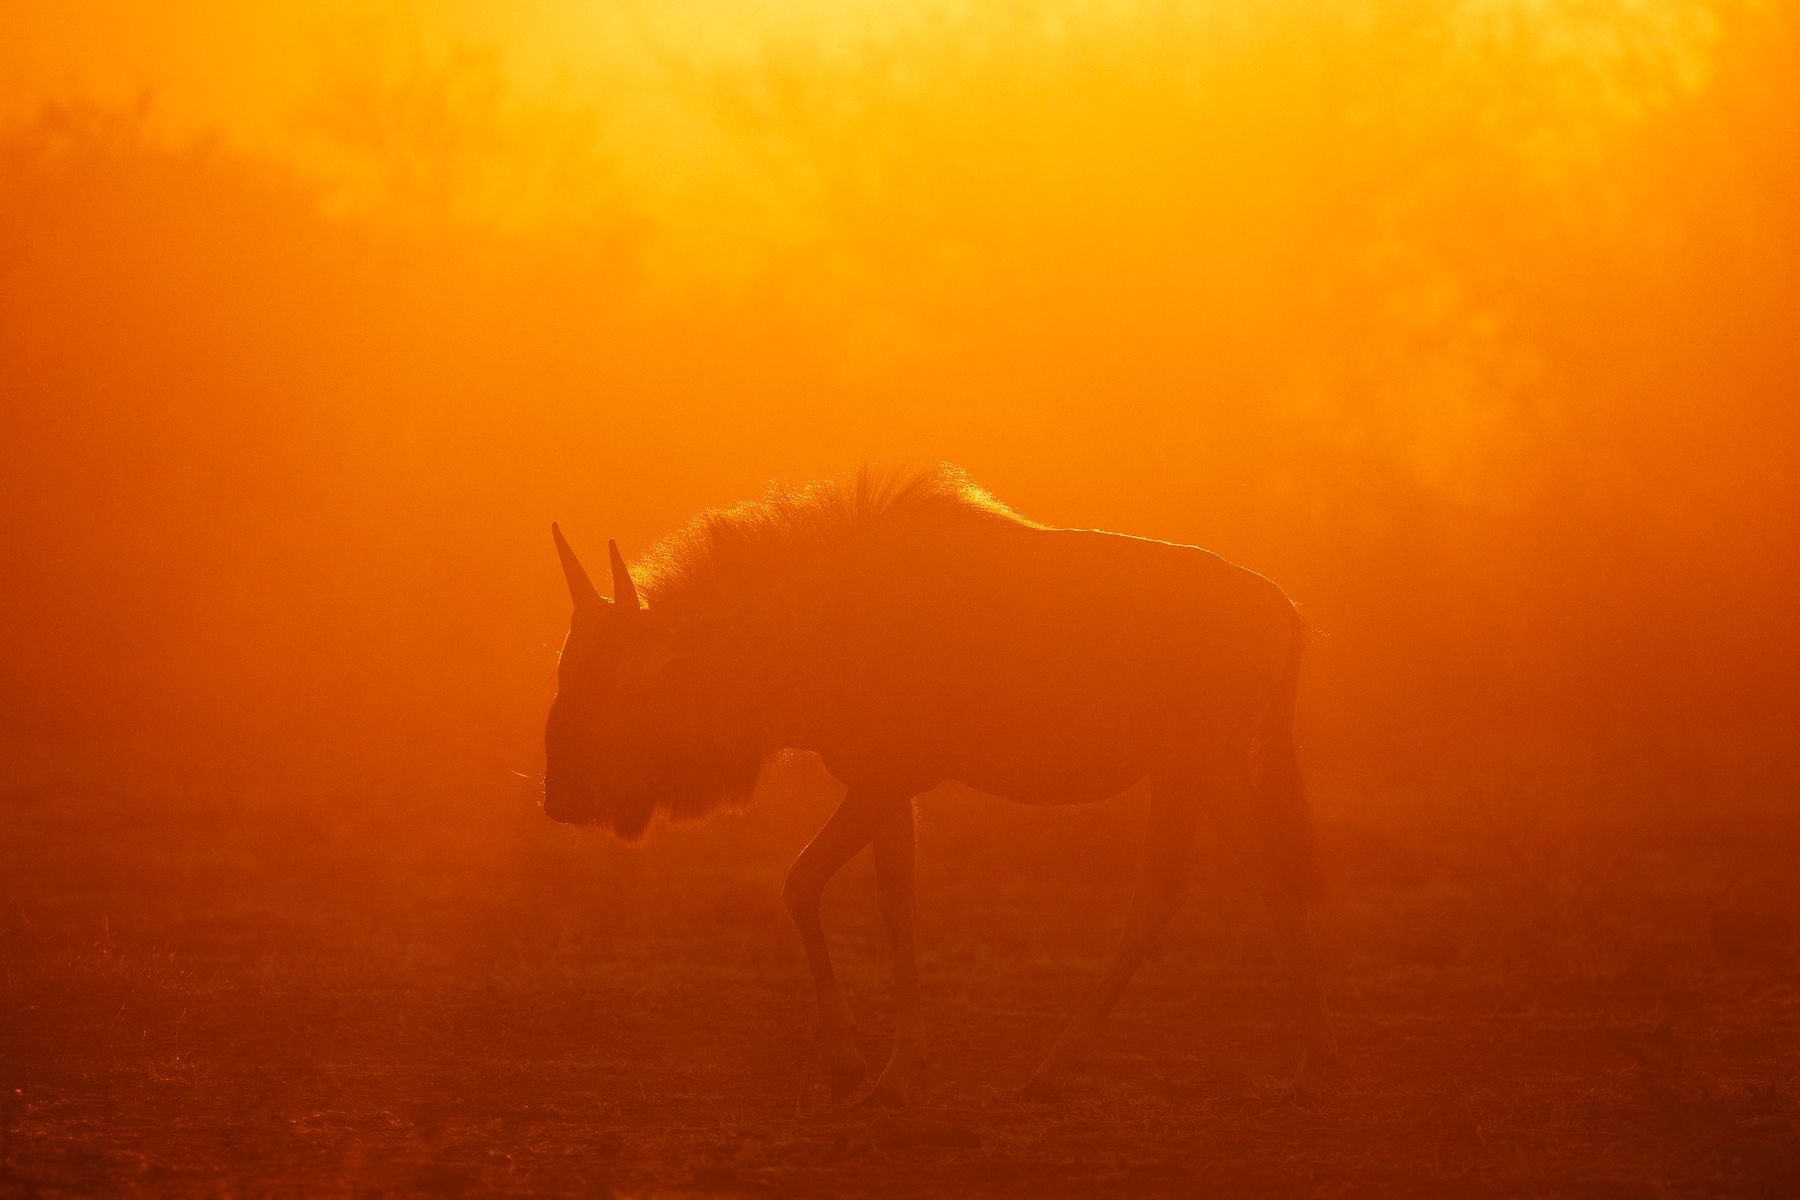
For instance, we’ve likely all heard of the golden hour. This is the period just after sunrise and just before sunset when the angle of the sun is less direct and harsh. Because the sunlight is travelling through more layers of atmosphere and is often diffused by clouds or haze the result is a beautiful golden and warm light that can lead to some incredible images. And of course just before the sun rises and just after it sets we have the blue hour which is a period when there is still ambient light available but the sun is no longer directly illuminating anything. This light is often less bright and has a blue or cool tonality.
And it’s not just the time of day that can affect the light from the sun. This may be counterintuitive but one of my favorite times to shoot is on overcast days when clouds cover the entire sky. On bright sunny days, the sunlight is arguably too strong and leads to very harsh lighting with a severe contrast between very bright highlights and very dark shadows. This can often be very difficult to photograph and can lead to sub-optimal images. On the other hand, when the sky is filled with clouds you can shoot all day long and you have a consistent and lovely source of light to work with. The clouds act as a massive diffuser and redirect the light so that you get a very nice and even source of lighting filling the entire sky. It’s pretty much the equivalent of having studio-quality lighting outside all day long.
Understanding light and environmental lighting conditions will allow you to significantly improve your photography! I recommend getting out there and capturing images in all sorts of lighting conditions to experience this for yourself.
Another way to greatly improve your photography skills is to develop a fundamental understanding of light. And not just the way light enters your camera but also the differences in light sources and environmental lighting. There’s a lot to unpack here and many people have written entire books on the subject but for today’s article, I’ll keep things relatively simple and cover the basics.
Let’s start with a conversation on natural and environmental light. Of course, we’re all familiar with the most powerful and consistent light source available: the sun. Although the light from the sun is constant (at least during the day) there are many environmental factors that can alter or change the way this light illuminates our scenes.
For instance, we’ve likely all heard of the golden hour. This is the period just after sunrise and just before sunset when the angle of the sun is less direct and harsh. Because the sunlight is travelling through more layers of atmosphere and is often diffused by clouds or haze the result is a beautiful golden and warm light that can lead to some incredible images. And of course just before the sun rises and just after it sets we have the blue hour which is a period when there is still ambient light available but the sun is no longer directly illuminating anything. This light is often less bright and has a blue or cool tonality.
And it’s not just the time of day that can affect the light from the sun. This may be counterintuitive but one of my favorite times to shoot is on overcast days when clouds cover the entire sky. On bright sunny days, the sunlight is arguably too strong and leads to very harsh lighting with a severe contrast between very bright highlights and very dark shadows. This can often be very difficult to photograph and can lead to sub-optimal images. On the other hand, when the sky is filled with clouds you can shoot all day long and you have a consistent and lovely source of light to work with. The clouds act as a massive diffuser and redirect the light so that you get a very nice and even source of lighting filling the entire sky. It’s pretty much the equivalent of having studio-quality lighting outside all day long.
Understanding light and environmental lighting conditions will allow you to significantly improve your photography! I recommend getting out there and capturing images in all sorts of lighting conditions to experience this for yourself.
Post Processing and Editing
Another crucial element of modern-day photography is the art of post-processing. I’ve talked and worked with many people who are relatively new to photography and are initially resistant to editing their images. Downloading and learning a powerful piece of software can be overwhelming and daunting off the bat but let me tell you that it is 100% worth it. And with a little bit of instruction and practice you’ll be off to the races in no time. Having the ability to organize, edit, manipulate, and enhance your images all on one platform is a great way to take your photography to the next level.
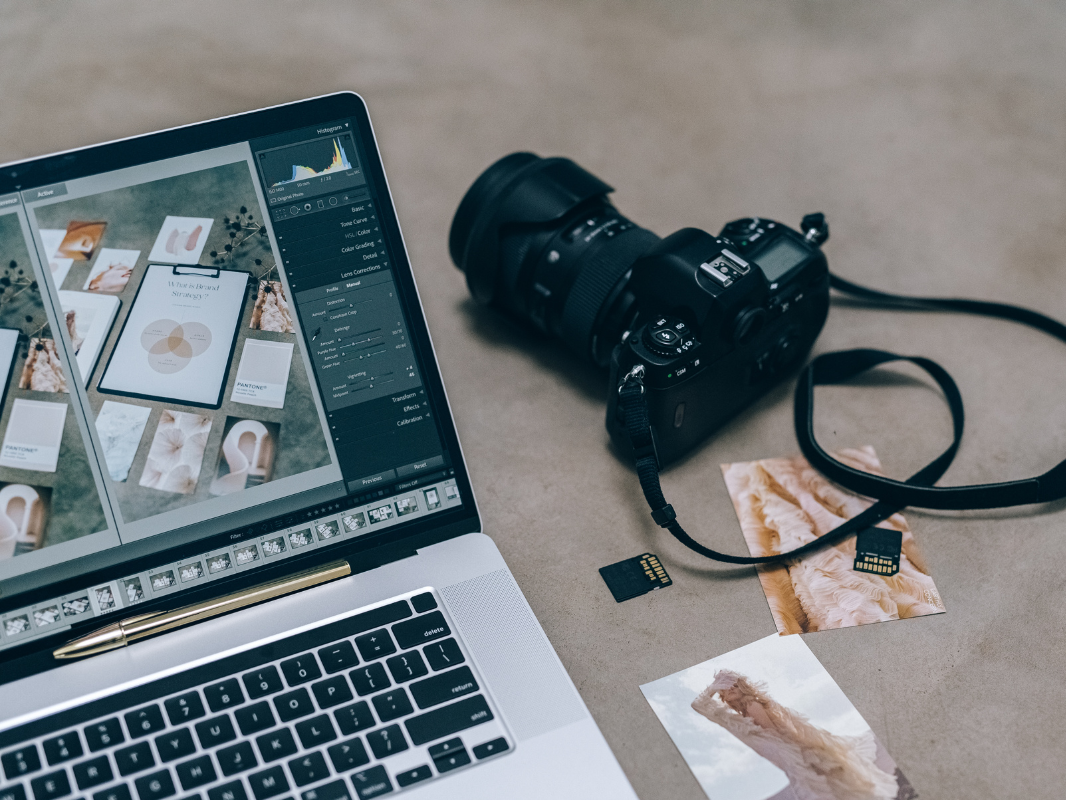
My personal photo editing software of choice, and the most popular in the world today, is Adobe Lightroom. This is an excellent tool that is intuitive, powerful, and well-designed. Whether I’m cropping an image, controlling highlights and shadows, selectively editing just part of an image, reducing digital noise, or creating a panorama, Adobe Lightroom is my photo editing software of choice. If you haven’t installed Lightroom or a comparable product and started editing your images, I strongly implore you to do so. Once you get the hang of it, you’ll be amazed at what’s possible with a few keystrokes and mouse clicks.
And while we’re on the subject of photo editing another great way to get the most out of your images is to shoot in your camera’s RAW file format. If you don’t plan to edit images at all then I recommend shooting in JPEG but if you’re willing to put in some work after you capture an image then you should shoot in RAW pretty much all the time. RAW files don’t look quite as nice off the bat but they store much more information and data than a JPEG ever could and will give you much more creative freedom when editing.
For anyone looking for a relatively simple way to see immediate improvements in their images download some photo editing software and start shooting in RAW. If you put a little bit of extra work in you won’t regret it.
Another crucial element of modern-day photography is the art of post-processing. I’ve talked and worked with many people who are relatively new to photography and are initially resistant to editing their images. Downloading and learning a powerful piece of software can be overwhelming and daunting off the bat but let me tell you that it is 100% worth it. And with a little bit of instruction and practice you’ll be off to the races in no time. Having the ability to organize, edit, manipulate, and enhance your images all on one platform is a great way to take your photography to the next level.
My personal photo editing software of choice, and the most popular in the world today, is Adobe Lightroom. This is an excellent tool that is intuitive, powerful, and well-designed. Whether I’m cropping an image, controlling highlights and shadows, selectively editing just part of an image, reducing digital noise, or creating a panorama, Adobe Lightroom is my photo editing software of choice. If you haven’t installed Lightroom or a comparable product and started editing your images, I strongly implore you to do so. Once you get the hang of it, you’ll be amazed at what’s possible with a few keystrokes and mouse clicks.
And while we’re on the subject of photo editing another great way to get the most out of your images is to shoot in your camera’s RAW file format. If you don’t plan to edit images at all then I recommend shooting in JPEG but if you’re willing to put in some work after you capture an image then you should shoot in RAW pretty much all the time. RAW files don’t look quite as nice off the bat but they store much more information and data than a JPEG ever could and will give you much more creative freedom when editing.
For anyone looking for a relatively simple way to see immediate improvements in their images download some photo editing software and start shooting in RAW. If you put a little bit of extra work in you won’t regret it.
Never Stop Learning
And finally, we’ve arrived at my last piece of advice when it comes to leveling up your photography. I’ve already hinted at this a few times throughout this article and it’s relatively straightforward, but I believe it’s one of the most important pieces of advice I can give. My final recommendation is to never stop learning. No matter how advanced you may be, no matter how much knowledge and expertise you may have, no matter how many photographs you’ve captured, sold, published, or printed, there is always something more to be learned. Something you can improve on. I’ve been taking images for years and I’m constantly amazed by how much I don’t know and have yet to learn.
I recommend that you constantly seek out knowledge from other photographers and the world around you. Whether that’s better understanding the behavior of an animal or having another photographer review and critique your work, it really can’t be understated just how important this is to your growth. Knowledge, experience, expertise, and practice are going to improve your photography more than anything else.
At Backcountry Journeys we’re striving to not only be an excellent provider of photography trips, workshops, and safaris but also a trusted source of knowledge in the photography world. If you ever have any questions or want to learn more about nature photography, send us an email, give us a call, read some of our articles, or attend some live webinars. We’re here to help you grow as a photographer!
I sincerely hope this article has been educational and informative and has inspired you all to get out there and level up your photography.
Until next time!

We offer world-class travel photography
experiences around the world.
Each tour is bundled with lodging, meals, and transportation between workshops included, allowing you to focus on photography instead of the stress of traveling.
experiences around the world.
Each tour is bundled with lodging, meals, and transportation between workshops included, allowing you to focus on photography instead of the stress of traveling.
Get Our Trip Catalog
Receive a trip catalog that highlights all of our upcoming photo tours and workshops.Schedule a Trip Consultation
Meet with a photo experience coordinator, and experience a personal touch to your booking experience.Landscape Guide
Receive a FREE Landscape Cheat Sheet Written By a Pro Photographer.Webinars
Our regularly hosted webinars provide photography instruction from our own guides on a wide range of topics.Education Portal
Explore our library of articles that cover everything from common questions, to in-depth guides on how to achieve that perfect shot.
Backcountry Journeys
Connecting Passionate People To
Exceptional Experiences.
Exceptional Experiences.
Business Hours:
Mon-Fri, 8AM-4PM MT
928-478-1521
adventure@backcountryjourneys.com
Mon-Fri, 8AM-4PM MT
928-478-1521
adventure@backcountryjourneys.com
arrow_drop_down_circle
Divider Text
All Images & Content Are Property Of Backcountry Journeys Photography Tours, Workshops & Safaris LLC - Copyright 2026
About Us
Receive a Digital Trip Catalog
Find an upcoming photography tour with our interactive catalog.