Mon - Fri: 8 am - 4 pm MT

About Backcountry Journeys
Why Choose Backcountry Journeys
If you're considering a photography trip, hear why Backcountry Journeys delivers the best experience in the industry.Frequently Asked Questions
If you're new to photography trips, or new to BCJ, you can find our common travel questions here.Fitness Levels
Our trips vary on physical intensity, and by reviewing our fitness levels, you can find out which trips may be more challenging, or aligned more closely with your comfort level.Meet The Crew
We've built an amazing team of experienced guides, and dedicated office staff that elevate your travel experience. Get to know their backgrounds, and hear their stories.Loyalty Program
We reward our frequent photo adventurers with exclusive discounts on amazing photography trips.Contact Us
If you need to get in touch with our office staff, or have additional business inquiries, you can find our information here.Refer a Friend
Know someone perfect for one of our tours? Recommend them through this quick form.Stay Up To Date On All Things
Backcountry Journeys
Backcountry Journeys
Our Photography Community
Our Webinars
Our regularly hosted webinars provide photography instruction from our own guides on a wide range of topics.Our Education Portal
Explore our library of articles that cover everything from common questions, to in-depth guides on how to achieve that perfect shot.Community Testimonials
We're proud to foster an amazing group of photo travelers, and here you can find their stories from their past adventures.Resources For Photographers
About Our Company
Resources For Photographers
About Our Company
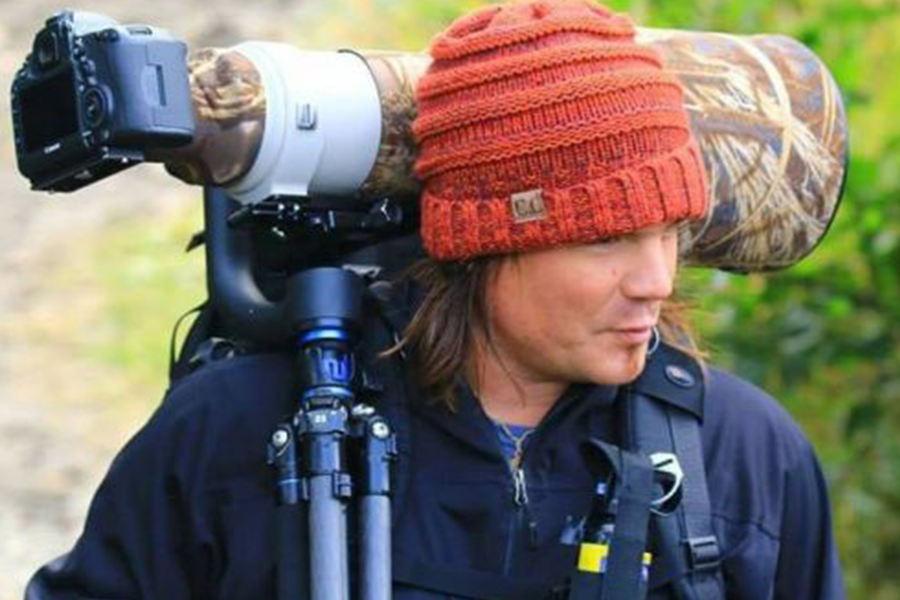
Flying with “Big Glass”
Published June 6, 2019
Wildlife photographers who travel know the pain.
There is so much to pack, so many details to attend to in order to make certain that you have everything you’ll need while out in the field, yet one thing consistently can create problems. Figuring out the most efficient way to pack your “big glass” for a flight(s).
There is so much to pack, so many details to attend to in order to make certain that you have everything you’ll need while out in the field, yet one thing consistently can create problems. Figuring out the most efficient way to pack your “big glass” for a flight(s).
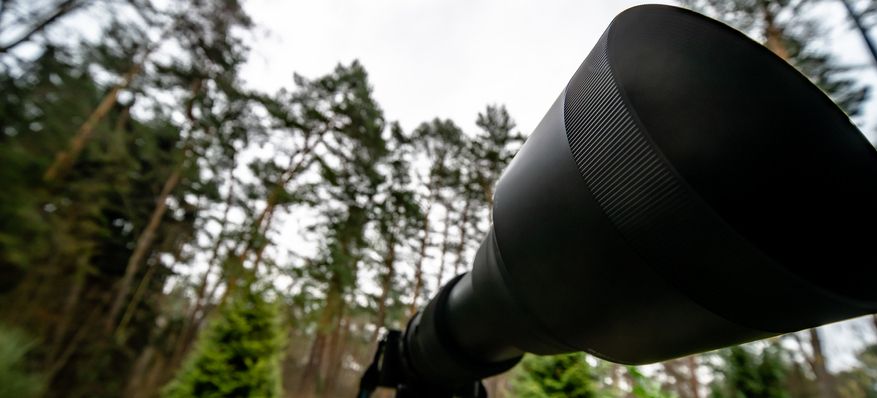
While there are options out there now for lenses that will get you big reach without a lot of girth, there are still quite a few folks out there looking to pack those larger super telephoto primes who deal with the challenge of “how to do this best?”
As Backcountry Journeys offers a variety of wildlife photography tours both domestic and abroad, we thought it would be nice to start a conversation on how best to travel with that big glass, as many of our guests will be doing soon, whether it be in India, Brazil, or Africa, among other wildlife centric locations, like Costa Rica or Alaska.
We’ve all been trained to think that the LAST thing we want to do is check camera gear, and really that would probably still be ‘best-case scenario’ but we’re here to tell you that it is not the end of the world if you have to check some of your gear. Remember when you purchased that 500mm prime lens it was shipped to you, probably across the country, and made it just fine? Just make sure to pack it well, and it should survive.
We hope the following tips, strategies, reminders, and suggestions will help when you’re packing your “big glass” in advance of your next Backcountry Journeys tour!
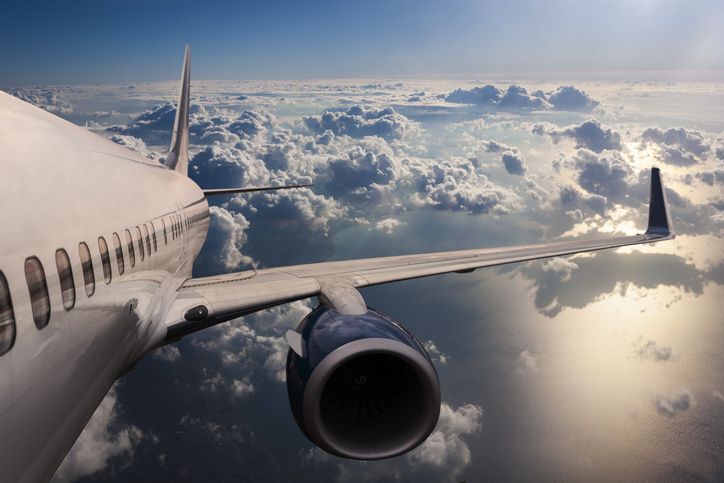
Check with your airline about any rules
Before packing it is always prudent to check with both your airline’s website and TSA’s website in order to familiarize yourself with any rules, expectations, and changes regarding checked and carry on luggage. It is not hard to avoid being surprised at the gate. This is going to be very important for international trips as sometimes rules are different in countries outside the U.S. There may be weight limits to carry-ons which is usually a non-issue domestically.
As Backcountry Journeys offers a variety of wildlife photography tours both domestic and abroad, we thought it would be nice to start a conversation on how best to travel with that big glass, as many of our guests will be doing soon, whether it be in India, Brazil, or Africa, among other wildlife centric locations, like Costa Rica or Alaska.
We’ve all been trained to think that the LAST thing we want to do is check camera gear, and really that would probably still be ‘best-case scenario’ but we’re here to tell you that it is not the end of the world if you have to check some of your gear. Remember when you purchased that 500mm prime lens it was shipped to you, probably across the country, and made it just fine? Just make sure to pack it well, and it should survive.
We hope the following tips, strategies, reminders, and suggestions will help when you’re packing your “big glass” in advance of your next Backcountry Journeys tour!
Check with your airline about any rules
Before packing it is always prudent to check with both your airline’s website and TSA’s website in order to familiarize yourself with any rules, expectations, and changes regarding checked and carry on luggage. It is not hard to avoid being surprised at the gate. This is going to be very important for international trips as sometimes rules are different in countries outside the U.S. There may be weight limits to carry-ons which is usually a non-issue domestically.
To check or not to check?
There are pros and cons to each. In a perfect world it’s generally best to not check your big-glass simply for the peace of mind you get from having that big expensive piece of equipment with you – rather than down in the cargo hold. Will it be fine in the cargo hold? The answer is generally yes as long as you pack it properly.
Carrying your glass on-board? Utilize a GOOD camera pack system
We plug F-Stop camera packs quite a bit, but for good reason! These packs do what we need them to do. Are there other brands out there that do a good job? Certainly. And we aren’t saying that you must go out and purchase an F-Stop pack, other brands are just fine. But we’ll use their packs as an example because they check all the proverbial “boxes” that we’re looking for. The Internal Camera Units (or ICUs) that are sold separately, and pack inside the backpacks do two very things that we want them to do; they organize well, and keep things safe (These packs also carry relatively well and are very good for hikes into the field, but that is for another day).
In addition to the backpack, you’ll need to get yourself a good padded internal organization unit (ICU). In the case of F-Stop, you can purchase different sized ICUs to match your needs. For big glass such as a 500mm or 600mm prime, you’d want to go with their Xlarge or CINE ICUs. The Xlarge ICU can be removed from your pack and stored under the seat in front of you on a typical airplane and is under the current domestic airline dimensions (24” x 17” x 10”) for a carry-on. The CINE ICU does not carry-on well but read further below for some use cases.
Checking your big glass? Pack it properly.
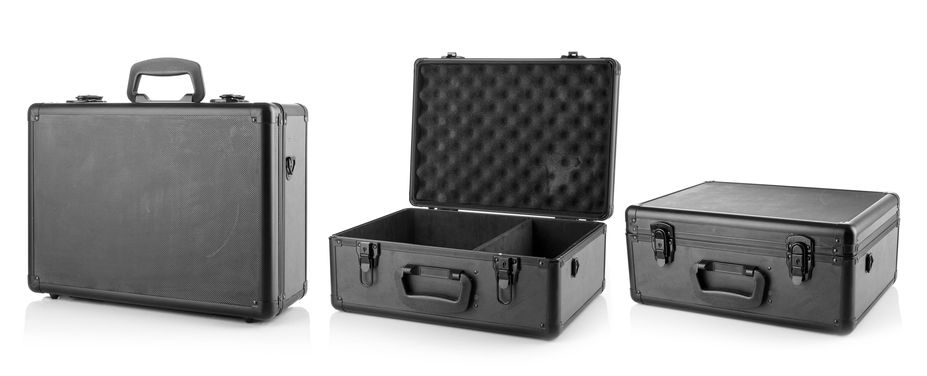
The best plan of attack here is to simply use the hard case that the lens came in (remember this was likely shipped to you via UPS or FedEx across the country) OR a Pelican case.
The best plan of attack here is to simply use the hard case that the lens came in (remember this was likely shipped to you via UPS or FedEx across the country) OR a Pelican case.
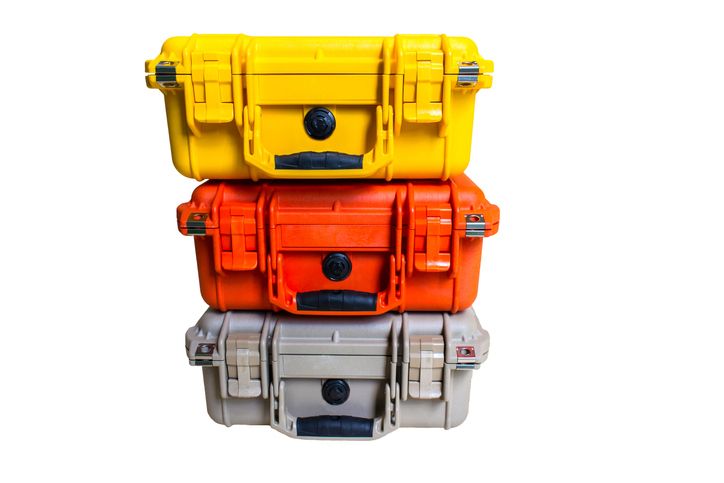
The idea being that your lenses (and other camera gear) are packed tight and safe. Regardless of your method, you’ll want a hard-case of some sort that is well padded on the interior. Often on in-country International flights, the airlines have weight restrictions for carry-ons that are actually enforced – therefore checking your big lenses becomes the only option.
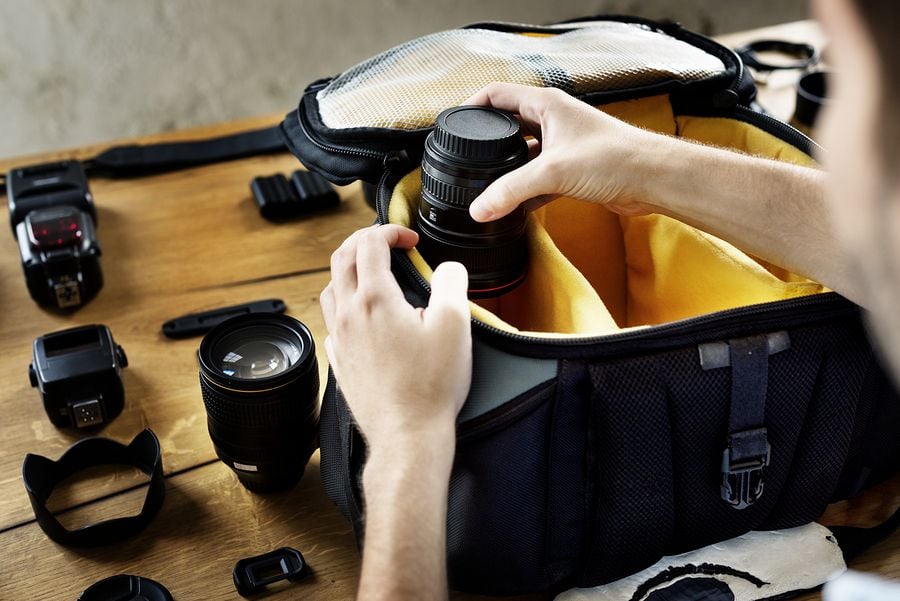
Keep everything separate, and take it all apart
This is why the inside of a good camera pack has those foam-padded divider mechanisms. If you aren’t sure what we’re talking about, click here for a look at a great example, and a discussion on the modularity of F-Stop packs.
Once you have your lenses and camera bodies separated and capped, and everything is taken apart, you can give each item its separate, padded space. Make sure to take it all apart – surely everyone reading this does this, but if you need a reminder that your gear is expensive, and leaving the lens on can damage the mounting threads to a point where you won’t be able to change lenses, here is that reminder.
You’ll not want any of your lenses to touch and your camera body should be secured, as well. Those foam dividers come into play now. Each lens and other gear needs that physical buffer from the other pieces. This can fill your pack up fast, so take time to decide exactly what you’ll need for your photographic goals. If you are traveling on a Backcountry Journeys trip, feel free to contact us and we’ll be happy to help pair things down. If you are heading out to shoot Bald eagles in Alaska, perhaps you won’t need that Macro lens. Take time to think about what you are bringing, and if you really need it. Space savings will help you pare things down so that you can easily get your large lenses into a proper case and with you on the plane.
A few examples…
Traveling to Katmai to photograph Brown Bears? Do this.
When traveling to remote regions in Alaska one generally has to fly on a larger jet to Alaska, then hop on a smaller jet to a village in Alaska, and then hop on a bush or float plane to an even more remote destination. Wow, that sounds cool!
Since our Brown Bears of Katmai and Brown Bears of Alaska: Lake Clark trips are “hiker” trips you’ll want to go with the backpack system mentioned above. For those bringing large prime lenses such as a 500mm or larger, you’ll also want to be able to access your lens/camera setup quickly from the top of your pack while hiking.
For this trip, I carry an F-Stop Shinn on-board as my carry-on (not it technically doesn’t fit…but it does). Inside the Shinn, I have all my lenses packed tightly together (including the big prime) in F-Stop’s XLarge ICU. This generally works fine on larger jets BUT if I’m hassled by the flight attendants it is easy enough to just pull out the ICU (which DOES meet carry-on requirements) and gate-check the larger backpack, picking it up once the plane lands.
When transferring to a smaller regional airplane I simply gate-check the Shinn backpack and carry the XLarge ICU on-board.
Now comes the kicker. The XLarge ICU doesn’t allow for top-loading access of my 600mm prime nor does the lens fit well with camera body attached. What to do? In a separate checked bag (this usually contains my clothing etc.) I have an F-Stop CINE ICU which is their largest ICU and does allow my largest lenses to fit with hood-on as well as an assortment of other lenses that can be accessed from the rear of the pack. I generally stuff this ICU with extra clothing etc to make use of valuable space while it is checked. When I arrive on location I simply swap ICU’s. The Xlarge ICU is emptied of gear and stashed away and the CINE ICU is loaded into the Shinn backpack for use in the field.
On our Katmai trips, in particular, I leave my checked luggage at our hotel in King Salmon for the duration of the camping trip (now with the Xlarge ICU) and I carry the Shinn on-board the float plane along with a lightweight duffel for my clothing (this helps keep the weight down in the float-plane and is much easier to manage than a big suitcase at camp).
Another option rather than using the F-Stop CINE is the LensCoat Xpandable bag. This is a somewhat sturdier option that fits nicely inside the Shinn backpack or even the F-Stop Sukha backpack. The major benefit of the Xpandable bag is that it actually expands to accommodate your big prime with hood & body attached or collapses so it can be used as a carry-on (it does meet most carry-on requirements but as always check first). Using the Xpandable bag eliminates the need for two ICUs on a trip like this. The disadvantage is that the Xpandable bag only has one compartment and no dividers for other lenses. I’ve managed to fit several other lenses in the bag and make it work by padding them well when I wanted to travel light – including a 100-400mm so it is certainly possible and if you want to keep things simple this might be the better option.
Traveling to India to photograph Tigers? Do this.
Airlines in India tend to have strict rules when it comes to carry-on weight limits. You certainly don’t want to risk them forcing you to check your expensive prime lenses when you don’t have a hard-case – so when traveling to India it is best to have a hard case of some sort.
When I travel to India I carry the LensCoat Expandable bag with my lenses packed tightly inside. I don’t bring a backpack for this trip so I just carry the Xpandable bag as my carry-on with the lenses as I am traveling to India. This provides peace of mind as I know that my gear is with me at all times – especially when there are usually multiple connections involved getting to New Delhi.
Once I arrive in India and I have to check my big-glass for weight restriction reasons I then transfer the large lens into its hard-case (which was previously checked) and carry-on the Xpandable bag which still contains some of my smaller lighter lenses. One cool thing about the Xpandable bag is that it actually folds flat and can be stashed in your checked luggage when not in use. On safari, this is a great bag to store your lens whilst cruising around bumpy, dusty dirt roads in search of large felines and other critters. Once the trip is over I’m not as worried about the airlines losing my gear so I might just check the large lens all the way back home in it’s hard-case.
Traveling to Costa Rica to photograph wildlife? Do this.
I travel to Costa Rica using the F-Stop pack system with the LensCoat Xpandable bag or the CINE ICU.
Generally, I am able to board a larger international flight with the Shinn or Sukha bag as my carry-on. If I am asked I can simply gate-check the larger backpack and then the ICU or Xpandable bag becomes my carry-on and I pick up my F-Stop backpack on the other side of the flight.
When transferring to smaller regional airplanes in Costa Rica I generally let the airline staff know that I have expensive camera gear. I check the actual backpack and then carry the lenses on-board (often there is a small space in the back of the plane where one can stash larger items before going to your seat as there is no overhead bin space on these flights). Once I arrive on-location I simply put the Xpandable Bag back into my backpack and off I go in search of wildlife! If I’ve opted for the CINE ICU I just transfer the gear from Xlarge ICU to the CINE (which has been living in my checked baggage).
Hopefully, these tips can help ease the pain of packing your large lenses in advance of your next Backcountry Journeys trip. This piece is meant to be the start of a conversation about how to best do this, so we’d love to hear from each of you about how you’ve packed in the past. What has worked best? What sort of roadblocks or rules have you run into in different countries? Please feel free to leave comments below in the comment section. This always seems to be an important topic in the traveling photographer world!

We offer world-class travel photography
experiences around the world.
Each tour is bundled with lodging, meals, and transportation between workshops included, allowing you to focus on photography instead of the stress of traveling.
experiences around the world.
Each tour is bundled with lodging, meals, and transportation between workshops included, allowing you to focus on photography instead of the stress of traveling.
Get Our Trip Catalog
Receive a trip catalog that highlights all of our upcoming photo tours and workshops.Schedule a Trip Consultation
Meet with a photo experience coordinator, and experience a personal touch to your booking experience.Landscape Guide
Receive a FREE Landscape Cheat Sheet Written By a Pro Photographer.Webinars
Our regularly hosted webinars provide photography instruction from our own guides on a wide range of topics.Education Portal
Explore our library of articles that cover everything from common questions, to in-depth guides on how to achieve that perfect shot.
Backcountry Journeys
Connecting Passionate People To
Exceptional Experiences.
Exceptional Experiences.
Business Hours:
Mon-Fri, 8AM-4PM MT
928-478-1521
adventure@backcountryjourneys.com
Mon-Fri, 8AM-4PM MT
928-478-1521
adventure@backcountryjourneys.com
arrow_drop_down_circle
Divider Text
All Images & Content Are Property Of Backcountry Journeys Photography Tours, Workshops & Safaris LLC - Copyright 2026
About Us
Receive a Digital Trip Catalog
Find an upcoming photography tour with our interactive catalog.